Baseball — Documentation
How to Play & Strategy
A walkthrough of every screen and button in the Single Game flow, plus strategy notes on how in-game decisions affect outcomes. For quick answers to common questions, see the FAQ.
01. Setting Up a Game #
-
Step 1
Start a Single Game #
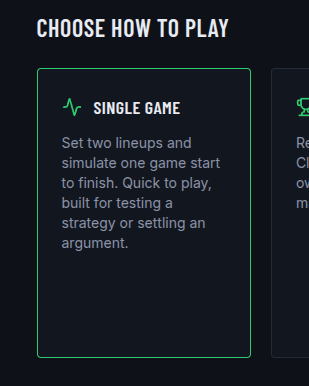
From the Baseball home page, click the Single Game card under "Choose How to Play."
-
Step 2
Pick Your Team #
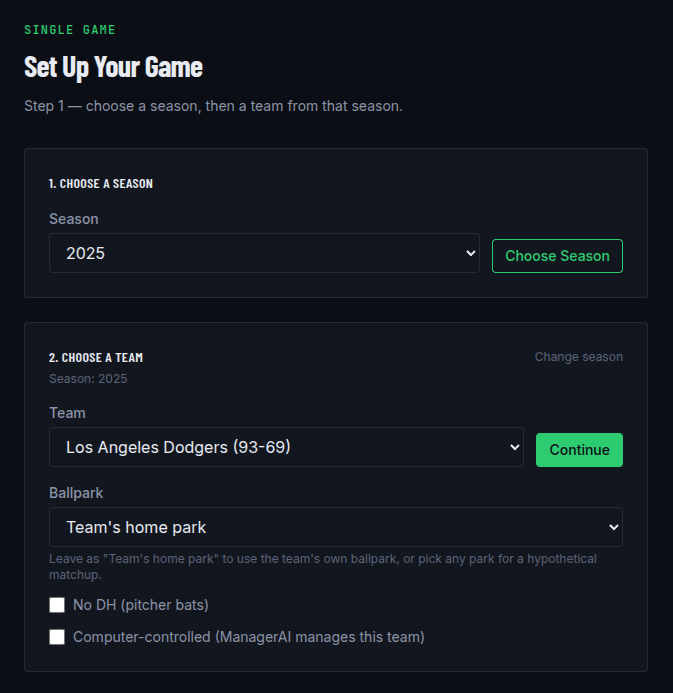
Pick a season and click Choose Season, then pick a team and click Continue. Check Computer-controlled if you want ManagerAI to run your team's lineup and in-game decisions instead of you — mainly useful for simulating a full game hands-off, with no user interaction.
-
Step 3
Pick an Opponent #
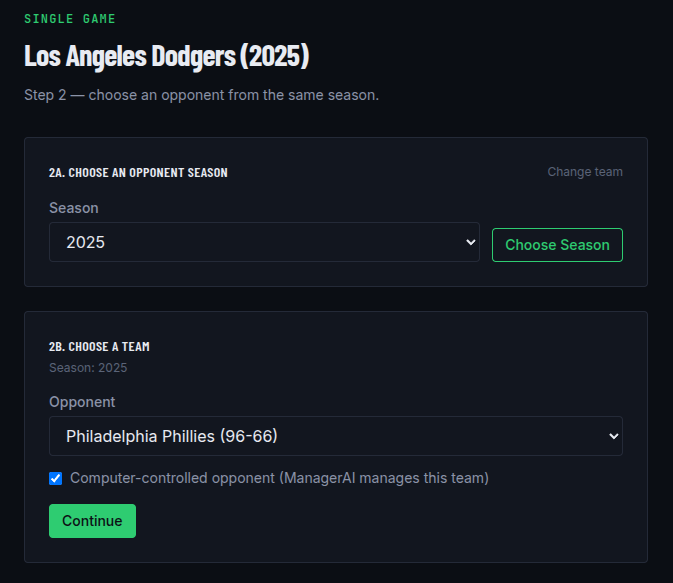
Same two steps, this time for the opposing team: Choose Season, then Continue. The opponent has its own Computer-controlled checkbox, so you can set up Human vs Human, Human vs Computer, Computer vs Human, or Computer vs Computer games.
-
Step 4
Set Lineups #
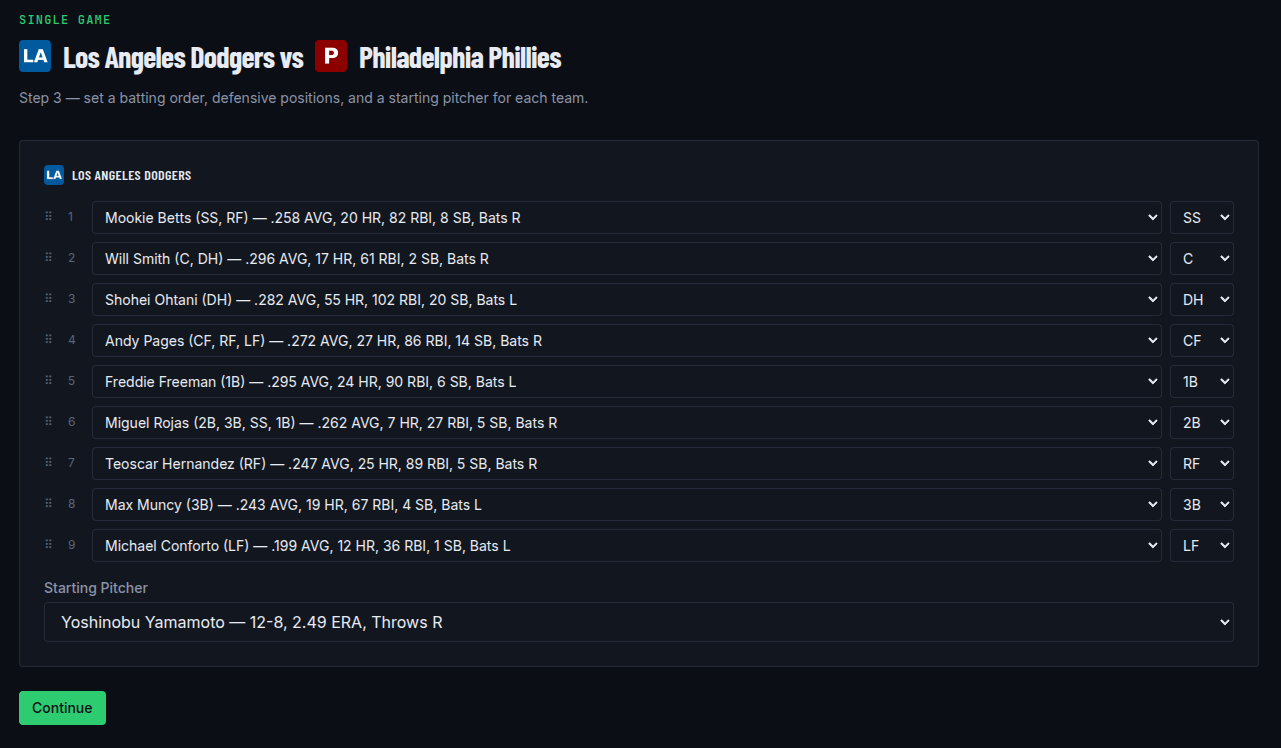
Set the batting order, defensive positions, and starting pitcher for both teams, then click Continue. Even a Computer-controlled team's lineup is editable here — it's pre-filled with ManagerAI's own pick, but you can change it before the game starts.
Each batting slot's player dropdown lists players who've actually played that slot's defensive position first, and shows every position a player is eligible for right next to their name. The Starting Pitcher dropdown only lists pitchers with a real starter's workload that season — relievers and mop-up arms aren't offered here.
Seasons from before the designated hitter existed are flagged No DH — the pitcher bats in the lineup instead of a DH. On a No DH lineup, the pitcher's batting slot is locked (shown greyed out) and always matches whoever's picked in the Starting Pitcher dropdown — change the pitcher there, not by editing that batting slot directly.
To swap two batters, drag one slot's ⠿ handle onto another — the target lights up so you can see exactly where it'll land — and dropping it trades those two slots' players and fielding positions with each other. This works on the locked pitcher slot too; drag it to a new spot and the lock (and the note explaining it) follows along.
-
Step 5
Confirm and Play Ball #
Review both lineups on the summary screen, then click Play Ball to open the gameboard and start the game. Use the "← Back" links on any setup screen to revisit an earlier choice.
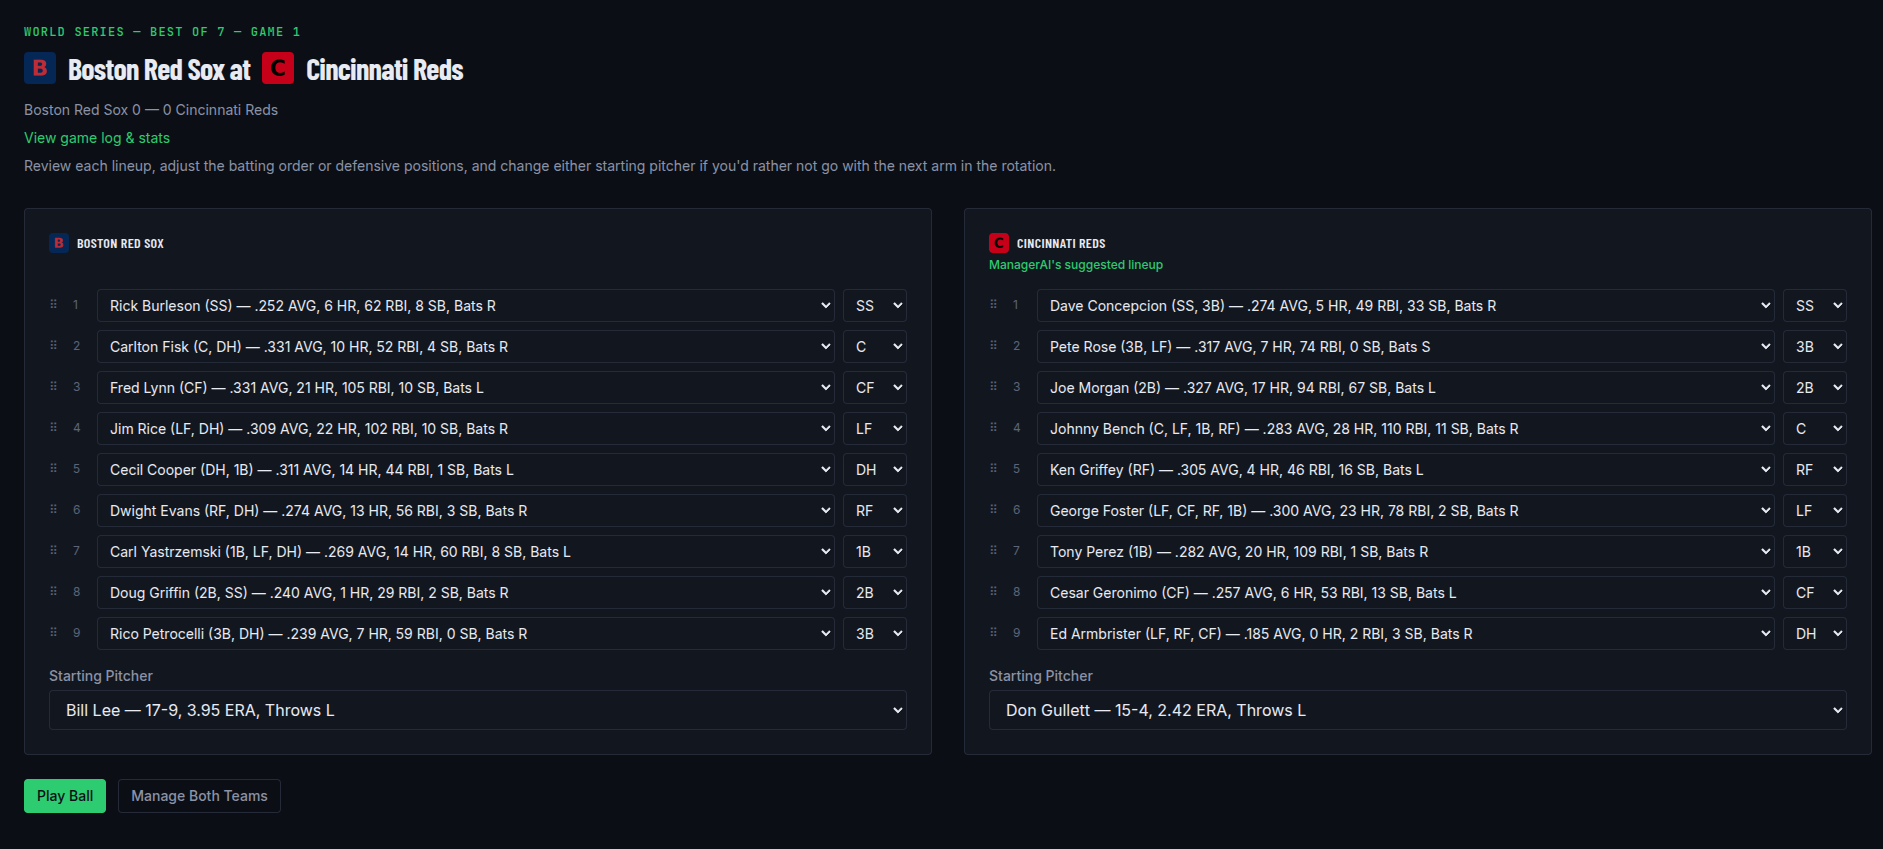
If the park this game is being played at doesn't have a photo you like, click Upload your own ballpark photo above the Play Ball button. Your photo is remembered for that park in every single game or All-Star game you play there afterward — only you see it.
If you set your opponent to Computer-controlled back on the Opponent step, you'll also see a Manage Both Teams button here — click it instead of Play Ball to take over both dugouts for this game.
If both teams are Computer-controlled, you'll instead see Watch Game in place of Play Ball, alongside Manage Both Teams.
Watch Game opens the gameboard and plays the game out one at-bat at a time, with ManagerAI managing both dugouts. The only button you'll see is Resolve At-Bat — click it to let ManagerAI play out the next at-bat for whichever side is up. You can still pinch hit, pinch run, change pitchers, and change fielders for either team between at-bats, the same manager controls you'd use in a normal game — ManagerAI just makes every other call (swinging away, bunting, stealing, positioning) on its own.
02. Working an At-Bat #
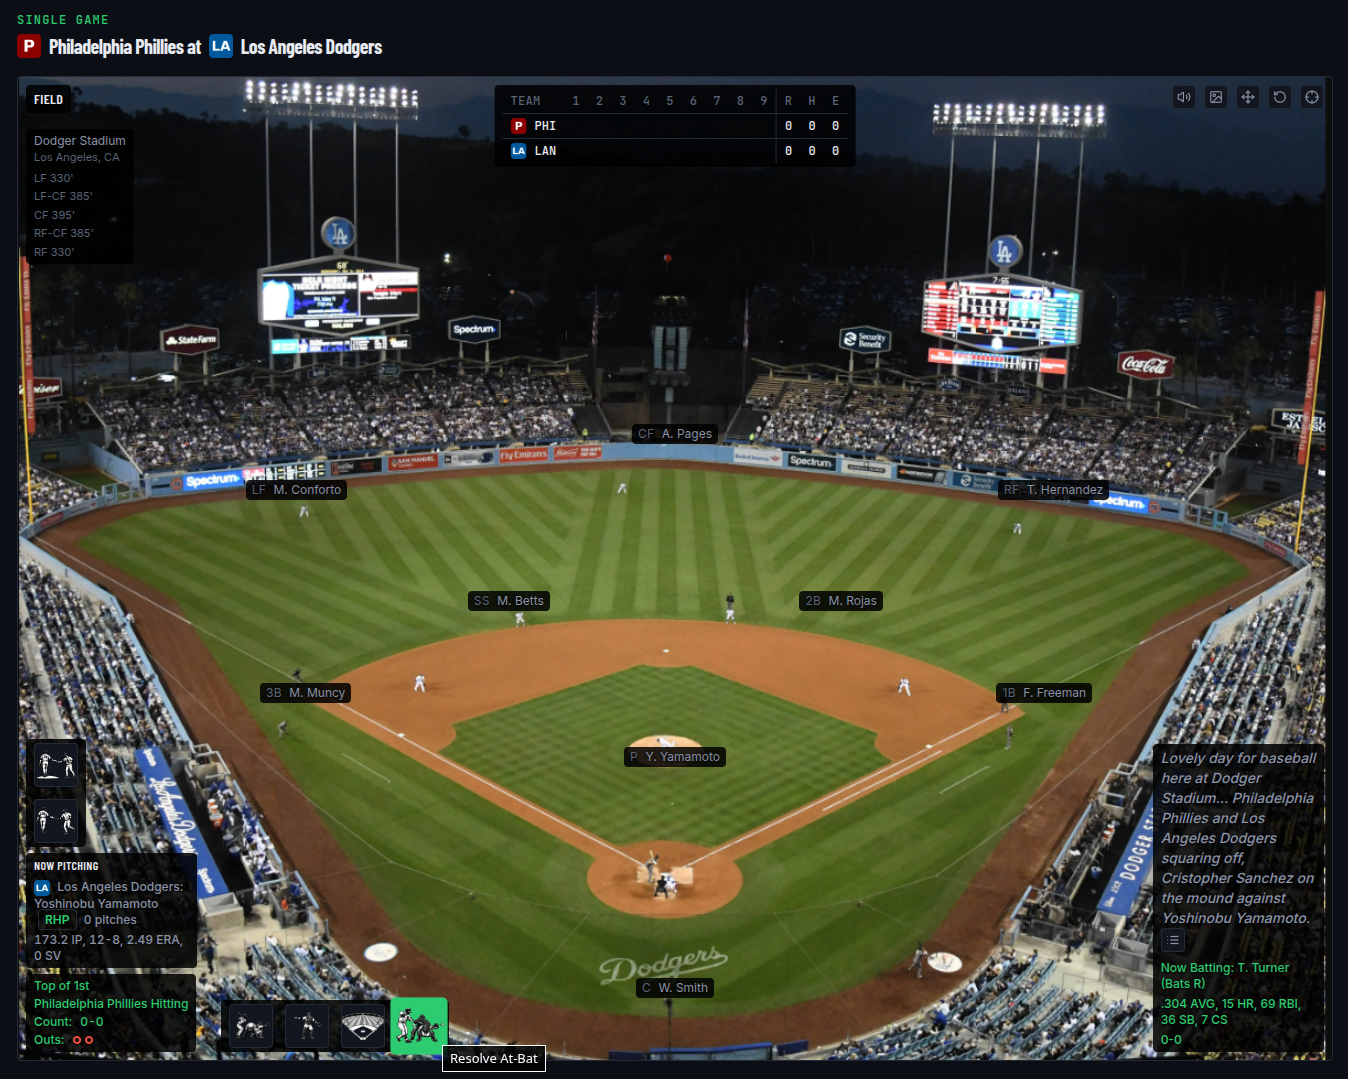
Each plate appearance moves through up to three steps, and the Field card itself only shows the icon buttons that make sense for the step you're on — a Defense group (bottom-left of the diamond) and an Offense group (bottom-right). Hover over any of them for a tooltip naming what it does. With runners on base, you'll start in a baserunning step (steal or move on); every plate appearance then has a strategy step where the batting side picks its approach, followed by a defense step where the pitching side can adjust before the at-bat actually plays out. A button only appears once its step is current and the situation allows it — for example, steal buttons only show up with a runner on base who has an open base ahead of them.
- You don't need a mouse. As soon as an at-bat's buttons are ready, the first one is already focused — press Enter or Space to use it. Press Tab (or an arrow key) to move to the next available action, and Shift+Tab (or the opposite arrow key) to move back — from the last one, either wraps you back around to the first. Pinch-hit, pinch-run, change pitcher, and replace fielders come last in that order, after the main at-bat actions. Every new at-bat resets focus back to its own first button.
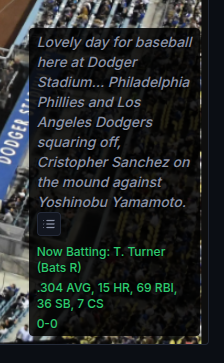
- To the right of the field, the current batter's name is followed by their season AVG, HR, RBI, SB, and CS. Below that is their line for this game, as hits-at bats (e.g. "2-3"), with any extra-base hits ("2B", "3B", "HR") and walks ("BB") tacked on — singles aren't listed separately since they're implied by the batting line. It updates after every completed plate appearance.
- In a season or World Series game, a Stats toggle in the Field card's corner switches that season line — and the pitcher's IP/W-L/ERA/SV on the mound and in the bullpen list, the Up Next hitters, and the field diagram's own fielder/catcher/pitcher hover tooltips — between what this season (or this series) has produced so far and each player's real-world historical line, folding in today's game live either way. It defaults to the season/series line, matching the mound and Now Batting cards' original behavior, but you can flip it to historical at any point; the toggle disappears once the game ends. A single game has no season or series to switch to, so it always shows the full-season line for whichever historical year you picked.
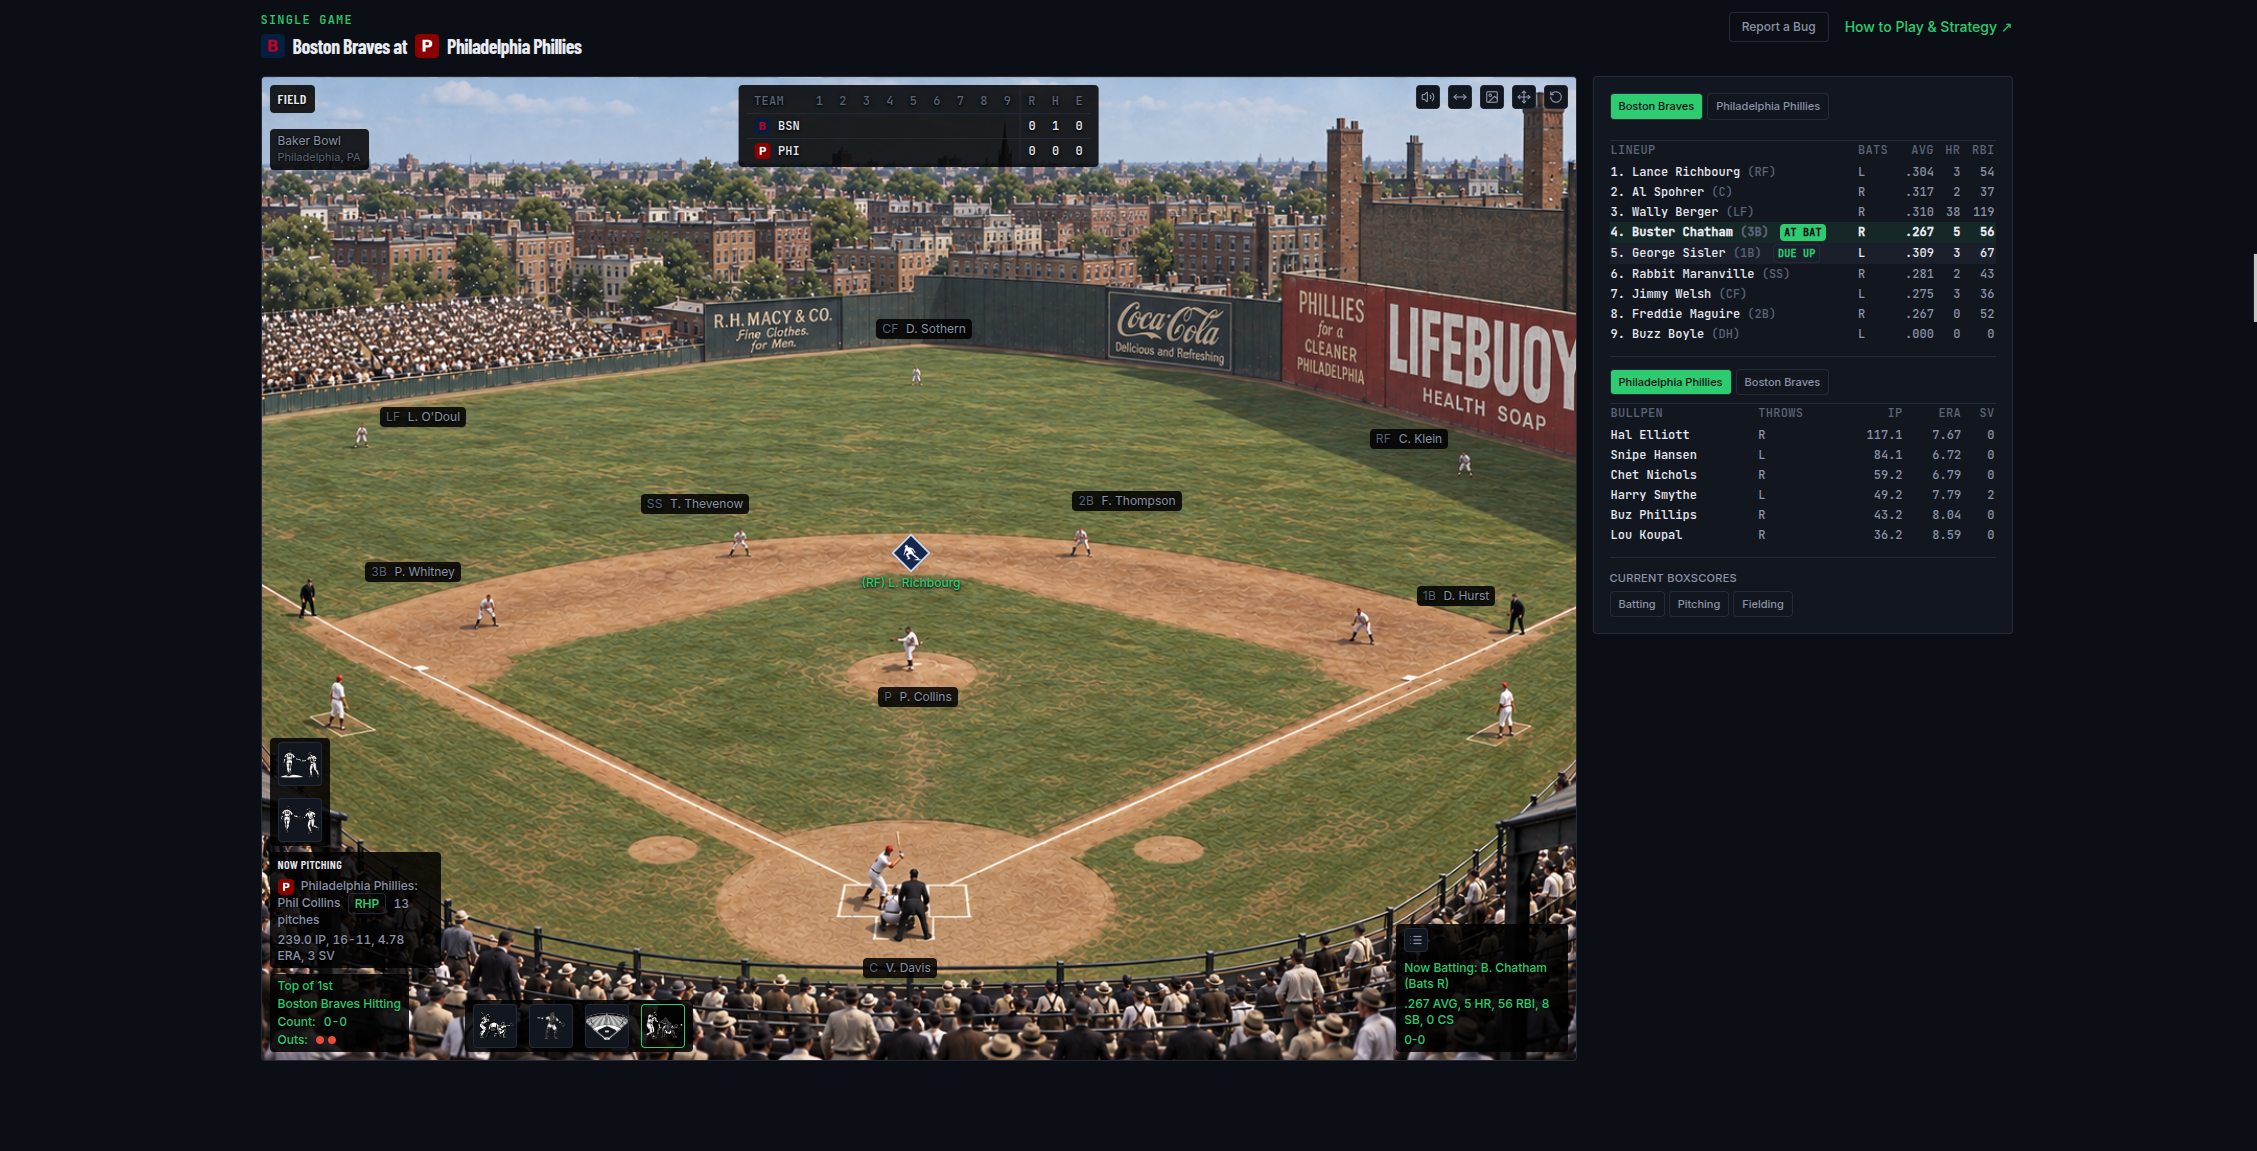
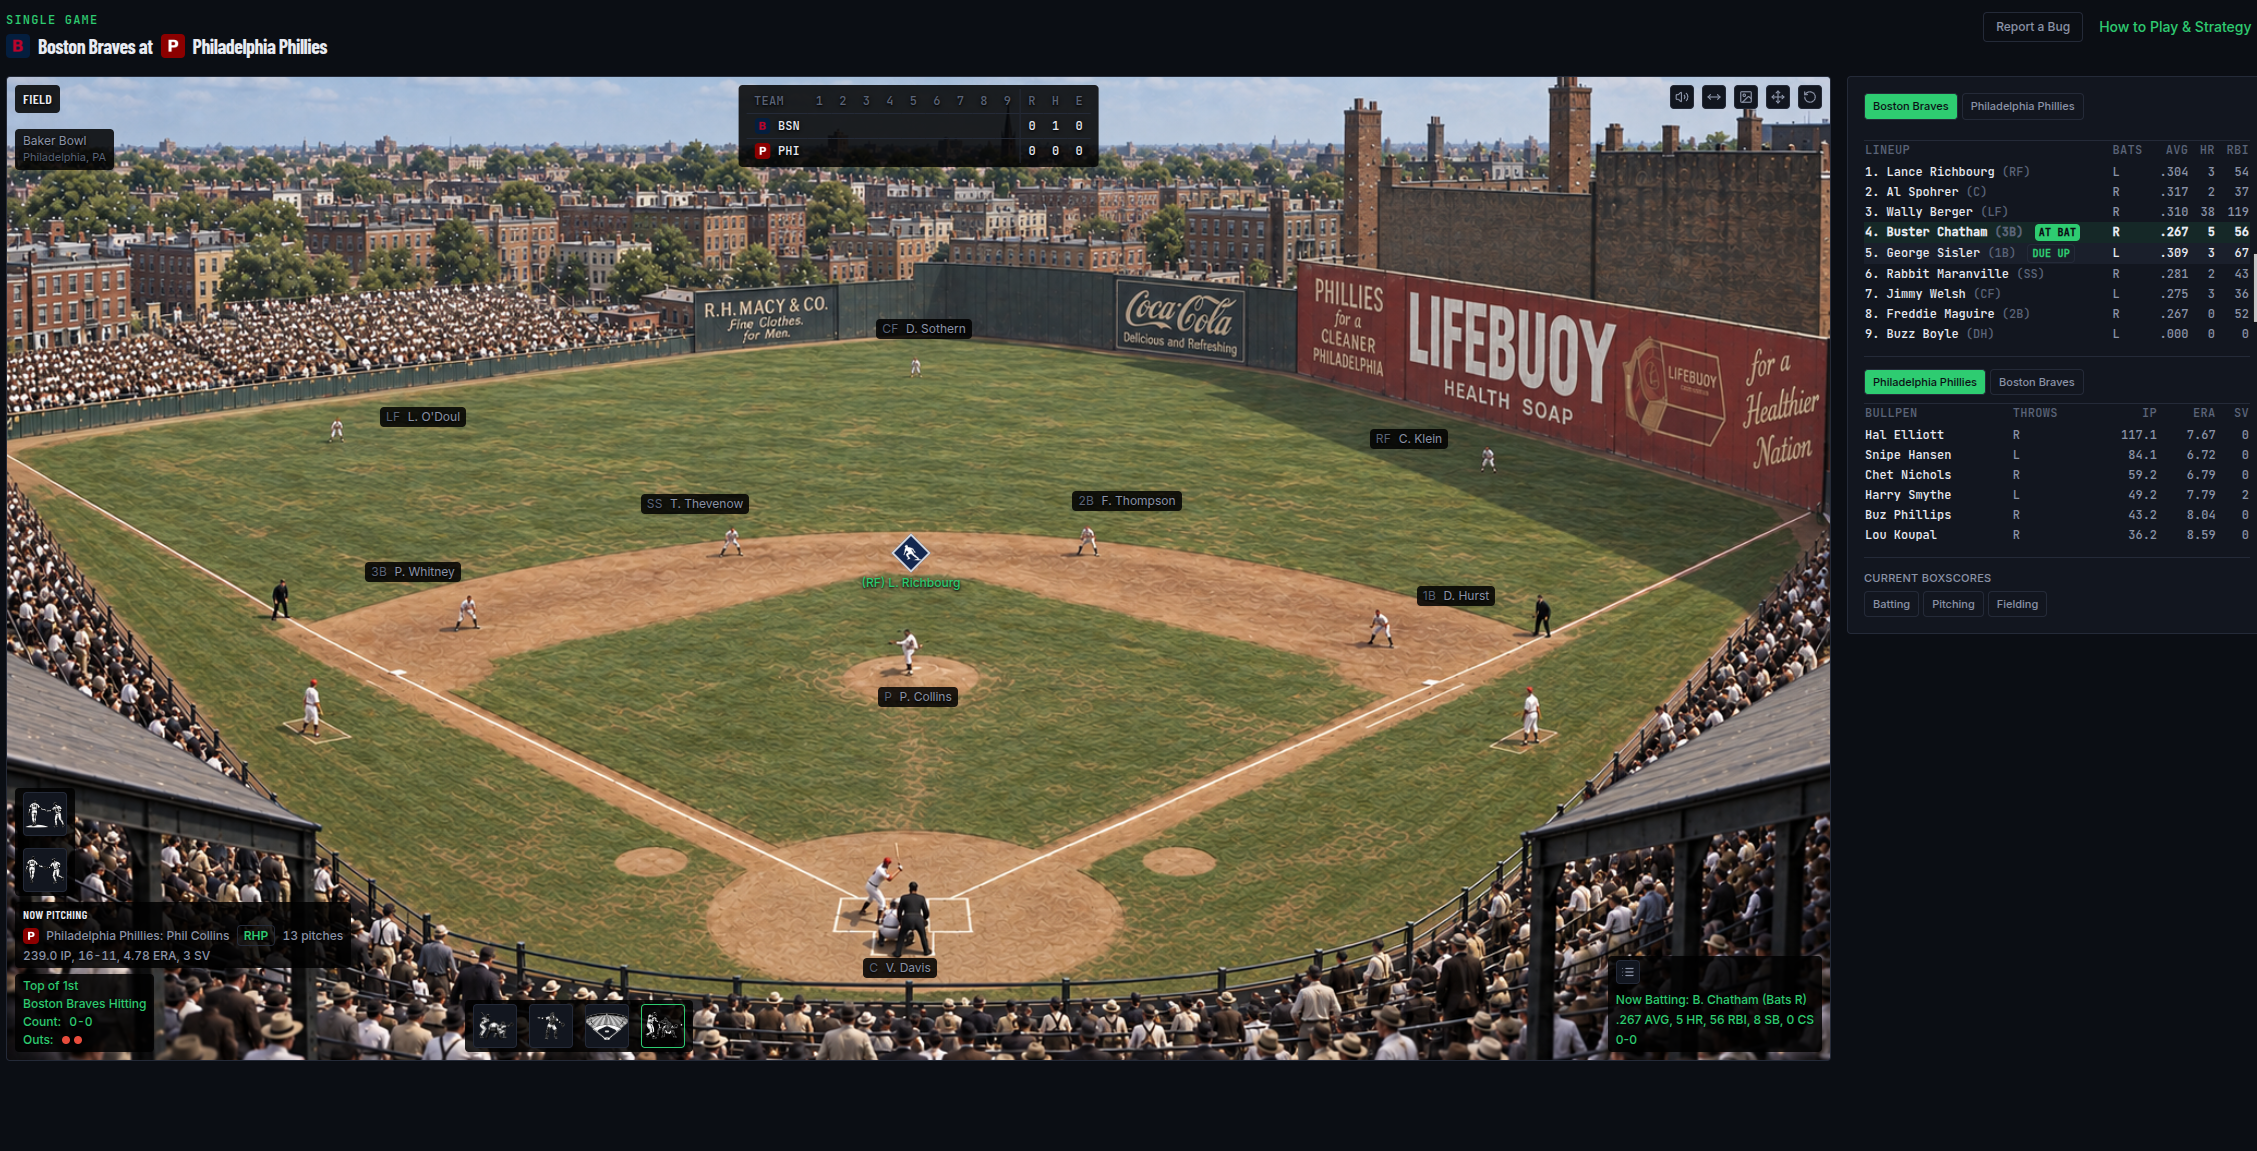
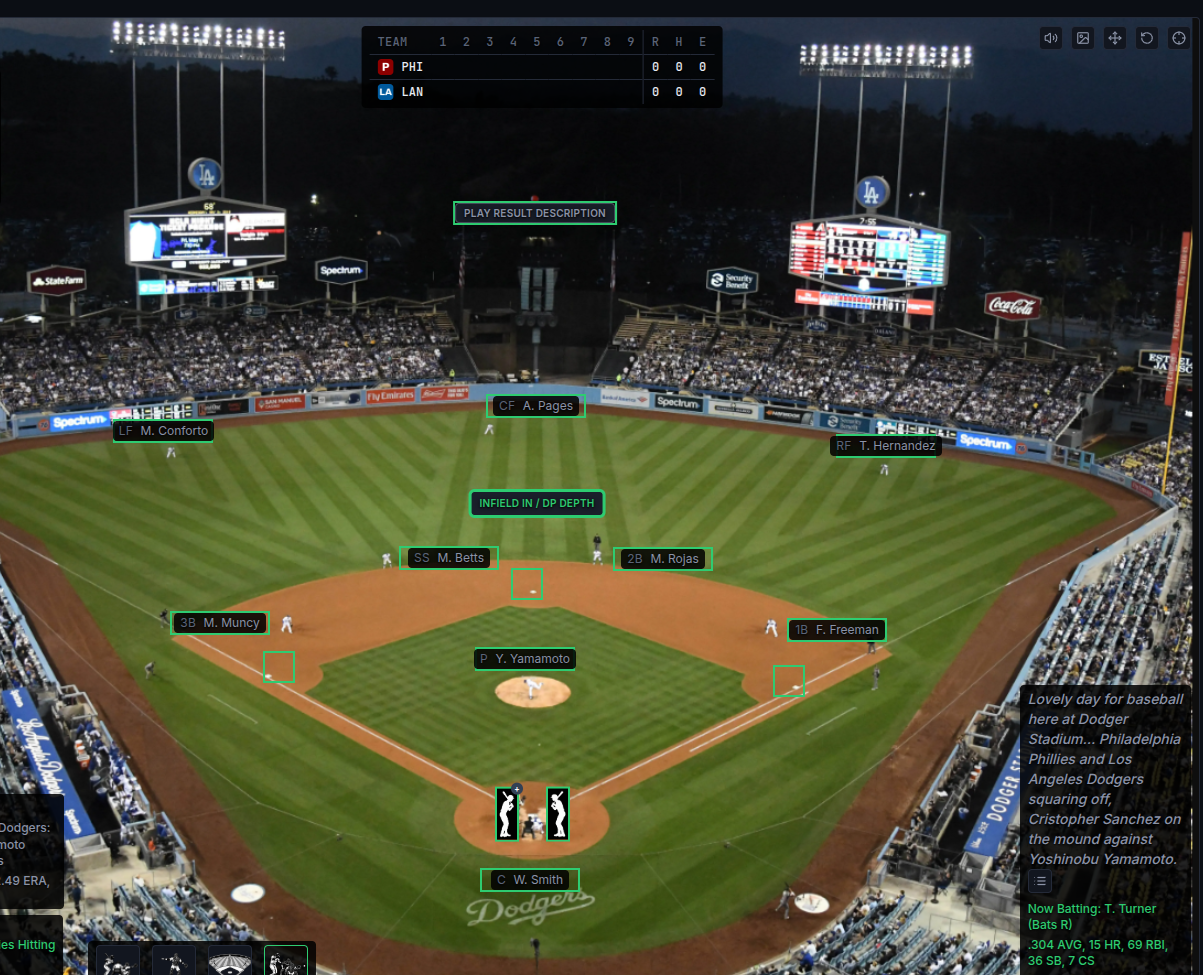
- For ballparks with a curated photo on file, the Field card shows that photo behind the field diagram instead of a plain background, and the fielder/base positions shift slightly to line up with it. Not every ballpark has a photo yet — where one isn't available, the field diagram shows on its plain background as usual.
- A small image icon in the Field card's top-right corner lets you switch back to the plain field diagram at any time, in case the photo isn't lining up the way you'd like. Clicking it again switches the photo back on. Your choice sticks for the rest of the game.
- Phone screens always show the plain field diagram, whether or not the ballpark has a photo, and whether you hold the phone upright or sideways. The background icon isn't shown on a phone. Open the same game on a tablet or a desktop and the photo is there.
- The gameboard plays a short sound effect for each at-bat outcome — a walk, a hit, a strikeout, a double play, and so on — so you can follow along without watching the screen every second.
- A speaker icon in the Field card's top-right corner lets you turn these sound effects off, or back on, at any time. Your choice sticks for the rest of the game.
- A left-right arrows icon in the Field card's top-right corner widens the card on a big enough screen, showing more of the ballpark background photo along the sides. Click it again to switch back. Your choice sticks for the rest of the game.
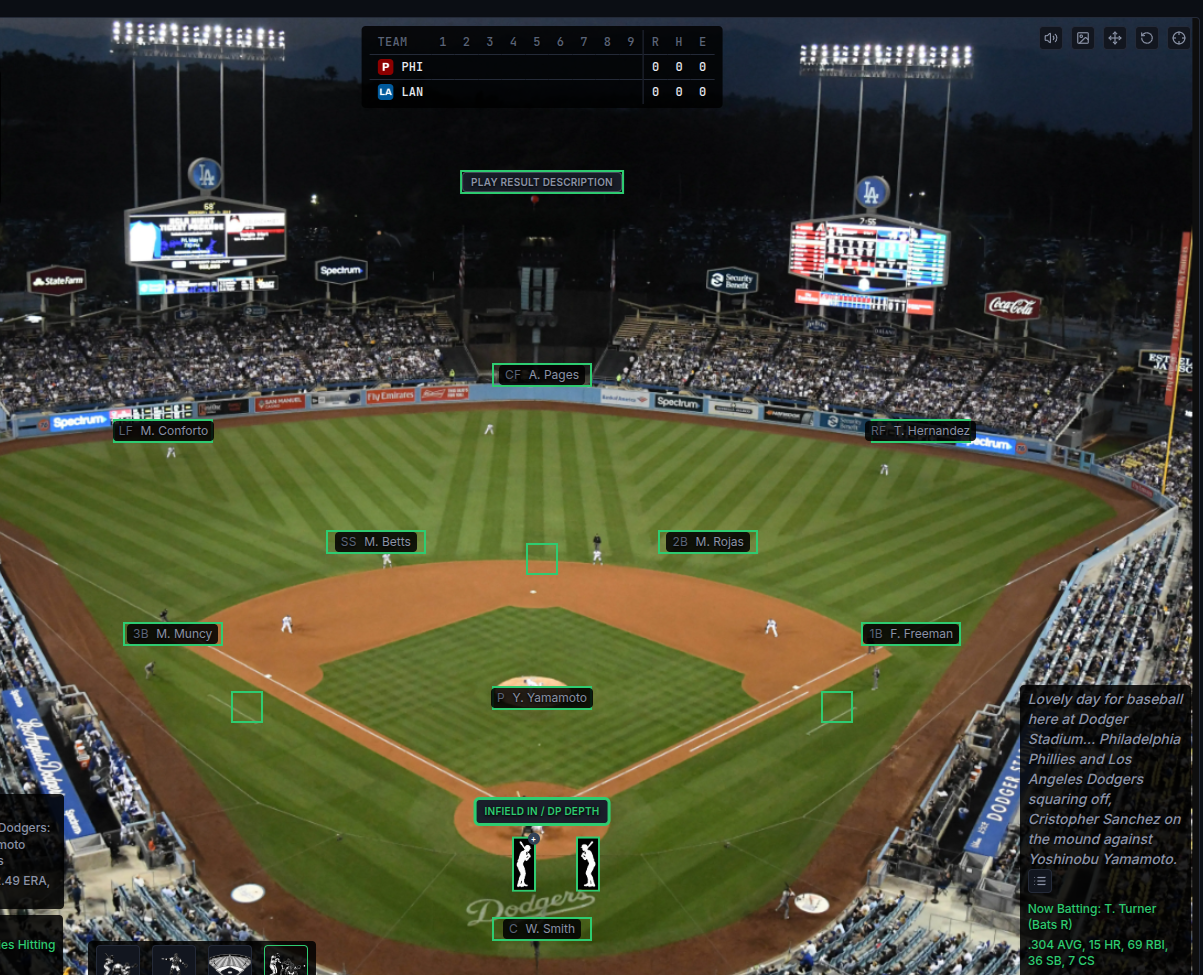
- Once a ballpark's photo is showing, a small icon next to the ballpark background toggle lets you drag each fielder, the DP DEPTH status badge, and the play-result banner (the "STRIKEOUT SWINGING" message that flashes after each at-bat) to your own preferred spot on that photo. Every drop saves right away, so there's no separate save step. Phone screens always show the plain field diagram rather than a photo, so the drag icon isn't offered there.
- Your positions are saved just for you and just for that ballpark. Play a different game at the same park later and your custom layout is there waiting for you, still just for you; every other player still sees the default layout unless they've set their own.
- Positions are remembered separately for each screen shape: tablet held upright, tablet turned sideways, and desktop. The field diagram is shaped a bit differently on each, so each one is set up on its own. Dragging fielders on a desktop leaves a tablet showing the standard layout until you drag them there too.
- Signed-in players can also show a batter icon at home plate, facing the way the current batter actually hits. It's off by default. Turn it on (or off again) with the small +/× button that appears on it while the drag tool above is active, and drag it to your own preferred spot the same way as any fielder.
- With a runner on base, there's a small chance a pitch gets away before the batter ever swings — a Wild Pitch (charged to the pitcher) or a Passed Ball (charged to the catcher). Every runner on base advances at least one base immediately, occasionally two, and a run can score right then — including a walk-off, which ends the game on the spot. A modal opens automatically announcing what happened; Got it clears it.
- The batter's own turn isn't decided yet when this happens — acknowledging the modal sends this same plate appearance back to the start of its baserunning/offensive/defensive steps above, using the runners' new positions. Any approach or defensive call either side had already locked in before the wild pitch no longer carries over automatically; both managers get a fresh look given where the runners ended up. It's still the same batter facing the same pitcher — just a new set of calls to make before the pitch is actually put in play.
- On a strikeout, there's a small chance the pitch gets away from the catcher instead of being caught cleanly — a Wild Pitch (charged to the pitcher) or a Passed Ball (charged to the catcher). When that happens, the batter isn't out after all: he takes off for first base, and any runner ahead of him who's forced to move does, same as on a walk. It's still a strikeout on the pitcher's and batter's own lines, just without the out.
- This can't happen with a runner already on first and fewer than two outs — real baseball's own rule, since the batter isn't entitled to first base in that situation regardless of what the pitch does. Every other time, it's rare: most third strikes stay ordinary strikeouts.
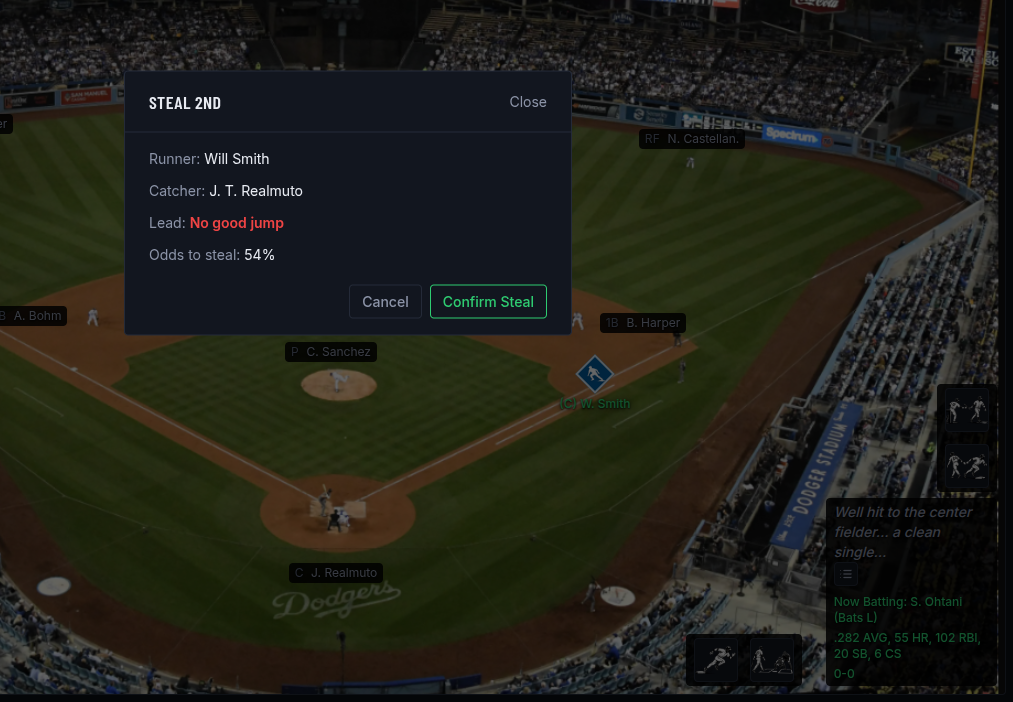
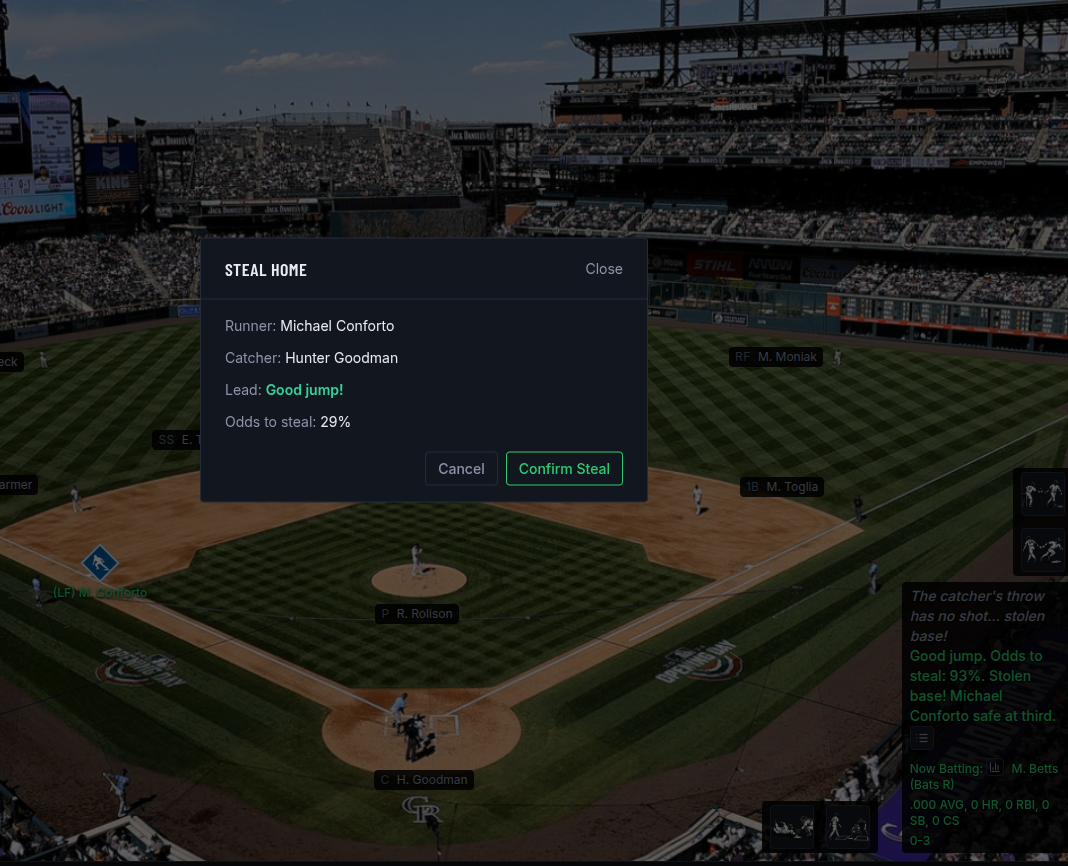
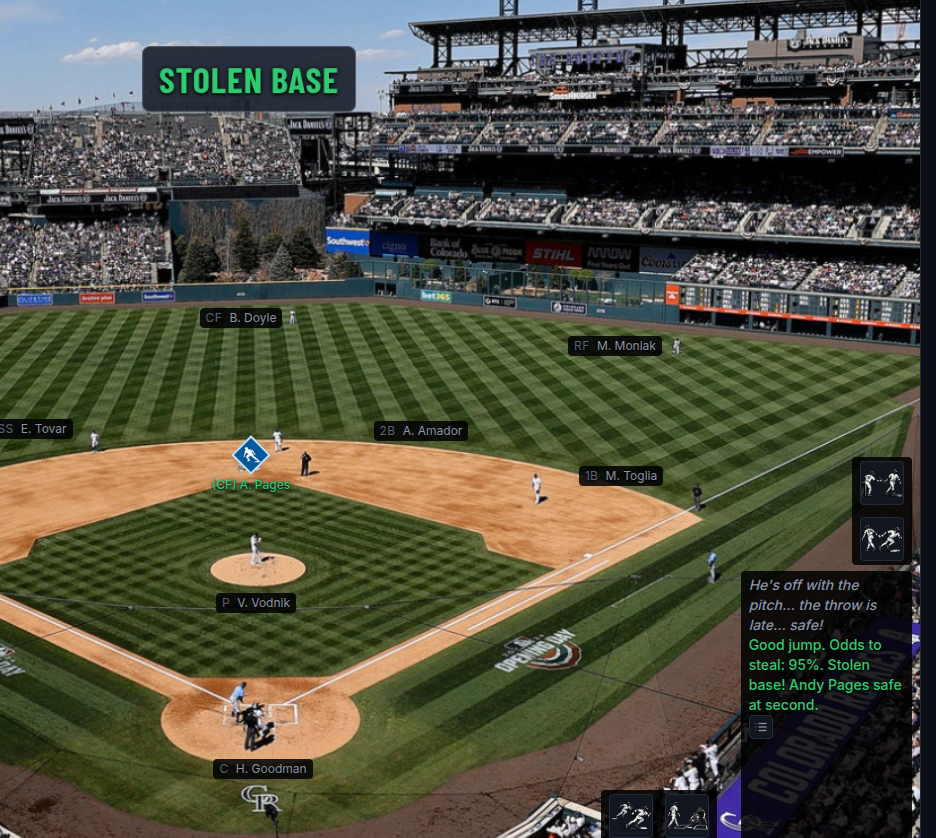
- A steal button appears for each open base a runner can take: Steal 2nd from first, Steal 3rd from second, Steal Home from third, and Double Steal when runners on first and second can both go. Each button opens a confirm modal first showing the odds of stealing safely -- the double-steal modal shows a separate percentage for each runner (2nd and 3rd), since a double steal can throw out either runner independently. A runner's lead/jump (and the odds that come with it) is re-checked fresh at the start of every plate appearance he's still on base for, not just when a new runner reaches the base -- so the same runner can show different odds from one batter to the next.
- Steal odds are scaled to the season you are playing. The game reads that season's league-wide stolen base and caught stealing totals and sets the baseline from them, so steals succeed at about the rate they did that year. Expect noticeably lower odds in a 1965 game than a 2025 game for the same quality of runner, and expect computer-managed teams to send runners less often in the low-steal eras.
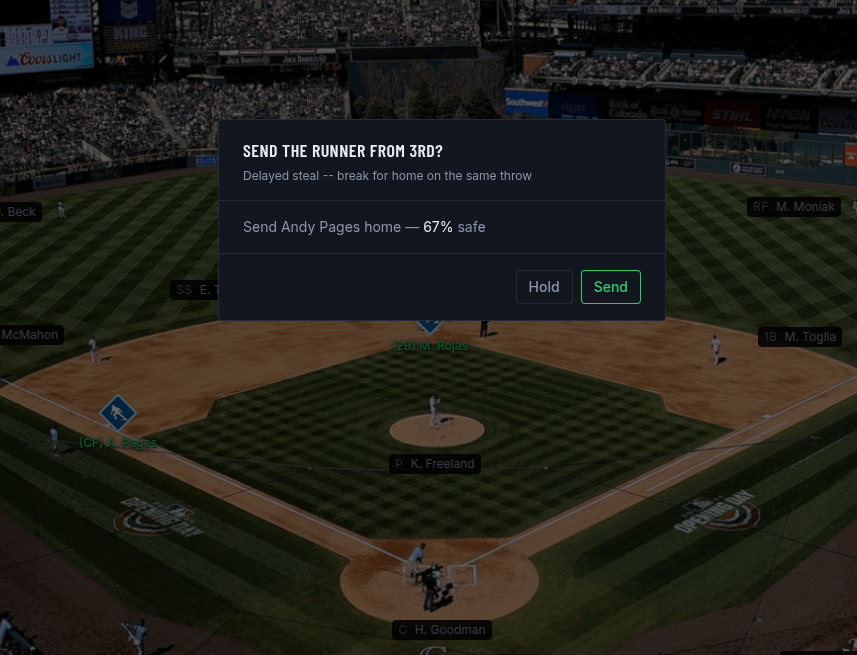
- If a runner is already on 3rd when you steal 2nd, he gets his own shot at breaking for home on that same throw down -- a delayed steal. Once the steal of 2nd is decided (whether that runner ends up safe or caught), a "Send the Runner From 3rd?" modal opens automatically showing his odds of scoring. Send to send him home, or Hold to keep him at 3rd -- holding is risk-free. If he's caught, it's scored as a caught stealing just like any other failed steal.
- Appears with at least one runner on base. Ends the baserunning step for this plate appearance once you're done taking leads or attempting steals, and moves on to picking your offensive approach below. With the bases empty, this step is skipped automatically and you'll go straight there.
- Declares a normal at-bat — no special strategy. Like every button in this step, clicking it only locks in your approach; it hands the turn to the pitching side, who gets a chance to react before the at-bat actually plays out with Resolve At-Bat below.
- Available with a runner on first or second, any number of outs. Locks in the play — the runner goes and the batter tries to make contact behind them once the pitching side clicks Resolve At-Bat. The early jump cuts both ways: it makes a runner forced out on a ground ball less likely to get doubled off (he's already past the usual force point by the time the ball's fielded), but it makes him more likely to get doubled off if the ball is actually a line drive that gets caught (he's caught that much further from getting back).
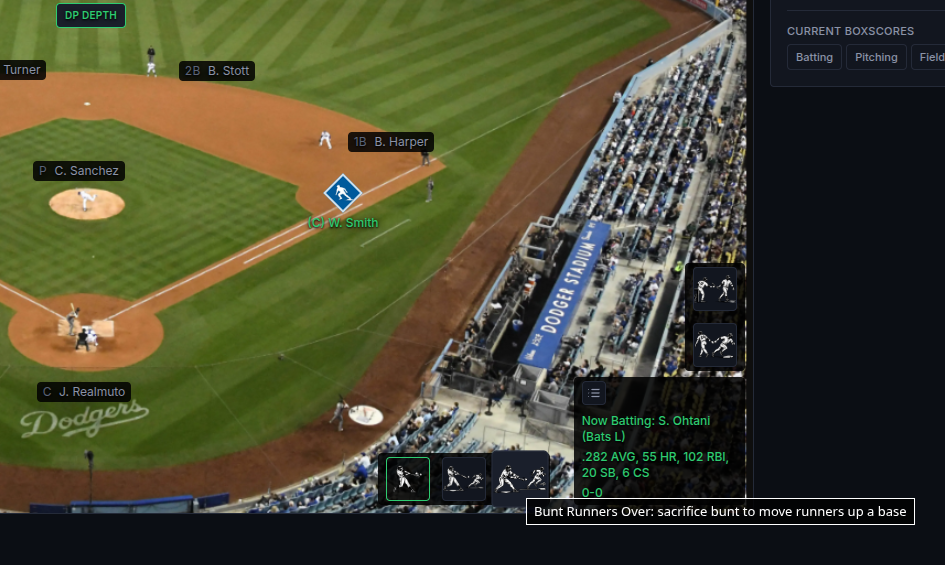
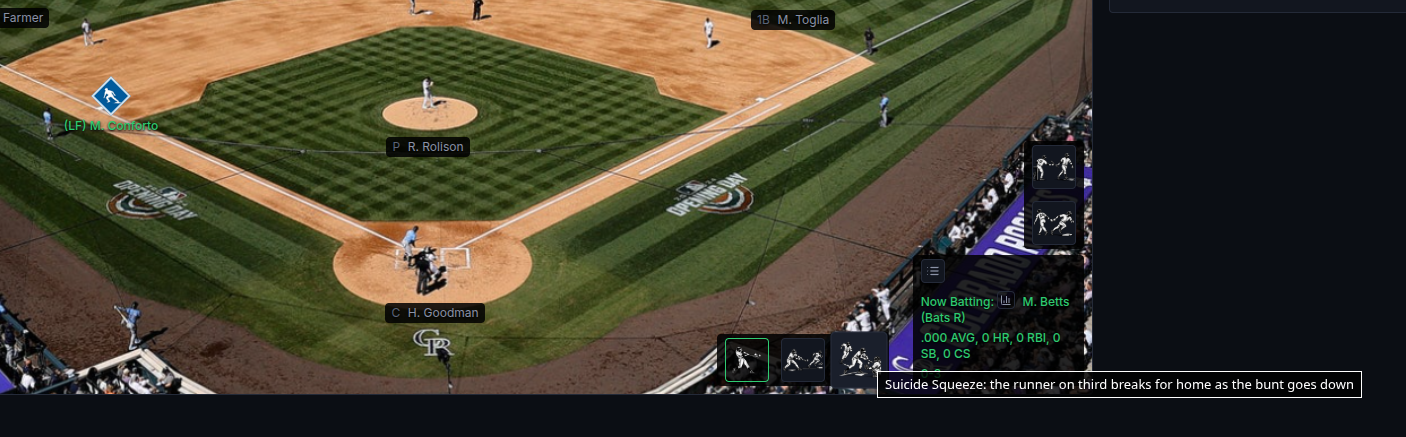
- With the bases empty, Bunt for Base Hit drags one down for a hit. With a runner on, it becomes Bunt Runners Over to sacrifice them into scoring position. With a runner on third and fewer than two outs, Suicide Squeeze also appears to bunt that runner home. Like Hit Away and Hit and Run, this only locks in the play — the pitching side still gets to react before it actually plays out.
- A bunt single always advances an existing runner exactly one base — a runner on first to second, a runner on second to third — never all the way home on the play itself. Unlike a regular single or double, there's no "Send the Runner?" decision here. A runner already on third still scores automatically, same as any other hit.
- On a bunt, the defense sometimes goes for the lead runner instead of the batter. If the batter is the one put out, the game log tags the play Bunt Out. If the lead runner is thrown out instead and the batter reaches first safely, it's tagged Fielder's Choice — the batter is charged with an at-bat but not an out.
- On a fly out -- or a line out caught by an outfielder, at reduced odds since there's far less time to react -- with fewer than 2 outs and a runner on base, a modal opens automatically showing each occupied base's odds of tagging up safely. A line drive caught by an infielder never offers a tag-up -- instead, the defense gets an automatic chance to double off a runner caught away from his base, no manager decision involved. That chance is much higher when the fielder who made the catch is the same fielder who covers the runner's own base (he can just step on the bag or tag him directly) than when another infielder has to make a throw first. Toggle Send for whichever runner(s) should go -- the button below updates to Send Runner (or Don't Send Runner with nothing toggled) so it's always clear what confirming will do -- then click it, or Cancel to hold everyone. Sending a runner also forces every runner behind them to attempt the same play, since a trailing runner can't be left standing alone once the runner ahead of them commits.
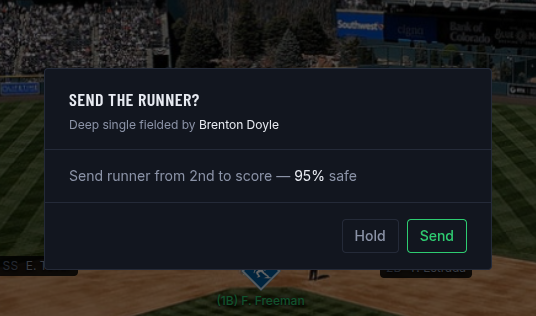
- On a clean single, double, or triple, there's a small chance the batter-runner had a shot at one more base than the hit earned outright — 1st to 2nd, 2nd to 3rd, or 3rd to home. When it comes up, a modal opens automatically showing the odds of making it, based on the batter's speed and the fielding fielder's arm. Attempt to send the runner, or Hold to settle for the hit's normal base. An unsuccessful attempt is an out on the bases — the hit itself still counts. A successful attempt is scored as the next hit type up (a single stretched into 2nd is credited as a double, a double stretched into 3rd as a triple) in the box score and play-by-play log.
- On a clean single or double, an existing runner already on base can also get a shot at an extra base — 1st to 3rd on a single, or 1st to home on a double, for example. A "Send the Runner?" modal opens automatically showing the odds, based on the runner's speed and the fielding fielder's arm. Send to attempt it, or Hold to keep the runner at the base the hit earned. This is separate from — and can come up alongside — the batter-runner's own Extra-Base Decision above.
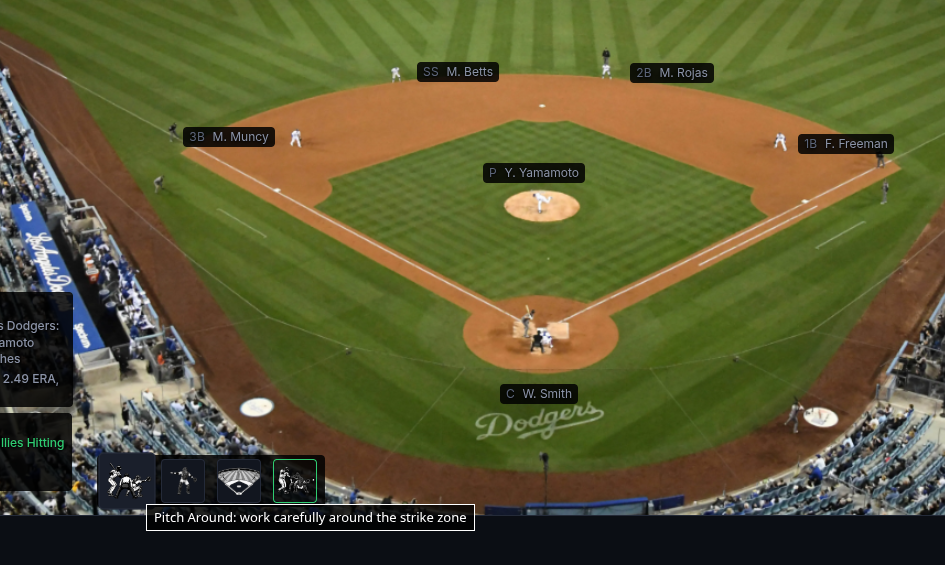
- Nibbles at the edges of the zone against a dangerous hitter without fully surrendering the at-bat — more likely to walk them than an ordinary pitch, without giving up the free pass outright. Often runs the count deeper, so expect more pitches thrown than a normal at-bat. Clicking it just marks it as your call for this at-bat — it highlights to show it's active, and you're still free to adjust positioning or switch to Intentional Walk before clicking Resolve At-Bat to actually pitch it. Click it again to change your mind and pitch normally instead.
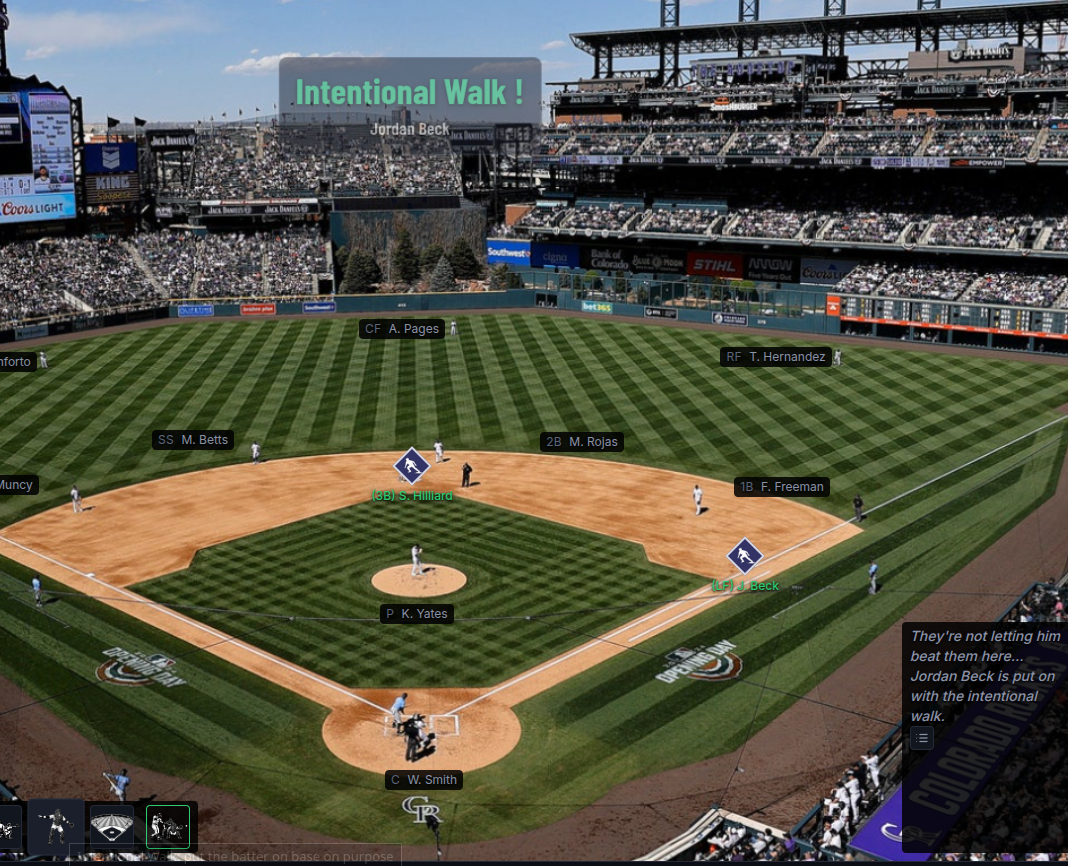
- Puts the current batter on first — no pitches thrown. Use it to set up a force play or avoid a hot hitter. Counts as a walk (BB) and also shows up on its own IBB line in the batting summary. Like Pitch Around, clicking it just marks it as your call for this at-bat — it highlights to show it's active, and it doesn't actually put the batter on until you click Resolve At-Bat. Click it again to change your mind before then.
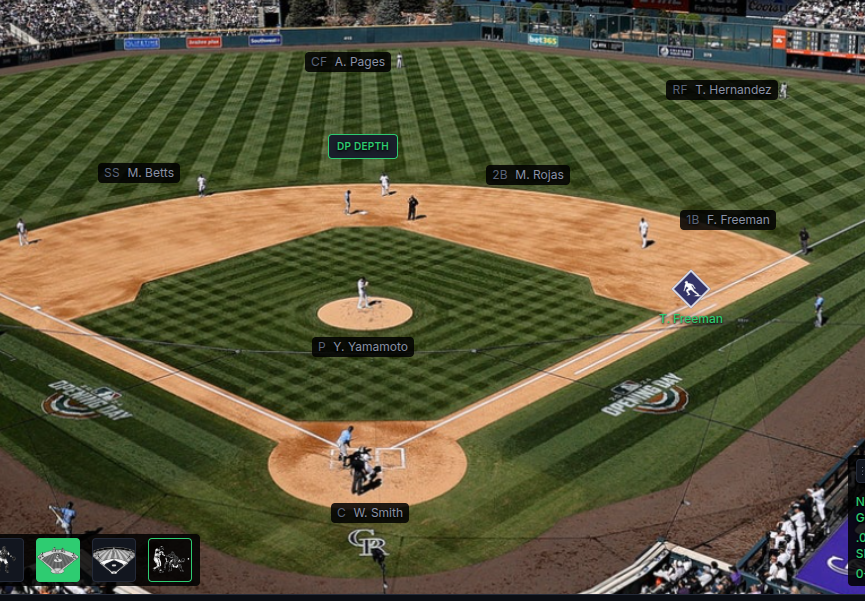
- Defensive alignment for the fielding side. Appears once the batting side has locked in its approach for this plate appearance. Clicking any of the three buttons just calls the alignment — it shows as a message between the pitcher and catcher and doesn't use up the batter's turn; clicking Resolve At-Bat is what actually plays it out, after which the defense resets back to normal positioning. With a runner on third, first base open, and fewer than two outs, Infield In guards the plate — a grounder fielded cleanly almost never lets that runner score, but one that sneaks past a drawn-in infielder now has a real chance to go through for a single. With a runner on first and fewer than two outs, DP Depth plays back for a better double-play angle at the cost of the same reduced range. No-Doubles Depth plays the outfield deep instead — a double is less likely to land deep (that mass shifts to a medium-depth double instead) and a runner trying to score from third on a triple has worse odds, at the cost of conceding more shallow singles. Infield In and DP Depth are alternatives to each other — calling one cancels the other — but since No-Doubles Depth is an outfield call, it can be called alongside either of them at the same time. Clicking the active alignment's button again cancels just that call and returns that part of the defense to normal positioning. Infield In and DP Depth also cancel themselves automatically if the runner they depend on is no longer where the call needs him — e.g. a stolen base, caught stealing, or pickoff that clears first (DP Depth) or third (Infield In) — since the alignment no longer means anything once that runner's gone.
- Plays out the plate appearance using whatever you locked in above: your Pitch Around or Intentional Walk call if either is active, otherwise the batting side's own approach. Always available once the batting side has picked an approach — including when a computer-controlled team is batting, in which case this is the human manager's own call as the pitching side.
- Once the at-bat resolves, the result comes from a single weighted draw against a probability table built for that exact matchup. The table is assembled from three real stat lines: the batter's season, the pitcher's season, and the league's season as the neutral reference point. They're combined using a formula that gives back the batter's own rate when he faces a league-average pitcher, and pushes past either one when batter and pitcher lean the same direction. A player with a thin season gets pulled toward the league average in proportion to how much of a full sample he has, so a September call-up with 20 at-bats isn't trusted like a 600-plate-appearance regular. Handedness, the ballpark, fielder range, pitcher fatigue, and times through the order each adjust the table before the draw. Pitching records track hits allowed but never break them into singles, doubles, and triples, so the sim has to split a pitcher's hits itself. It does that using the same season's real league-wide split, then nudges it by whether the pitcher is a groundball or flyball type. Because the split comes from the season being played, a 1912 game produces triples at 1912 rates and a 2024 game at 2024 rates, which are less than half as common. Two limits sit on the table. A stat the season's records don't carry stays at zero, which is why seasons before 1884 produce no hit batsmen. And hit by pitch is capped at five times the league rate for that season, because the log5 formula multiplies both sides' tendencies and that runs away on an outcome this rare. The cap only applies where both the batter and the pitcher are extreme, so an ordinary matchup and a hit-prone batter facing an average pitcher both play out exactly as their real numbers say.
Playing by Keyboard #
Now Batting Card #
Ballpark Background #
Sound Effects #
Wide Layout #
Custom Fielder Positions #
Wild Pitch / Passed Ball #
Uncaught Third Strike #
Steal 2nd / Steal 3rd / Steal Home / Double Steal #
Send the Runner From 3rd? #
Continue to At-Bat #
Hit Away #
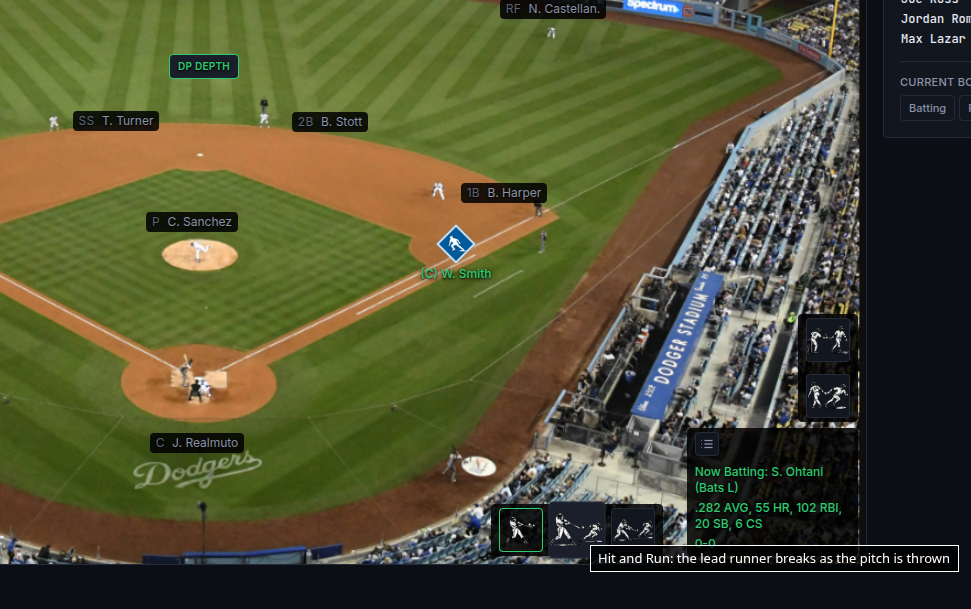
Hit and Run #
Bunt for Base Hit / Bunt Runners Over / Suicide Squeeze #
Runner Advancement on a Bunt Single #
Bunt Out vs. Fielder's Choice #
Tag-Up Decision #
Extra-Base Decision #
Runner Scoring Decisions #
Pitch Around #
Intentional Walk #
Infield In / DP Depth / No-Doubles Depth #
Resolve At-Bat #
How the outcome is decided #
03. Manager Controls #
Substitutions are made from small icon buttons on the Field card itself: a Defense group (pitching changes, fielder replacements) on the left, and an Offense group (pinch hitters/ runners) on the right. Hover over any of them for a tooltip naming what it does. Buttons only appear when they're legal to use — for example, Replace Fielders only shows up if you have at least one open position to fill. Each substitution button opens a popup where you pick the player(s) and confirm.
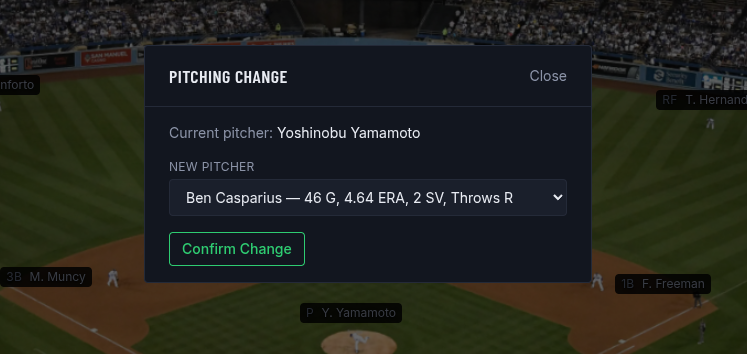
- Click Change Pitcher on the left side of the Field card, pick a reliever from the bullpen list, then click Confirm Change. If a pinch hitter you sent up can't take the mound, this modal opens automatically and can't be dismissed until you pick a replacement. In a No DH game, the incoming pitcher also takes over the old pitcher's spot in the batting order — the Play-by-Play log records both as separate entries, one for the pitching change and one for the batting-order takeover.
- In a single game or World Series game, both the bullpen card and this dropdown are capped to the 6 relievers with the most innings pitched in the selected historical year. In a season game, every reliever still eligible to enter is listed, with no cap, ranked by your current season-to-date innings pitched instead of that historical total, and each one's name is followed by his assigned bullpen role in parentheses (Closer, Setup, Middle, Long, or Mop-Up) if you've set one on the "Pitching Staff" screen. The list sorts by that role's importance first — Closer, then Setup, then Middle, then Long, then Mop-Up, then anyone unassigned — and by innings pitched within each group.
- The bullpen list shows for the computer-controlled team's pitcher too, so you can see who's available on the other side — and Change Pitcher works for that side as well, if you'd rather make the call yourself. The CPU still manages its own pitching changes whenever you don't step in first.
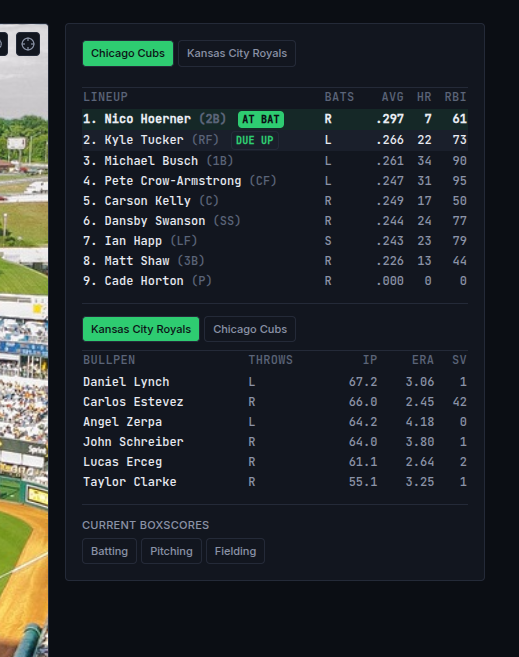
- Two buttons above the bullpen table, below the lineups on the right, switch between the pitching team's relievers and the batting team's, the same way the lineup panel's buttons switch between batting orders. Switching teams is instant and does not affect the game.
- A reliever who has just entered the game can't be pulled again right away — real MLB rules require him to face at least 3 batters in a row (or 1, in a game set before 2020), or to pitch until his team's half-inning ends, whichever comes first. While that's still in progress, Change Pitcher is grayed out, and hovering over it shows how many more batters he needs to face. Once he's faced enough batters, or the half-inning is over, the button opens back up.
- A CPU-controlled team won't make more than one non-emergency pitching change in the same half-inning — once it's swapped in a reliever to fix a lefty/righty matchup or because the current arm is worn down, it'll ride him out the rest of that half-inning rather than chasing another matchup right behind it. The one exception is a pitcher who's actually getting rocked: the CPU will still pull him even if it just made a change.
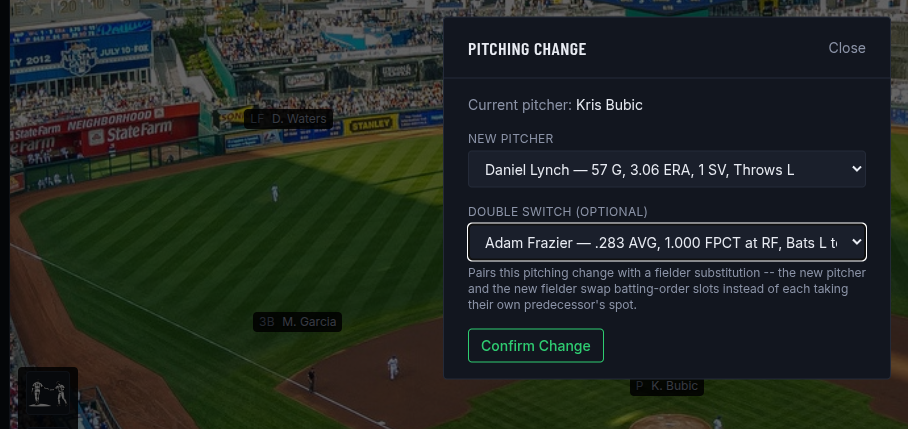
- In a No DH game, this modal also offers a Double Switch dropdown — pick a bench fielder to bring in at the same time as the pitching change, and the two swap spots in the batting order instead of each simply taking over his own predecessor's: the new fielder bats where the old pitcher would have, and the new pitcher bats where the fielder he's replacing would have. Use it to push the new pitcher's own next at-bat as late as possible. The CPU manager makes this same move on its own when it's replacing a weak-fielding starter at the same time it changes pitchers.
- If your whole pitching staff has already appeared and a pitching change still has to happen — usually deep in extra innings or a lopsided blowout — a position player takes the mound instead of the game getting stuck. He pitches with a flat, well-below-average arm regardless of who he is, the Play-by-Play log calls out that no pitchers remain, and whoever he was fielding is replaced from the bench.
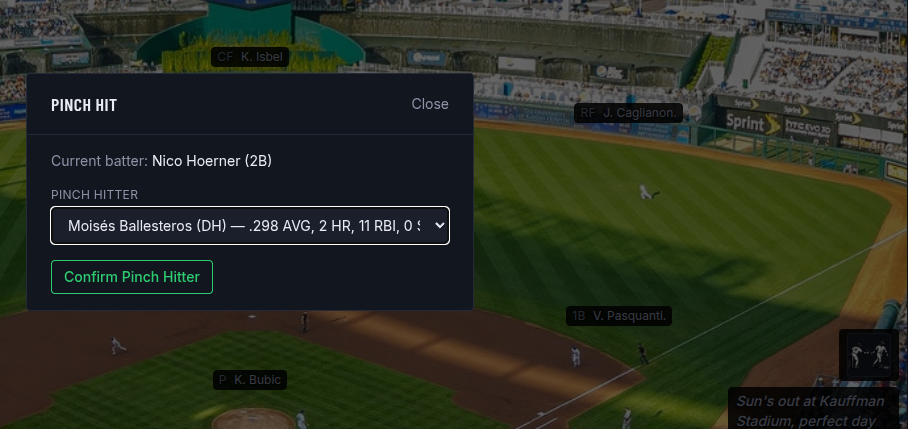
- Click Pinch Hit on the right side of the Field card, pick a hitter off the bench, then click Confirm Pinch Hitter.
- In a season game, a This Season/Historical toggle appears above the dropdown and switches every bench hitter's stat line between this season's totals so far and each player's real-world historical line. It defaults to historical. A single game or World Series game has no season-to-date line to switch to, so the toggle doesn't appear there.
- Pinch Hit works for the computer-controlled team too, if you'd rather make the call yourself. The CPU still manages its own pinch-hitting whenever you don't step in first.
- Click Pinch Run for the base you want to run for, on the right side of the Field card (one button appears per occupied base with an eligible runner), pick a runner, then click Confirm Pinch Runner.
- Pinch Run works for the computer-controlled team too, if you'd rather make the call yourself. The CPU still manages its own pinch-running whenever you don't step in first.
- Click Replace Fielders on the left side of the Field card. The popup lists every open position with a dropdown next to it (defaulted to "No change"), so you can swap one position or several at once in a single submission — for example, sending in a new shortstop and a new left fielder together. Pick your replacements and click Confirm Substitutions.
- In a season game, the same This Season/ Historical toggle from the Pinch Hit popup appears here too, in the popup's upper right — flipping it switches every position's dropdown at once, between each bench fielder's season-to-date batting and fielding-percentage line and their real-world historical one. It defaults to historical.
- Replace Fielders is also available for the computer-controlled team's defense, if you'd rather make its substitutions yourself. The CPU still manages its own fielders whenever you don't step in first.
- Each position's dropdown in the Replace Fielders popup isn't limited to your bench — anyone currently in the game who has played that position before shows up too, labeled with where they're playing right now (e.g. "Currently playing 2B"). Picking one of these moves that player over and swaps whoever was already at the target position into their old spot, so both stay in the game — no one is replaced.
Pitching Change #
Pinch Hit #
Pinch Run #
Fielder Change #
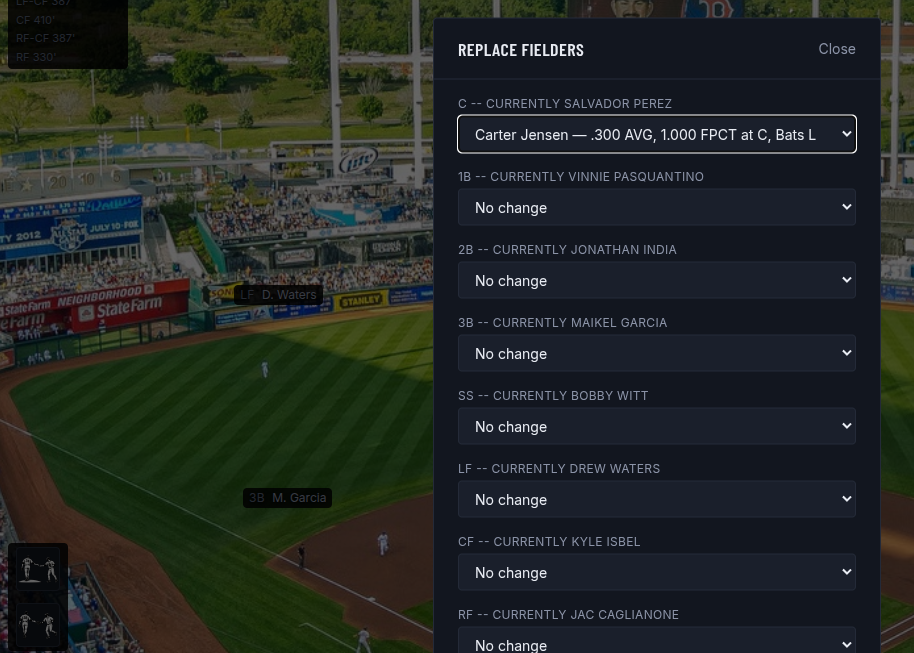
Repositioning a Fielder #
04. Box Score & Game Log #
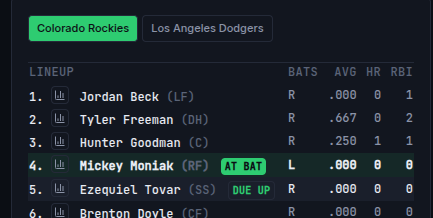
- The right column next to the Field card carries the full nine-spot batting order and stays visible the whole game. Each row shows the slot, player, position, their bats hand (L/R/S), and their season AVG, HR, and RBI. The batter at the plate is marked At bat, and the hitter due up behind them is marked Due up. Two buttons above the table switch between the batting team's order and the opposing team's; on the opposing team's order, Due up marks the slot that leads off their next turn at the plate. Switching teams is instant and does not affect the game. A † next to a name flags that slot as currently held by a substitute (pinch hitter or pinch runner) rather than the original starter.
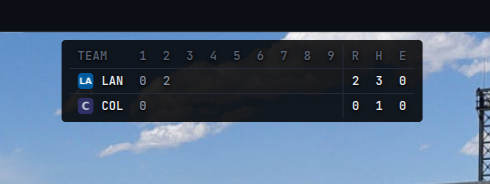
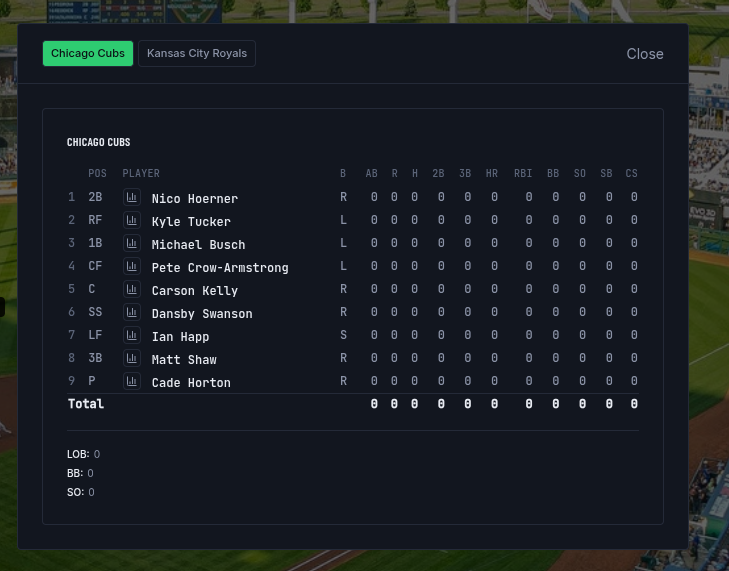
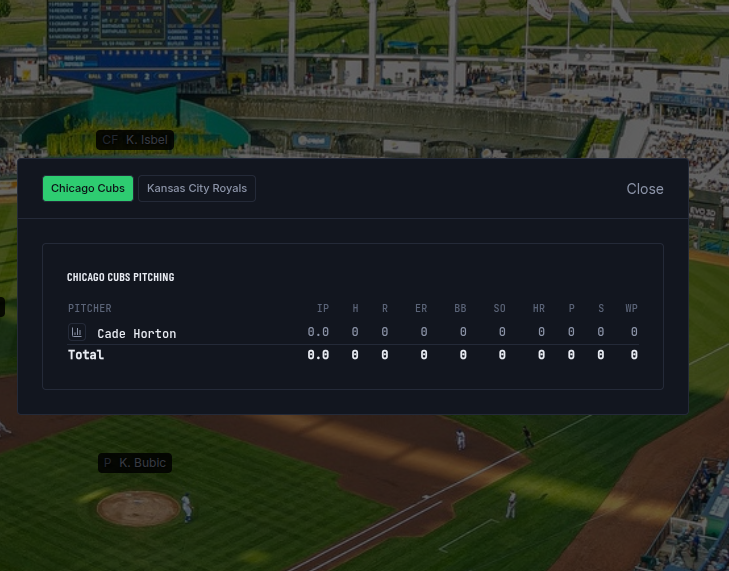
- The line score at the top of the Field card, and the batting, pitching, and fielding tables below the field, update automatically after every at-bat — no need to refresh the page. The pitching table tracks HR (home runs allowed) and WP (wild pitches) alongside the usual counting stats, and the fielding table tracks PB (passed balls).
- Fielding follows official scoring, so a few totals climb faster than you might expect. Your catcher is credited with a PO on every strikeout. An E is charged to whoever actually misplayed the ball, including a dropped pop-up or line drive, and a wild throw on a tag-up, a stretch for an extra base, or a runner sent home. Whenever the play-by-play says a throwing error let someone advance, that fielder's E moves in the same at-bat.
- Below each batting table is a summary line for the things that don't get a column of their own: doubles, triples, home runs, runners left on base, steals, caught stealing, intentional walks, and HBP (batters hit by a pitch), each naming the players involved. A batter credited more than once shows a count after their name, like Smith (2).
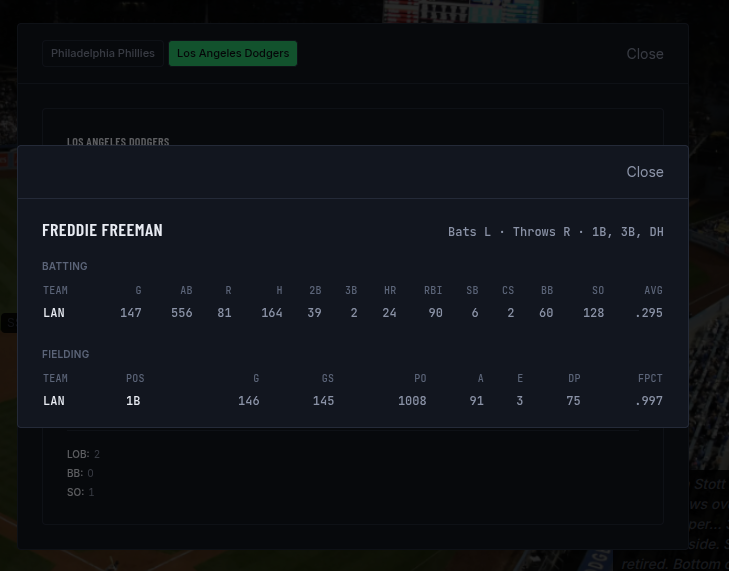
- In the Batting or Pitching tables, click the small bar-chart icon next to a player's name to open a popup of their full current-season pitching, batting, and fielding lines. The page stays where it is while the popup is open, so you can close it and open the next player's without losing your spot in the table.
- A Play-by-Play button next to the "Now Batting" text on the Field card opens the full log in a popup. Every play for the current game is preserved, newest at the top, with a separator line marking each new half-inning. Most entries include a short broadcast-style commentary line above the batter/pitcher details — the same wording that flashed on the field diagram when the play happened. Substitutions are named in the log too — pinch hitters, pinch runners, fielder changes, pitching changes, and repositioned fielders are all named in the log as they happen, whether you made the move or the computer manager did. A wild pitch or passed ball can also show up on any pitch with a runner on base — a small, independent chance for baserunners to advance that has nothing to do with the batter's own at-bat; it's called out in the log the same way an error is. A pickoff attempt at first base can show up the same way — a small, independent chance the defense catches a runner leaning off first on its own, entirely separate from any steal attempt you or the computer manager might make. A deliberately called pickoff attempt (yours or the computer manager's, at any base with a runner on it — see the Pickoff buttons above) shows up in the log too, labeled Picked Off or Pickoff Attempt (Safe).
- Plays decided by a probability roll carry a small arrow underneath — click it to expand a breakdown of the odds behind that play, with the actual roll that decided it shown in parenthesis next to the percentages.
- A ball that just clears the fence for a home run isn't always a sure thing — the outfielder underneath it sometimes gets a real shot at the play. That home run can end up robbed for a fly out, deflect off his glove for a double instead, or squirt off his glove and still carry over the fence.
- A wild pitch or passed ball always pauses the board with a confirmation popup describing what just happened before play continues, the same way a computer-controlled pitching change, pinch hit, or steal attempt does — click Got it to dismiss it. The action buttons underneath stay grayed out and unclickable until you do.
- After the final out, a Download Game Log link appears in place of the action buttons — click it to save the full play-by-play as a file.
- If you're logged in, a Save Game button also appears after the final out. It stores the finished game's full box score in your account's history, viewable anytime from My Saved Games on the Baseball page.
- My Saved Games on the Baseball page lists every game you've saved outside a season or World Series. Click the × in the corner of a game's card to delete just that one — you'll be asked to confirm first. A Delete All Saved Games link sits at the bottom of the page; it also requires confirmation and removes every game on the list in one go. Neither option touches box scores from games played during a season or World Series — those are deleted only when that season or series itself is deleted.
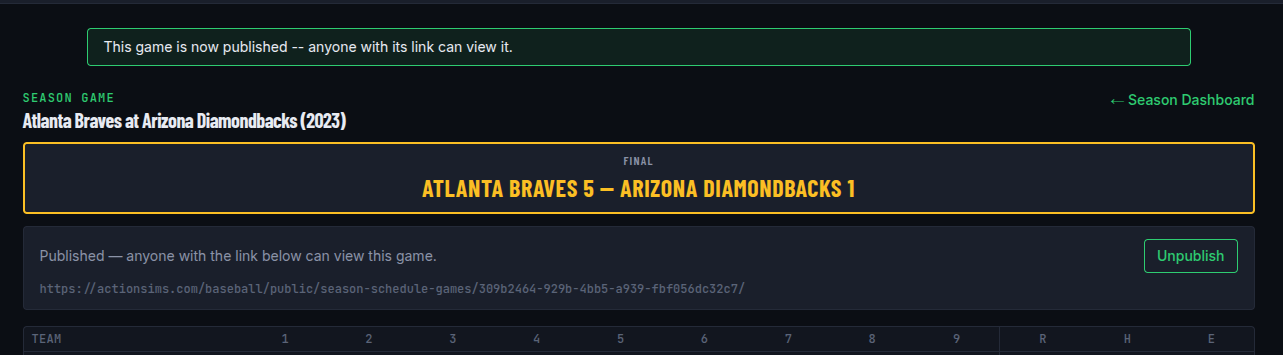
- Any finished game you're viewing — a saved single game, a regular-season or postseason game from a season, or a World Series game — has a Publish button. Click it to turn on a public link anyone can open, no account needed, to see that one game's final score and box score and to generate its newspaper article. Nothing else about your account is visible through that link — not your other games, your roster, or your season.
- A game stays private until you publish it. Click Unpublish at any time to take the link down again — the page stops working immediately for anyone who still has it.
- A published game shows a Published badge wherever it's listed — your My Saved Games page, a season's schedule, or a World Series' Game Log.
- Click Report a Bug below the Play-by-Play panel and describe what happened. The current game state is attached automatically, so there's no need to explain the score or situation — just what looked off.
Lineup Panel #
Live Box Score #
Player Stats #
Play-by-Play Panel #
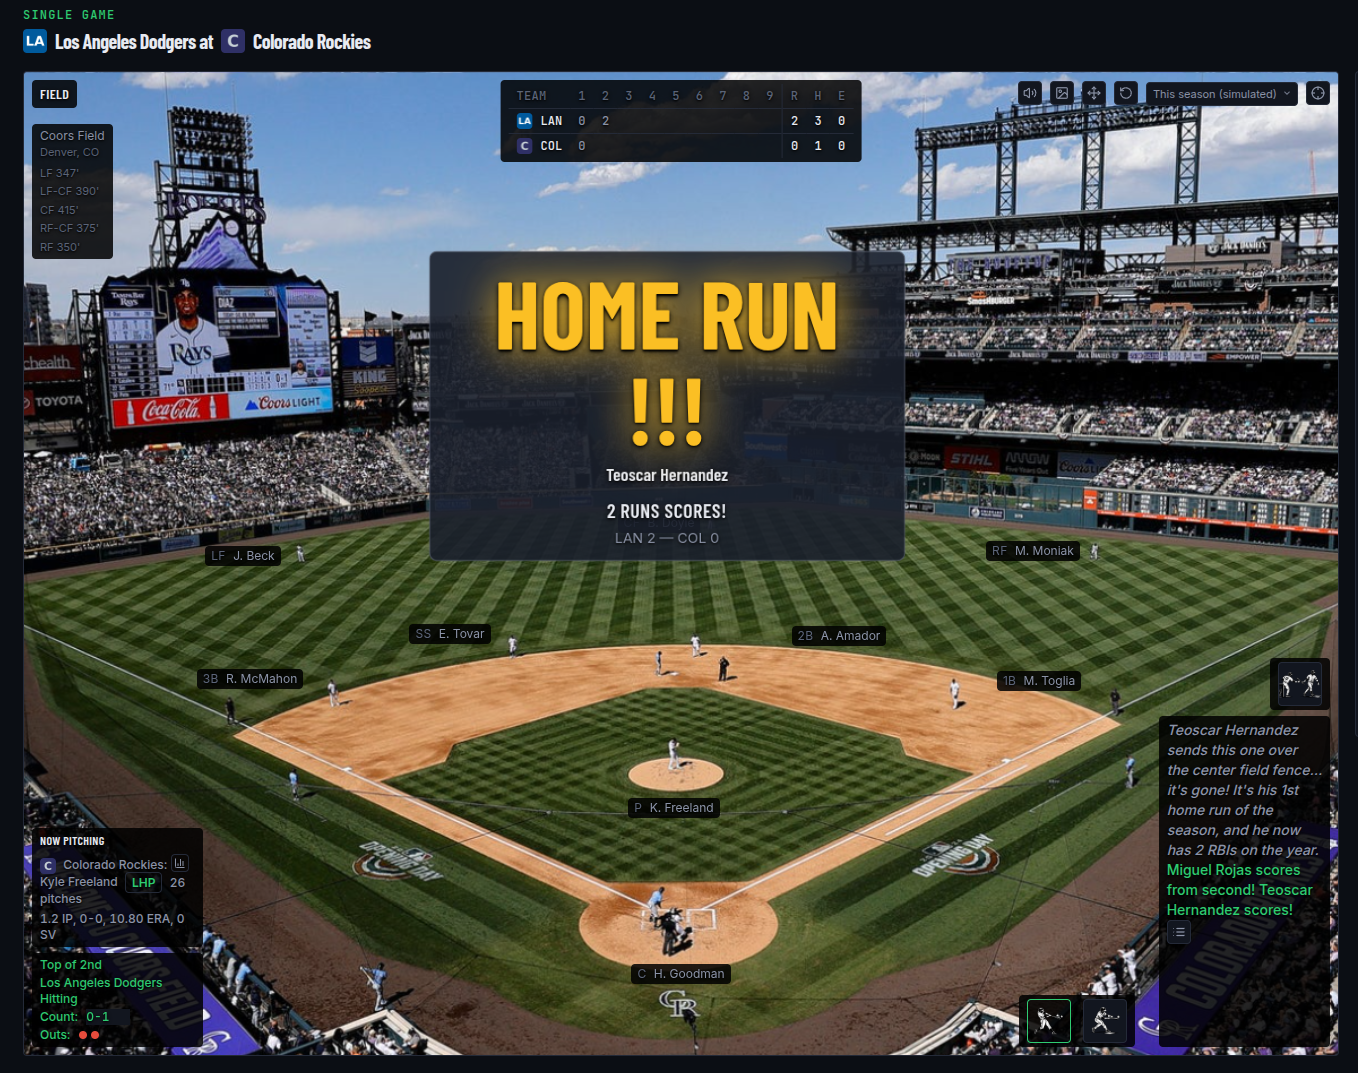
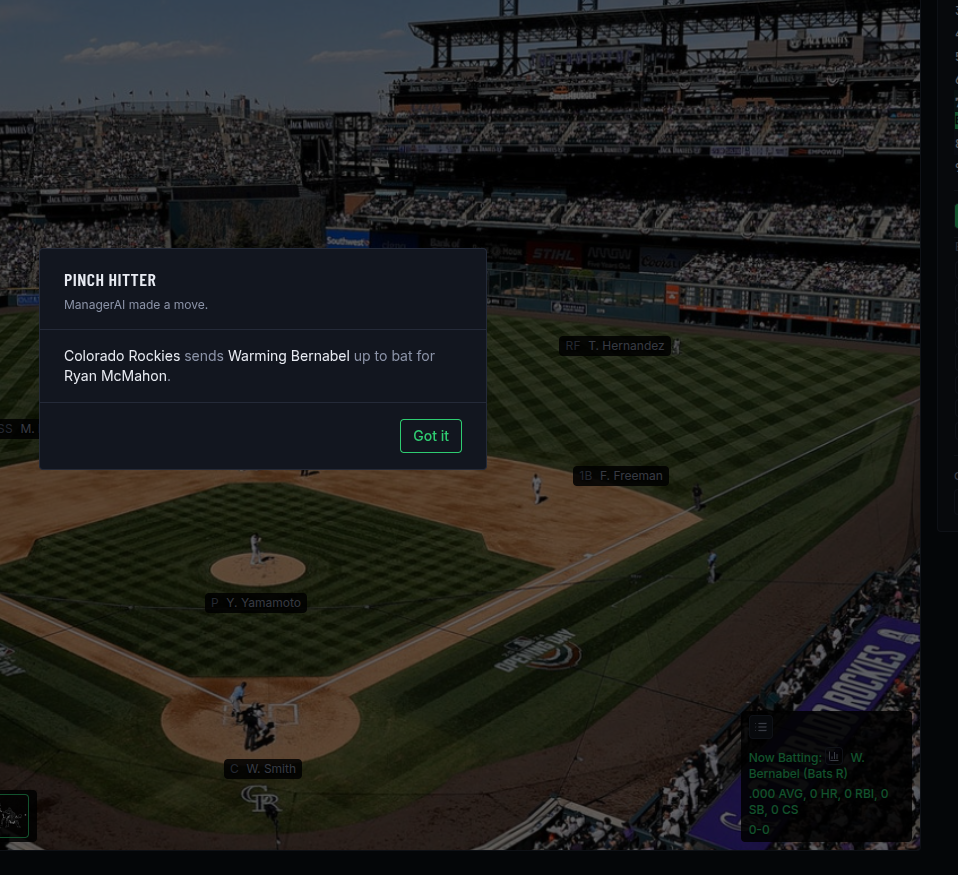
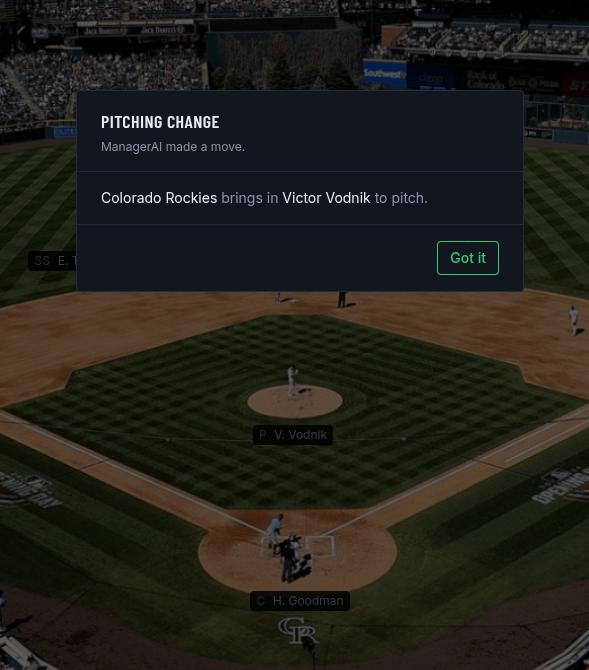
Download Game Log #
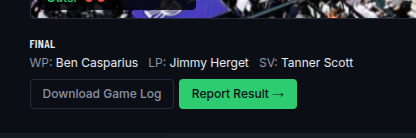
Save Game #
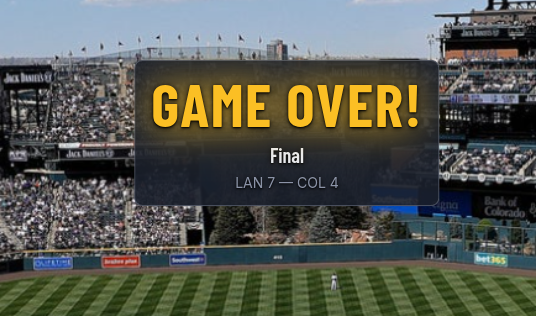
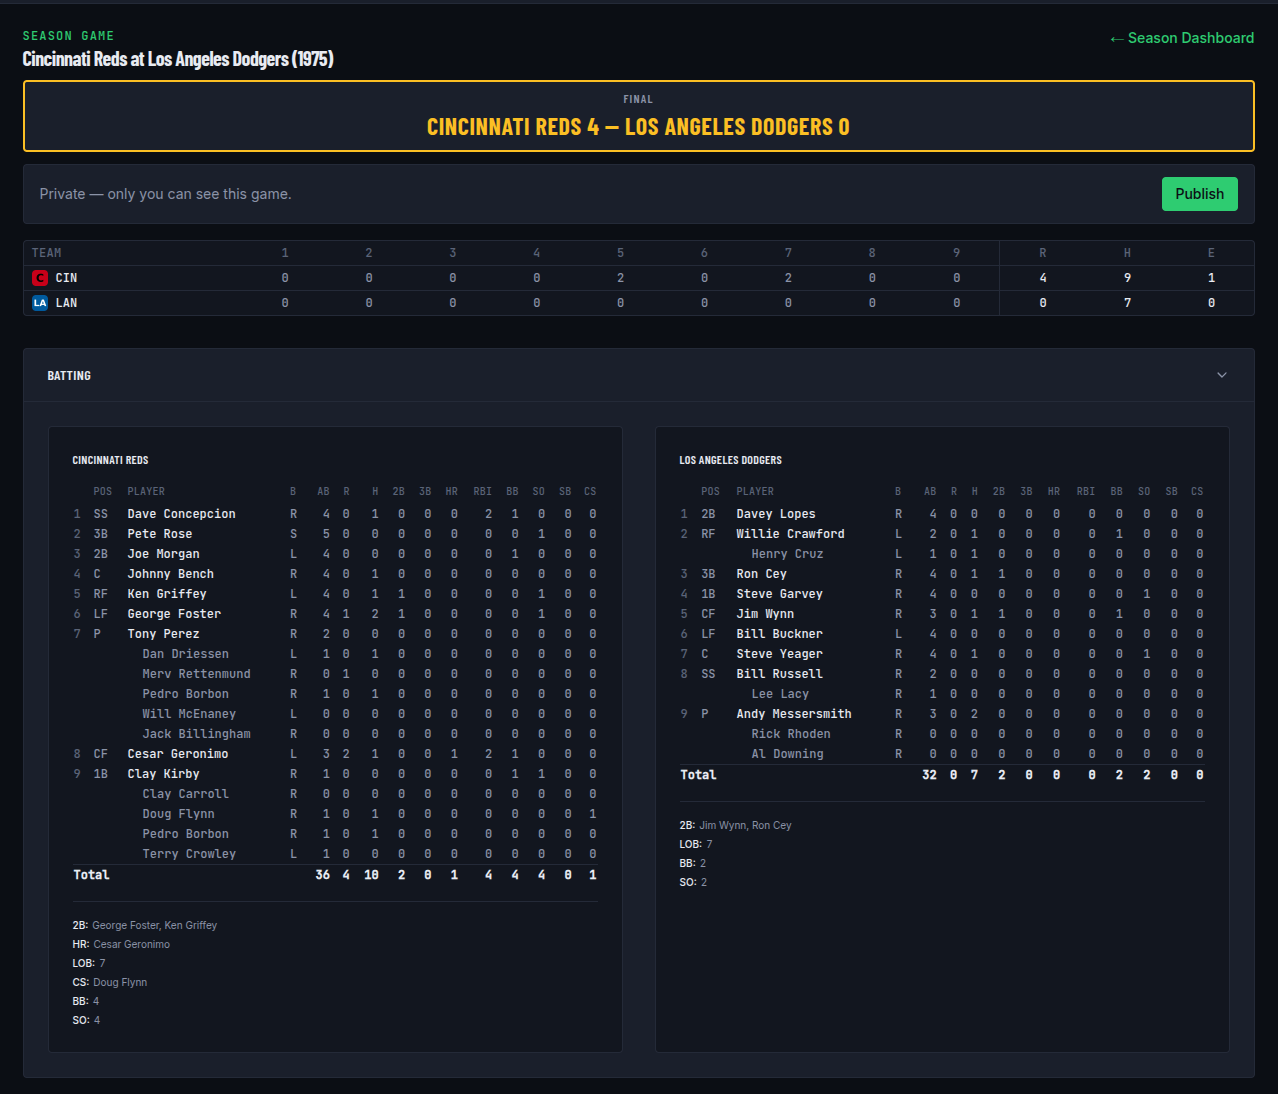
Manage Saved Games #
Share a Game #
Report a Bug #
05. Strategy Notes #
-
Batting Order and On-Base Skills #
A lineup with high on-base hitters at the top of the order and power hitters in the middle gets more baserunners driven in.
-
Pitcher Fatigue #
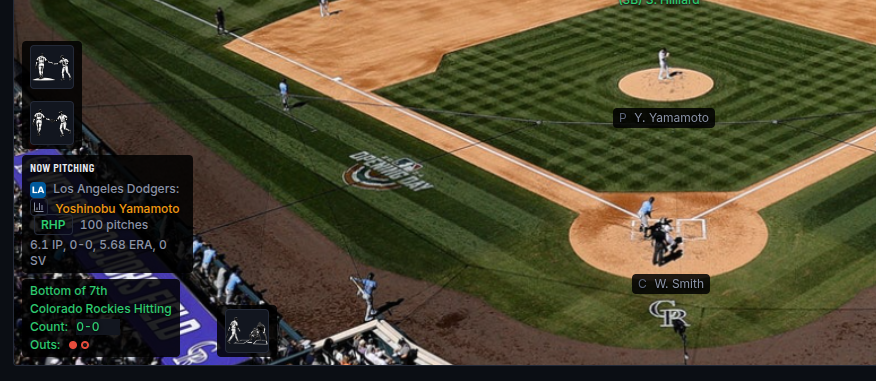
Each pitcher's limit is drawn from their own season workload — about 16 or 17 pitches per inning of their typical outing, so a one-inning reliever tires around 15-20 pitches while a workhorse starter can push past 100. The pitching card flags their name and pitch count in red once they cross that limit — and in a no-DH lineup, that same red flag (with a hover tooltip showing "Tired" and the pitch count) follows a pitcher into the "Now Batting" display when he's due up himself. The moment they cross it, their chance of allowing a hit or home run jumps 10% and keeps ramping up with every pitch further over, capping at a 20% increase once they're 50% past it. A Pitching Change before that point avoids the increased hit and home run chance.
-
Times Through the Order #
A batter's odds against a given pitcher shift with how many times he's already faced him in this game, separately from the pitch count. The first look is the batter's worst, at a 5% lower chance of a hit or home run. The second is neutral. The third and any after it are his best, at a 5% higher chance. The count resets for each new pitcher, so a reliever's first batter is on his first look no matter how many plate appearances that batter has already had.
This stacks with pitcher fatigue by addition rather than multiplication: a starter who is both 50% past his pitch limit and facing a lineup for the third time allows hits at a 25% higher rate, not 26%.
-
No-Hitter & Perfect Game Protection #
When the CPU is managing a team, it won't pull a starting pitcher who's working a no-hitter or perfect game — pitch count, matchup, and "getting shelled" thresholds all stand down until a hit is allowed. The one exception is an All-Star Game, where every pitcher still rotates out on schedule regardless of how the outing is going.
-
The Pitcher at the Plate #
In a No DH game, the pitcher's slot is the weakest spot in the order, and the sim treats it that way. A pitcher with enough real at-bats that season hits his own line; the rest — most of them, since a pitcher rarely gets even 50 at-bats — are measured against how that season's pitchers hit as a group, which in most eras is somewhere between .110 and .200 with almost no power.
That makes the pitcher's spot worth planning around. Bunting a runner over costs you less there than anywhere else in the order, and pinch hitting for the pitcher in a late close inning usually buys more than the innings you give up. ManagerAI applies the same reasoning when it runs a team.
-
Small Ball #
Steals, bunts, and Hit and Run work best with a fast runner on base and a contact hitter at the plate — not as a default on every pitch.
-
Hit and Run and Double-Play Risk #
A runner breaking early makes a ground-ball double play noticeably less likely (he's already past the usual force point by the time the ball's fielded, so the defense often settles for the sure out at first), which is why it's often called with a double-play situation on the line. The tradeoff: if the batter instead lines out, that same early jump makes the runner more likely to get doubled off, since he's caught further from getting back. That downside is rarer with a batter who makes contact reliably.
-
Pitch Around and Intentional Walk #
With first base open and a power hitter up, an Intentional Walk or Pitch Around can set up a more favorable matchup against the next batter.
-
Infield In and DP Depth #
Infield In cuts down a run at the plate when it matters most; DP Depth buys a better shot at two outs on one swing. Both trade away infield range, so each is best suited to situations where that tradeoff is worth a grounder sneaking through for a single. Late in a close game, No-Doubles Depth plays the outfield deep to guard against an extra-base hit, at the cost of conceding more singles.
-
Late-Game Substitutions #
Pinch Hit replaces a weak bat, Pinch Run replaces a slow runner, and a Fielder Change upgrades late-inning defense, once your bench is available.
-
Ballpark Dimensions #
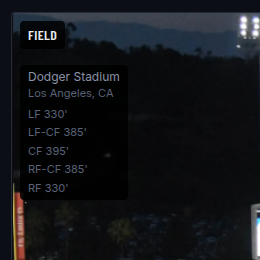
For ballparks with known fence distances (shown in the Field card's left column), the home team's actual outfield dimensions nudge home run chances up or down — a shorter fence makes it a little easier to clear, a deeper one a little harder, and it applies to both teams playing there, not just the home team. A tall wall over a short fence doesn't get the same boost as a short fence with a normal wall — think Fenway Park's Green Monster, whose short distance is offset by its height. Not every ballpark has curated dimensions on file; where they're missing, home run chances are still shaped by that park's real-world scoring history instead.
A wall's height also shapes what happens on a fly ball that just barely clears the fence: at a park with a notably tall wall, an outfielder has less of a real shot at robbing it, so the ball is more likely to clang off the wall for a double instead of carrying clean over. A handful of parks with a well-known wall nickname, like Fenway's Green Monster or Wrigley's ivy, will name that wall directly in the game log when a fly ball deflects off it for a home run. Wrigley's ivy and Fenway's deep center-right "Triangle" also carry their own small, real chance of swallowing an otherwise-clean catch outright: at Wrigley, a lost ball is ruled a ground-rule double, and at Fenway, it's ruled a triple.
06. Starting a World Series #
-
Step 1
Choose a Mode #
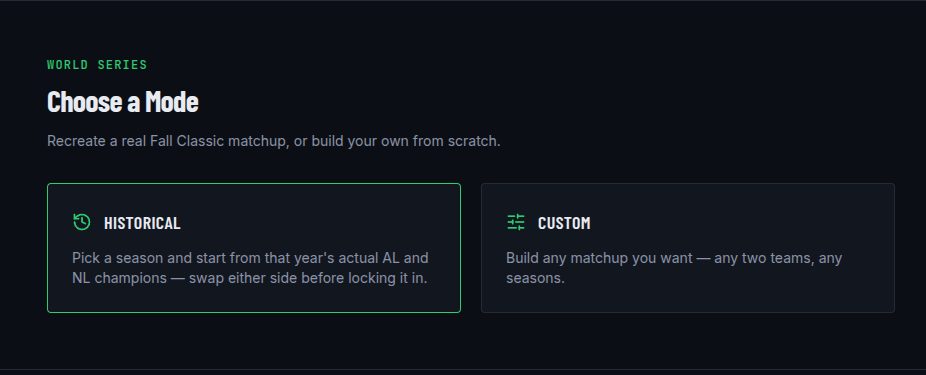
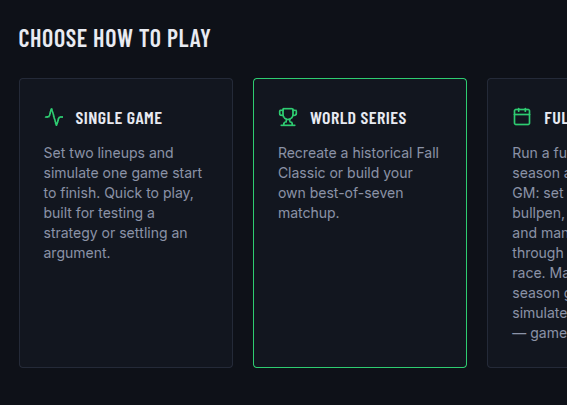
From the Baseball home page, click the World Series card, then choose Historical to recreate a real World Series matchup, or Custom to build any matchup you want.
-
Step 2 — Historical
Pick a Season #
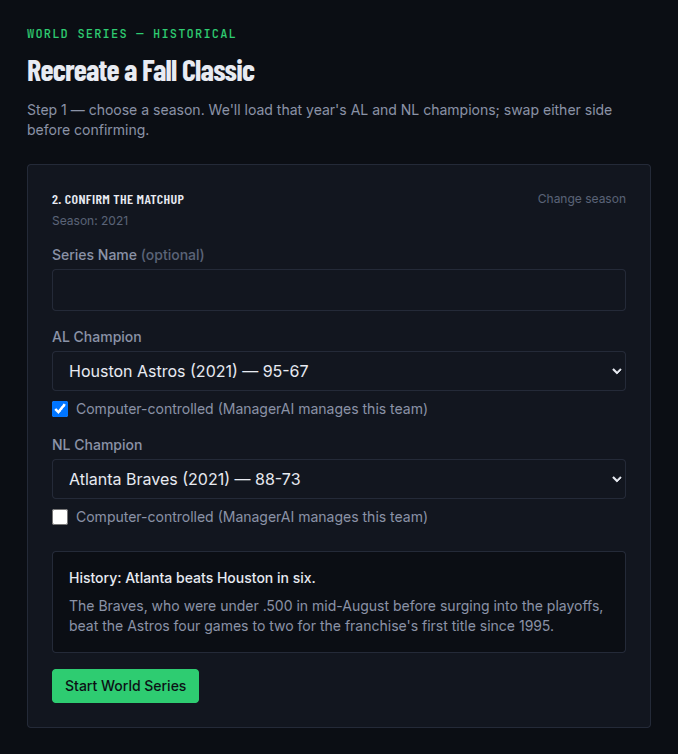
Choose a season and click Choose Season. That year's actual AL and NL pennant winners load automatically, and the season picker gives way to the matchup card — click Change season in that card if you want to pick a different year. Either side can be swapped for any other team on record, from any season, if you'd rather play a hypothetical matchup. When a real World Series was played that year, a short description of what actually happened appears beneath the matchup. Optionally give the series a Series Name to tell it apart from others later — handy if you recreate the same matchup more than once; leave it blank and the series list falls back to "Team A vs Team B." Check Computer-controlled under either team to have ManagerAI run that side's lineup and in-game decisions for the whole series instead of you. Click Start World Series to lock it in.
-
Step 2 — Custom
Pick Two Teams #
Choose a season and click Choose Season for each side independently — the two sides don't need to share a year, so a 1927 team can face a 1975 team. Once both sides have a season, pick a team for each. Optionally give the series a Series Name to tell it apart from others later — handy if you set up more than one series with the same matchup; leave it blank and the series list falls back to "Team A vs Team B." Choose which side gets Home Field Advantage, check Computer-controlled under either team to have ManagerAI run that side's lineup and in-game decisions for the whole series instead of you, and click Start World Series.
-
Step 3
Pregame #
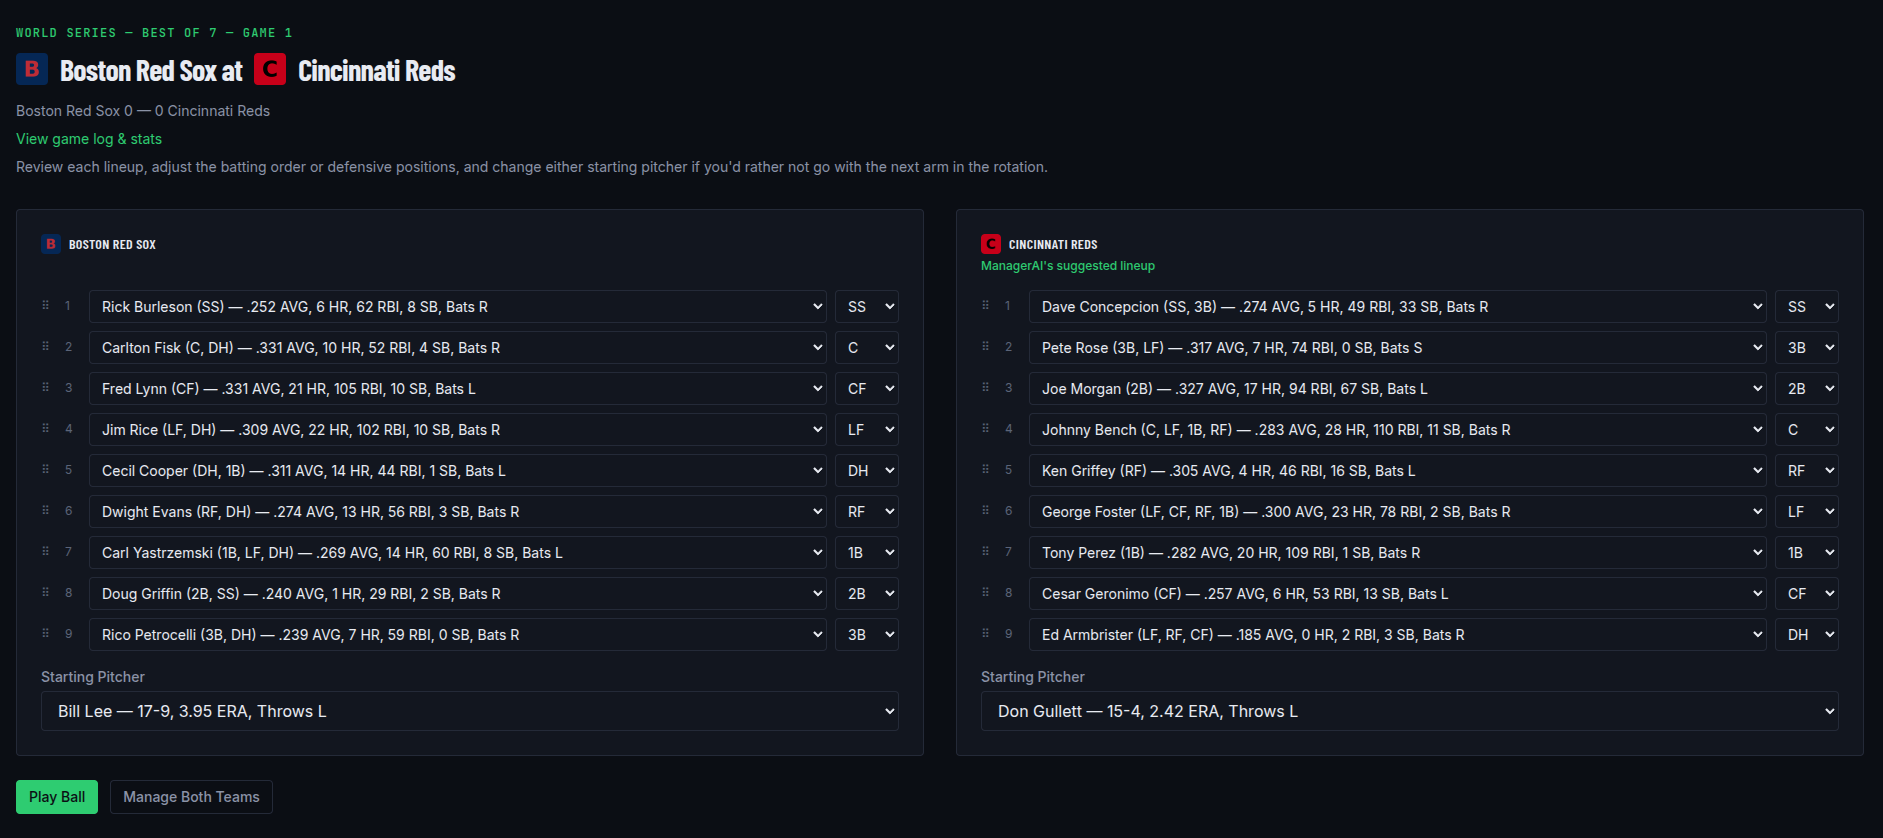
Before each game of the series, you'll land on a pregame screen for that matchup. Each side's batting order and defensive positions are pre-filled, and the starting pitcher defaults to the next arm in that team's rotation — the ace starts Game 1, the #2 starter Game 2, and so on, cycling back around if the series reaches Games 6 or 7. Adjust either lineup or either starting pitcher as you like, then click Play Ball to launch that game. It plays exactly like a Single Game.
Same lineup-builder as everywhere else: each batting slot's dropdown surfaces players with experience at that slot's position first and labels every player with their eligible positions, and the Starting Pitcher dropdown is limited to that team's actual starters — the rotation always uses the DH, so there's no pitcher's-spot lock to worry about here. Drag a slot's ⠿ handle onto another to swap those two batters and their fielding positions with each other.
If you checked Computer-controlled for a side back on the matchup screen, its lineup here is still editable — pre-filled with ManagerAI's own pick — but that side stays computer-managed once the game starts unless you click Manage Both Teams next to Play Ball to take it over for this one game. If both sides ended up Computer-controlled (e.g. you chose Just Watch for this game), that button reads Watch Game instead, and plays the game out one at-bat at a time with ManagerAI managing both dugouts.
-
Step 4
Continue the Series #
When a series game ends, its final screen shows a Continue Series → button in place of the usual Save Game button. Clicking it records that game's result, credits the win, and advances both teams' rotations, then takes you straight to the pregame screen for the next game. Once a team wins enough games to clinch, you're returned to the Baseball home page instead, with the series champion announced.
-
Bullpen Roles
ManagerAI Reads Bullpen Roles in World Series Play #
Both teams' bullpens get closer, primary and middle setup, long relief, and mop-up duty assignments automatically as soon as the series is created — best-ERA arms into setup and middle relief, the saves leader as closer. ManagerAI holds each side's assigned closer for a true save situation and reaches for the 5th rotation starter if long relief and mop-up are both empty, and the bullpen list on the gameboard shows each reliever's role, sorted by it.
There's no Pitching Staff screen for a World Series team, so these assignments aren't editable — they're set once from that team's stats and used as-is for the rest of the series.
A season's own postseason bracket also tracks which relievers pitched in earlier series games and prefers a rested arm over a tired one. A standalone World Series (Historical or Custom mode) doesn't carry appearance history between games, so its bullpen decisions weigh role and ERA only, without a rest-day preference.
-
Series Progress
Game Log & Series Statistics #
A link on the pregame screen (and, once the series is decided, the champion screen) opens the series' Game Log: every completed game's score, the current series standing, and cumulative batting, pitching, and fielding totals for both teams. Click any game in the log to open a read-only box score for that specific game, including a collapsed Game Log section with the full play-by-play.
-
My World Series
Delete a World Series #
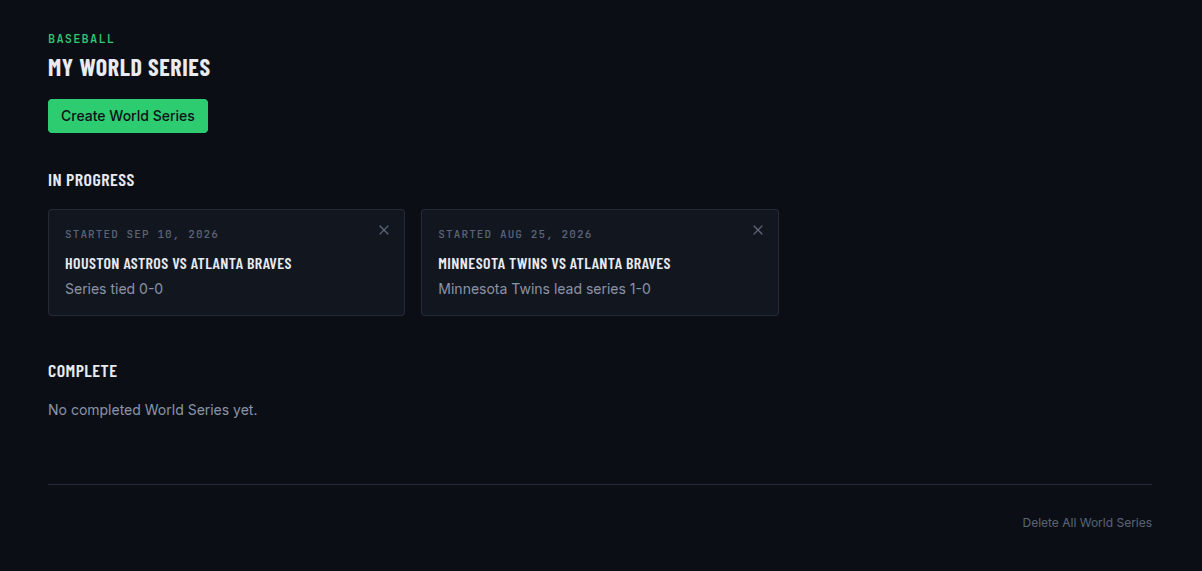
My World Series on the Baseball page lists every standalone series you've started, in progress and complete (a season's own postseason bracket is reached from that season's dashboard instead). Click the × in the corner of a series' card to delete it — you'll be asked to confirm first, since this permanently removes all of that series' games and every saved-game box score from games played during it. This can't be undone. A Delete All World Series link at the bottom of the page does the same for every standalone series at once.
-
Home Field
Best-of-Seven, 2-3-2 #
The series runs best-of-seven, hosted 2-3-2: the home-field team takes Games 1, 2, 6, and 7, and the other side hosts Games 3, 4, and 5. In a Historical series, home field goes to whichever team had the better regular-season winning percentage. In a Custom series, you choose which side gets it.
07. Starting a Season #
-
Step 1
Pick a Year and Team #
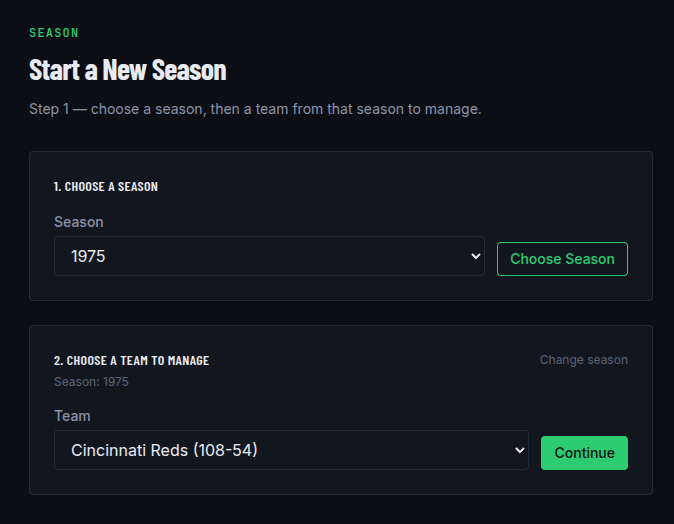
From the Baseball home page, click the Full Season card. Choose a season and click Choose Season, then pick any team from that year — not just the pennant winners — to manage as GM. Negro League teams aren't available for season play yet.
-
Step 2
Set Season Options #
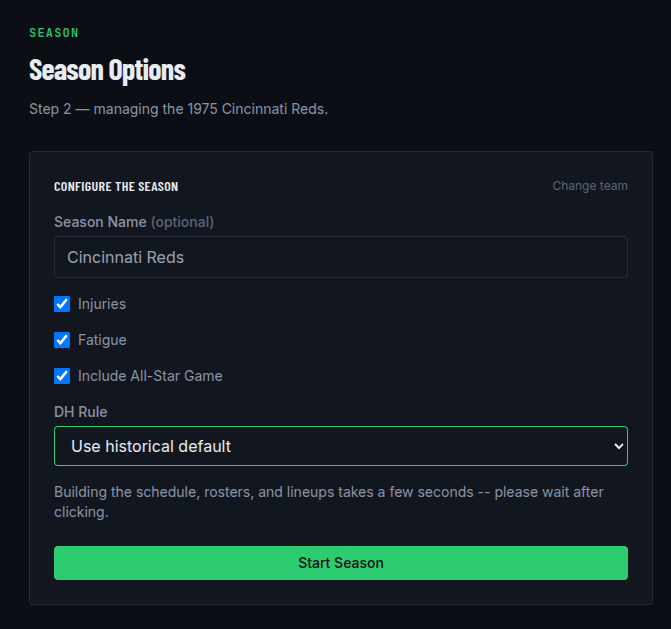
Optionally give the season a Season Name to tell it apart from others later. Leave it blank and the season list falls back to the year and team name. Choose whether Injuries and Fatigue are in effect for the season, set a DH Rule override if you'd rather not use that year's historical default, and turn on Include All-Star Game if you want an in-season All-Star break — see below. Click Start Season to lock it in.
-
Alternate Setup
Build a Custom Season #
From the Seasons list, + Build Custom Season builds a season out of any teams you pick, instead of reproducing a real year's schedule with every team from the league. Pick a year, check any teams you want from it, then optionally repeat with a different year before continuing — mix teams from any years you like, at least two teams total.
On the next screen, choose which of your picked teams you'll manage as GM and a Season Style: a regular season with playoffs afterward, a regular season leading into knockout rounds, or a tournament that skips straight to the bracket.
Either regular-season style needs Games Per Team (every team plays a full round against each of the others you picked, repeated until it reaches that number), and standings from that schedule seed the postseason bracket. A tournament has no regular season and no standings to seed the bracket from, so pick a Bracket Seeding instead: the order you picked teams in, or a random draw.
Every style needs a Playoff Bracket Size for the postseason instead of a real year's playoff format. Regular season + playoffs and Tournament also ask for one Playoff Best-Of length applied to every round. Regular season + knockout rounds asks you to set a best-of length for each round of the bracket separately — for example, a best-of-3 semifinal followed by a single-game final.
If your picked teams come from more than one DH era, you'll need to explicitly force the DH on or off for the whole season rather than using the historical default. Everything else — standings, stats, and the bracket itself — works the same as any other season.
-
Season Option
Injuries #
Turning on Injuries when you start a season means players can get hurt as the season goes on — after a game a player appeared in, and occasionally on a hit-by-pitch during the game itself. Older players are somewhat more likely to get hurt. This only applies to regular-season games; it has no effect on single game or World Series mode, or on a season's own postseason bracket.
An injury comes in one of three severities: day-to-day (back in a few games — he can still be started in the meantime, just at reduced effectiveness), short-term (out several weeks), or season-ending. A short-term or season-ending player is unavailable for lineups, pinch hitting, pinch running, and defensive replacements until he's healed, but keeps his spot on the active roster — see Manage Your Active Roster below for how that's shown. A hit-by-pitch injury during a game removes that player immediately and puts in a replacement, the same as any other forced substitution.
For any other team in the league, ManagerAI calls up a replacement on its own once a short-term or season-ending injury opens a real gap in that team's active roster — you make that call yourself for your own team, from the Active Roster screen's "Minor Leagues" list. Every injury and every activation off the injured list is reported in the season log.
The team dashboard's Current Injuries card keeps a running log of every injury the team you're viewing has had this season, same detail as the Active Roster screen — a healed player stays listed there too, marked as returned, rather than dropping off once he's back.
-
What's Next
Season Home #
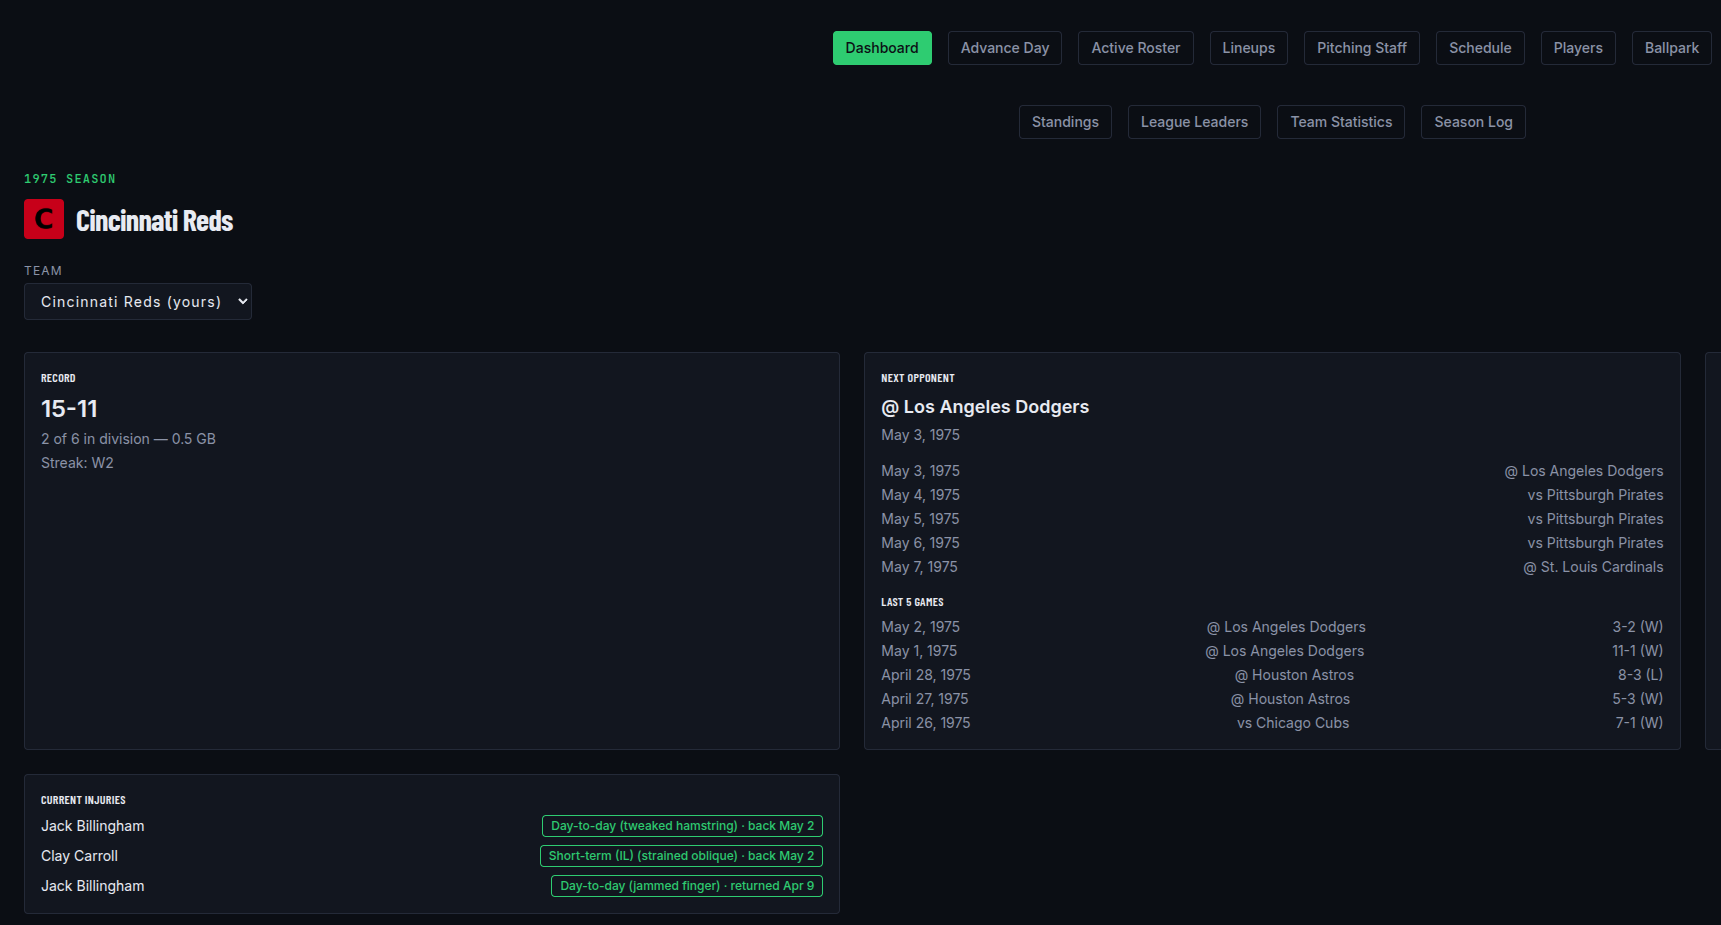
You'll land on your season's home page with the team and year on record. A confirmation message reports how many teams were found for that year — the full historical league, not just the team you're managing. From here you can jump to the schedule and standings; league leaders and full team/player stat browsing are still being built.
A team picker at the top switches whose dashboard you're looking at — record, streak, next opponent, and the roster/lineups/pitching-staff quick links all follow whichever team is selected. That's not limited to your own team: pick any team in the league (or jump in from its standings row) to check in on — or take over — an AI-controlled team's active roster, lineups, or rotation order.
-
What's Next
Getting Around a Season #
Every season screen — the dashboard, Advance Day, roster, lineups, pitching staff, schedule, and players — shares the same row of buttons at the top and bottom of the page. The button for whichever screen you're on is highlighted.
The dashboard's top row also carries a second, league-wide grouping — standings, league leaders, team statistics, and the season log — beneath the common row. Those four screens are only reachable from the dashboard: visit one directly and its own nav rows show just that grouping plus a Dashboard button, rather than the common row.
Where a screen has a team picker (Advance Day, roster, lineups, pitching staff, schedule, players), the nav buttons carry that selection with them — jumping to another screen from an AI-controlled team's roster keeps that same team selected instead of dropping you back to your own. A Postseason button joins the row automatically once the season's postseason bracket exists.
-
What's Next
Advance Day #
"Advance Day" lists every game on the schedule for the season's current date, including both games of a doubleheader. Your own team's game is always listed first. For each unresolved game, choose Play to manage it yourself in the gameboard (or Resume if you've already started it), or Auto-Sim to let the computer play it out headlessly. The date only advances once every game on it is finished, so a doubleheader keeps both rows visible until both games are complete.
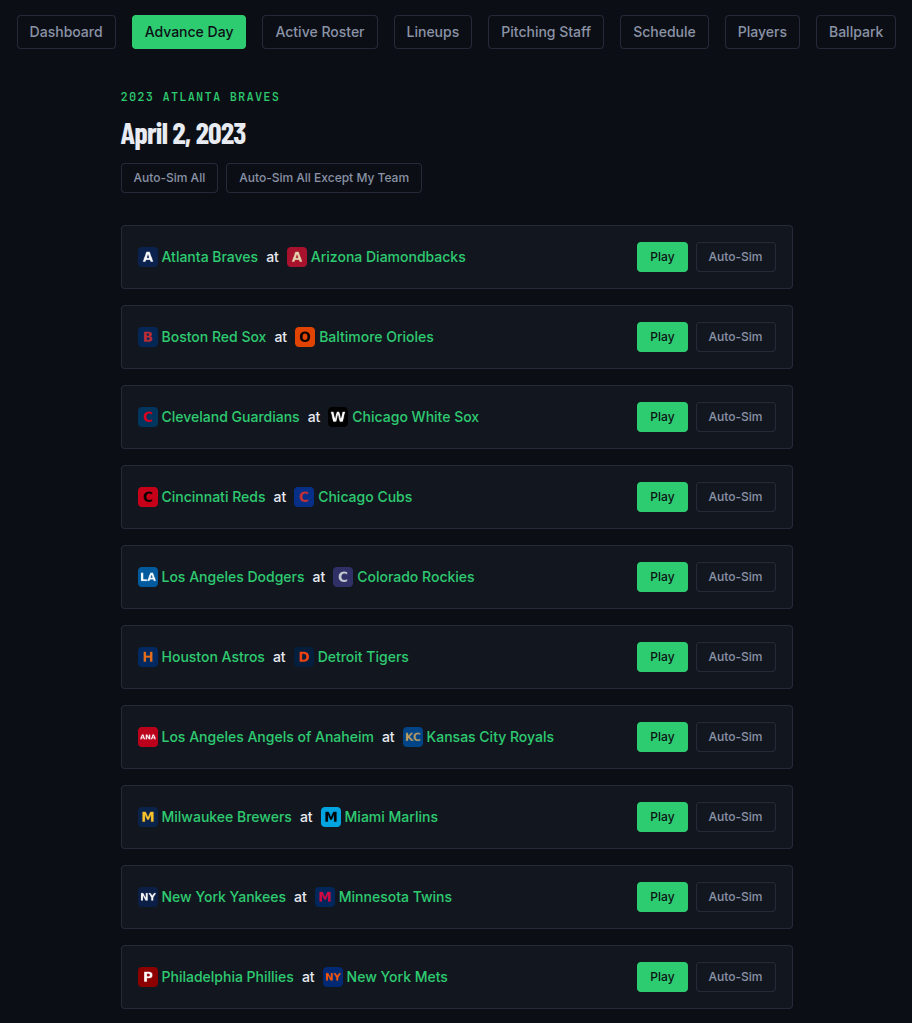
To resolve a full day at once, use Auto-Sim All to sim every game left on the date, or Auto-Sim All Except My Team to sim everyone else's games while leaving yours for you to play manually (shown only on days your own team has a game). Either button — and the per-game Auto-Sim button — opens a progress window listing each game and updating it to its final score as the sim finishes; if a game gets stuck mid-batch, the batch stops there and the rest are left unresolved so you can retry.
Your opponent's lineup on the pregame screen is always editable, but stays computer-managed once the game starts. To take over both dugouts for that one game instead, click Manage Both Teams next to Play Ball.
Once a game is finished, its final score becomes a link to that game's full result page.
Arriving here from an AI-controlled team's screen keeps that team selected — navigating on from Advance Day to roster, lineups, or pitching staff stays on that same team instead of dropping back to your own.
Once every scheduled game is played, Advance Day shows a Season Complete message. If a postseason bracket was generated, it links to it, whether or not your team made it in.
-
What's Next
Postseason #
Once every scheduled game is played and a postseason bracket was generated, Advance Day links to it. Every round's series is listed, whether or not your own team made it in.
If your team is in a series, choose Play to manage it yourself in the gameboard, same as any other game. If neither side is your team, clicking Play asks which side, if either, you'd like to manage for the next game — choose Manage for whichever side you'd like to control, or Just Watch to let the computer play both sides. That choice is asked again before every game of the series, so it can change from one game to the next.
Either way, Auto-Sim is always available to skip straight to a final score for the series' next game without playing it out.
-
Season Option
In-Season All-Star Game #
Turning on Include All-Star Game when you start a season adds a 3-day break in the third week of July: Monday and Wednesday off league-wide, with the All-Star Game itself on Tuesday. Advance Day pauses there and offers Setup All-Star Game instead of a game list — the season won't move past the break until it's played.
That link leads to a short setup step: check Computer-controlled under either league to have ManagerAI run that side instead of you, then click Continue to Lineups. If both leagues end up Computer-controlled, the lineup screen offers Watch Game in place of Play Ball, playing the game out one at-bat at a time with ManagerAI managing both dugouts, instead of a regular-season game's Play/Manage choice. ManagerAI manages a computer-controlled side liberally here — changing pitchers every inning or so and working the bench in partway through the game — rather than the more conservative approach it takes in a regular-season game.
Ballpark is set to that year's real All-Star Game host by default; pick a different park from the dropdown on this same screen if you'd rather play somewhere else.
Squads are built from this season's own stats so far, not real history: 3 catchers and 2 at every other position per league, plus the 5 best starters and 7 best relief arms, ranked by how this season's simulated games have actually gone. This is a separate game mode from the standalone All-Star Game on the Baseball home page, which instead replays a real historical year's actual selections.
Like every other exhibition mode, the game itself is saved and can be resumed, but nothing that happens in it counts toward any player's season stats.
Once it's created, this game is also listed on the season's own Schedule page, right on the break's date, with a link to set it up or (once finished) its final score — you don't have to wait for Advance Day to reach the break to find it. It's also mixed into My All-Star Games on the Baseball home page alongside any standalone games you've played; see Finding and Deleting a Game below.
-
Schedule
Browse the Full Schedule #
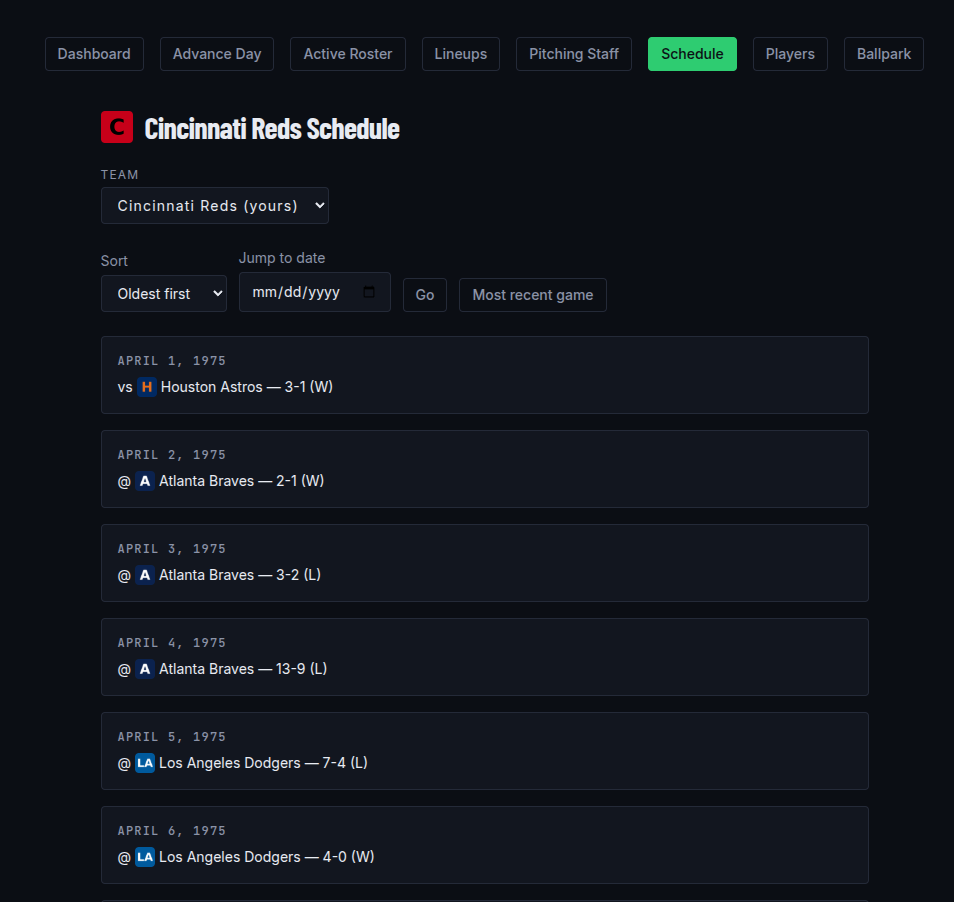
"Schedule" on the season dashboard lists every game on record for whichever team's dashboard you're viewing, grouped by date, with a team picker at the top to switch whose schedule you're looking at and a "Jump to date" field to scroll straight to a specific day. Any game already played shows its final score with the winner's runs listed first (e.g.
4-2 (W)) — click it to open a read-only box score for that game, including a collapsed Game Log section with the full play-by-play.For a Full Season, the matchups and dates are the real, as-played schedule from that year, so you can set your lineup exactly as it stood on any given day.
-
Newspaper
Generate a Newspaper Article #
Open any completed game — a regular-season game from the Schedule, a saved single game, or a World Series/postseason game — and click Generate Newspaper Article, below the Game Log, to get a full write-up of that game — headline, subheadline, and a story built entirely from that game's own box score and play-by-play. Nothing is invented: every name and stat in the article traces straight back to what actually happened on the field, so it can never disagree with the box score above it.
Every completed game also gets a Player of the Game, shown next to the final score and named in the write-up — whoever had the strongest overall performance, at the plate or on the mound, for either team.
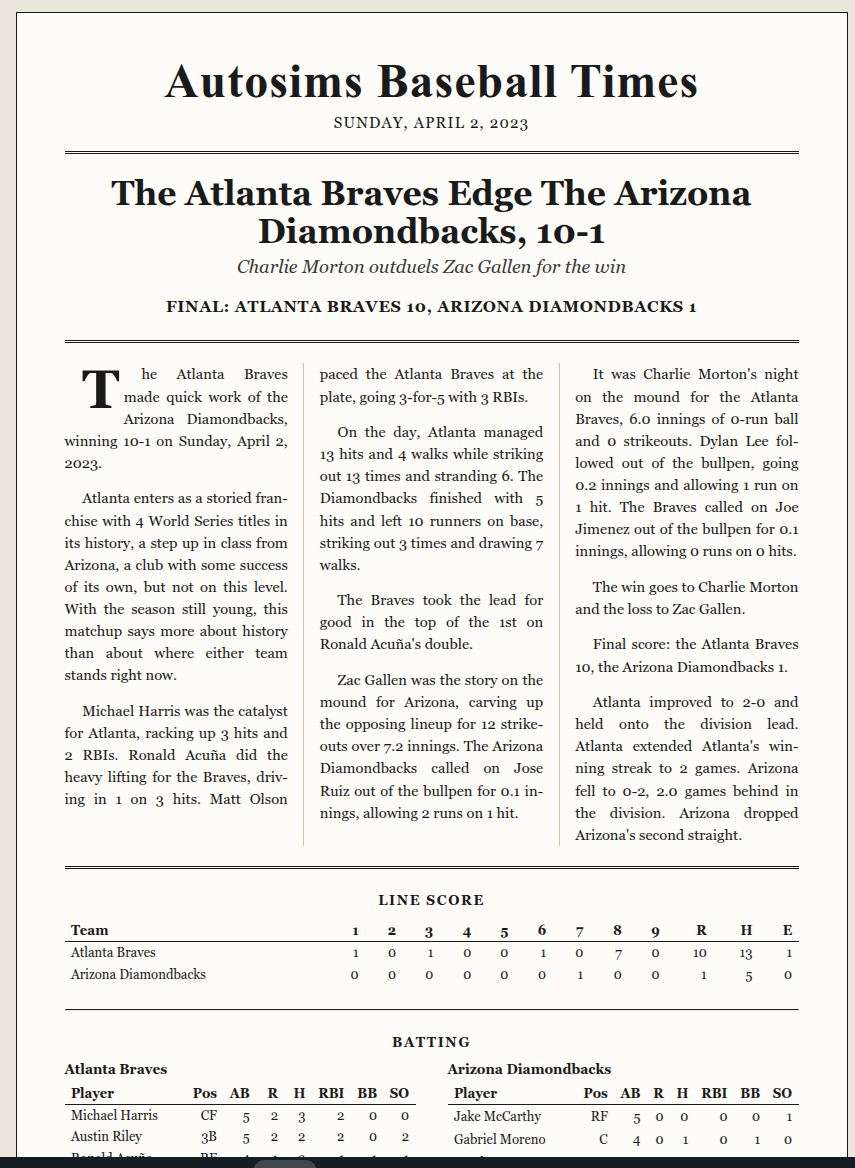
Generating the same game's article twice always produces the exact same write-up — it isn't re-randomized on every click. Anyone viewing a game you've published to a public link (see Share a Game, below) can generate its article too.
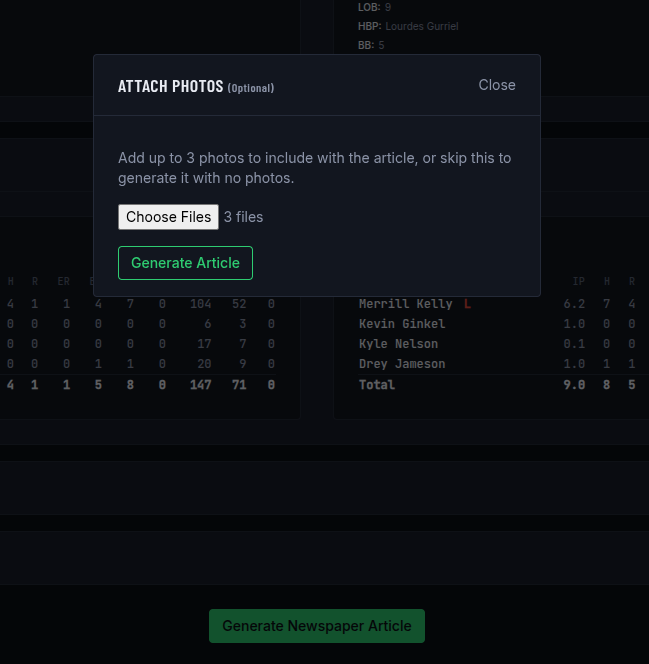
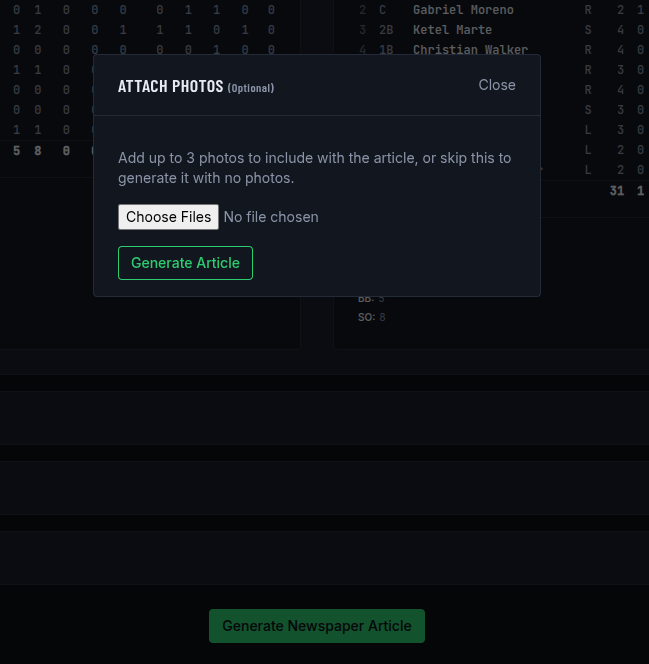
Before the article generates, you can attach up to 3 photos to go with it — or skip that step and generate it with none. Only you can attach photos to your own games; a visitor viewing one of your published games sees whatever photos you've already added, but can't add their own.
The headline and lede match the season it was played in — an early 1900s game opens like a period wire report, while a modern-day game opens like today's sports page.
The write-up follows the shape of the game itself — a scoreless stretch that finally breaks, or a run that changes the game late, gets called out, while a pitching change that didn't affect the outcome is left out of the story.
For a season game, the write-up also frames the matchup itself — how each team's franchise history compares, and whether the two are division rivals — before getting into the game's own story. Early in a season, before there's much of a season narrative to draw on yet, it says so rather than reading more into a handful of games than is there.
-
Standings
Check the Standings #
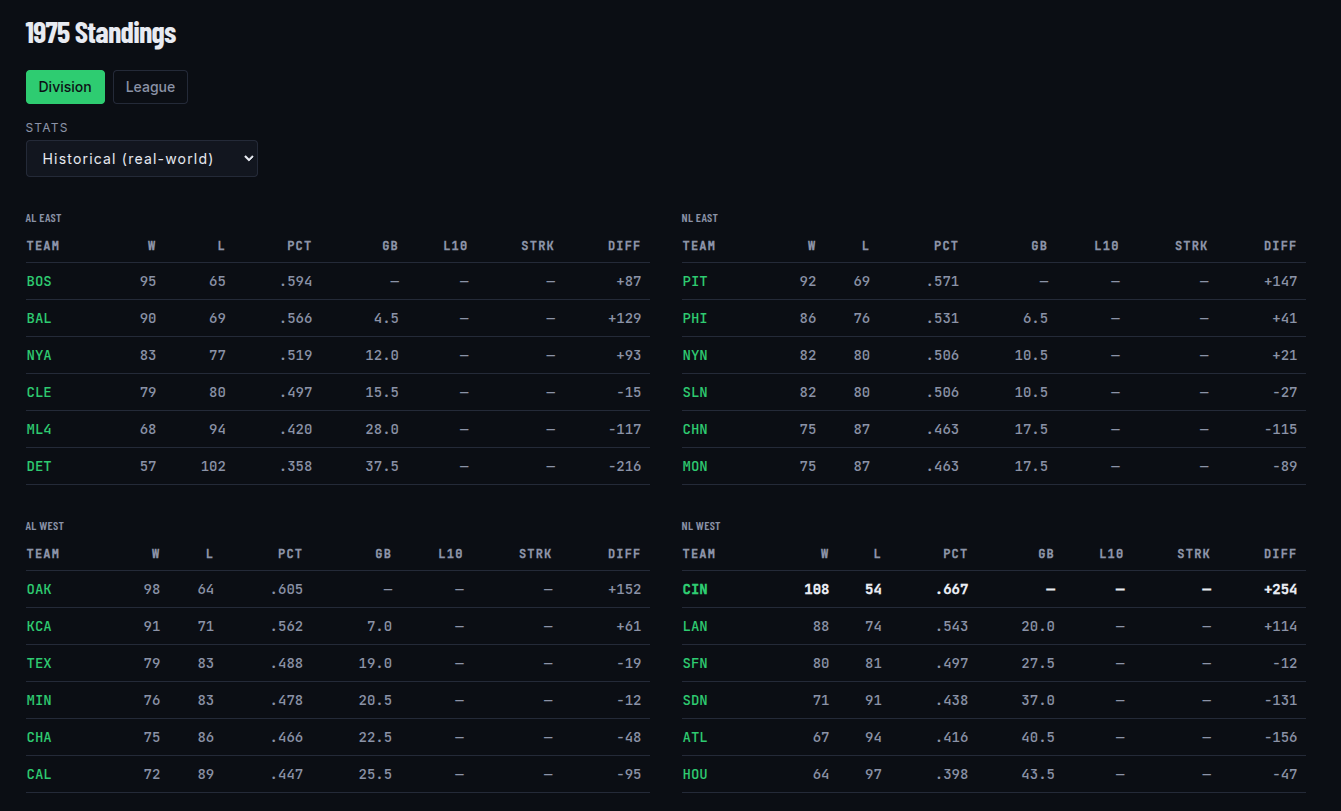
From the season dashboard, "Standings" shows how every team in the league is faring, computed fresh from that season's own completed games. Switch between three views: Division, which groups teams the way that year's league actually aligned them; League, spanning every division in the American or National League; and Wild Card, which ranks the non-division-leaders competing for a wild card berth. Each team's record, winning percentage (shown the traditional scoreboard way, like
.571rather than0.571), and games behind the group leader are shown, with your own team highlighted. The Wild Card tab only appears once a league has split into three or more divisions that year — earlier eras with just one or two divisions per league have no separate wild card berth to chase, so the tab is left off entirely rather than showing an empty race.Every row's team name links to that team's stat page, and "Dashboard" opens its own season dashboard — including AI-controlled teams, not just the one you're managing. From any team's dashboard you can reach its active roster, lineups, and pitching staff screens the same way you reach your own.
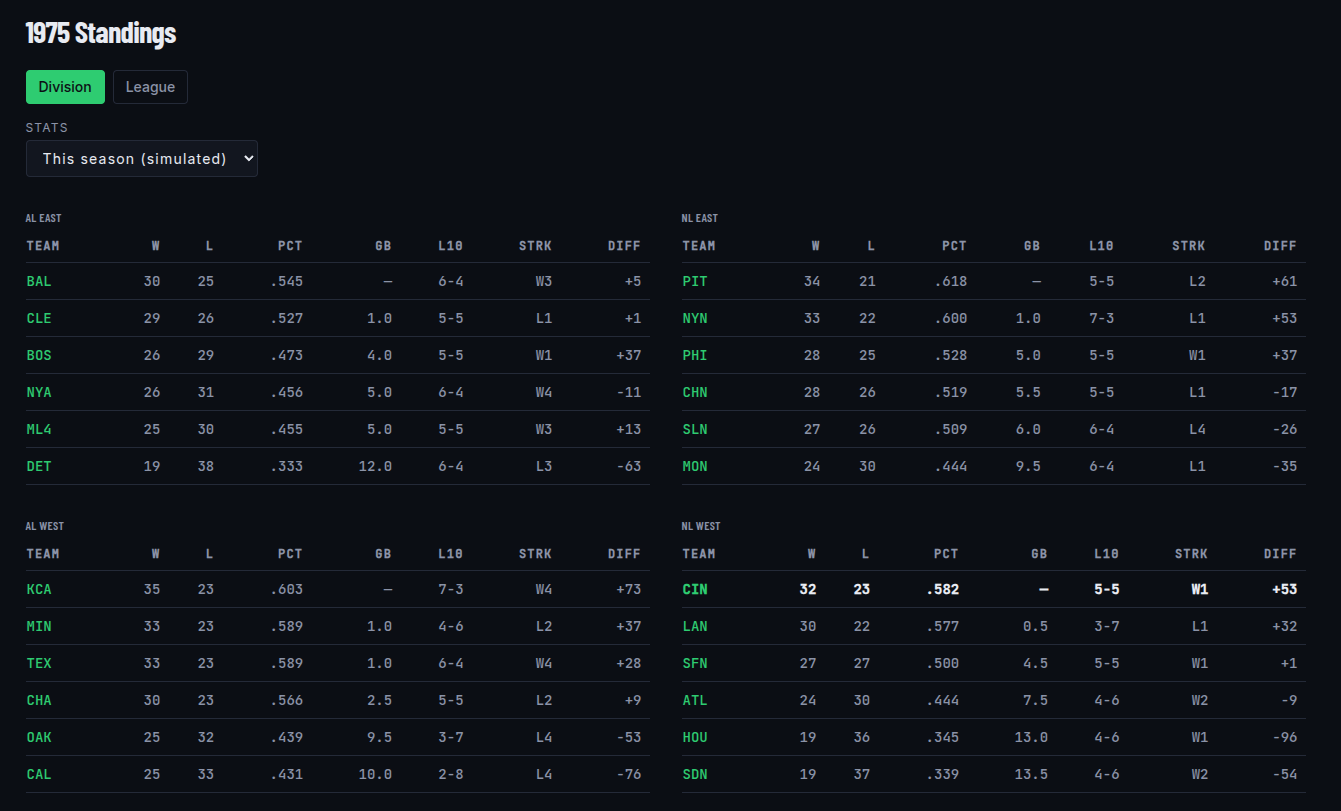
A Stats toggle above the table switches between these standings (the default) and each team's real-world historical won-loss record for that year instead.
-
League Leaders
Browse the League Leaders #
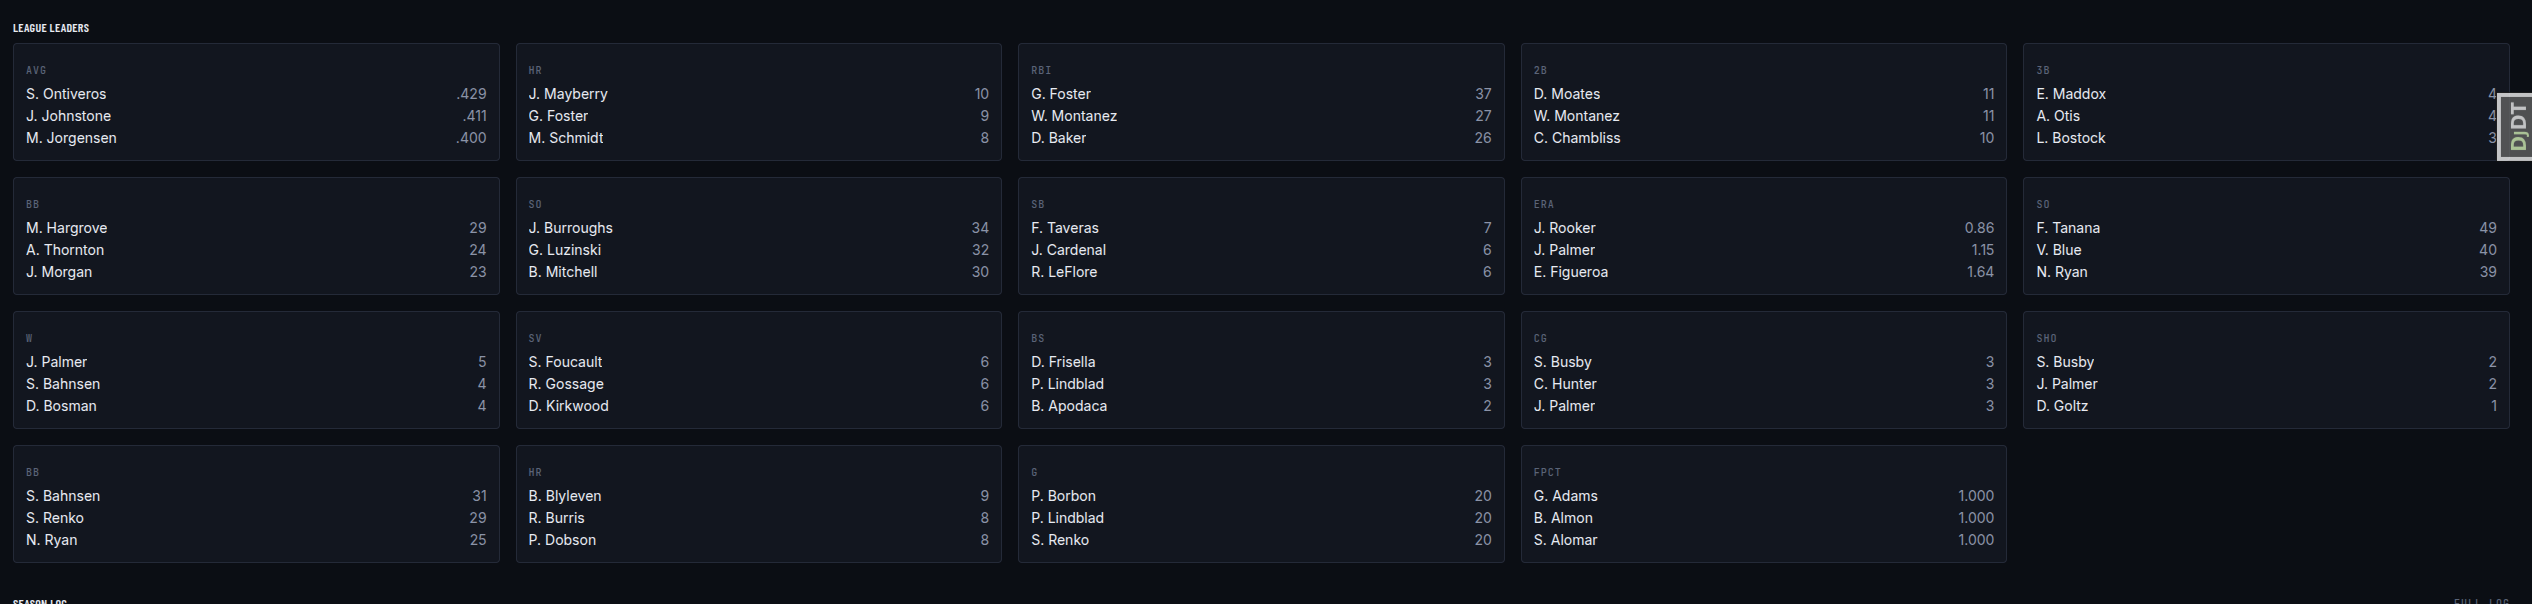
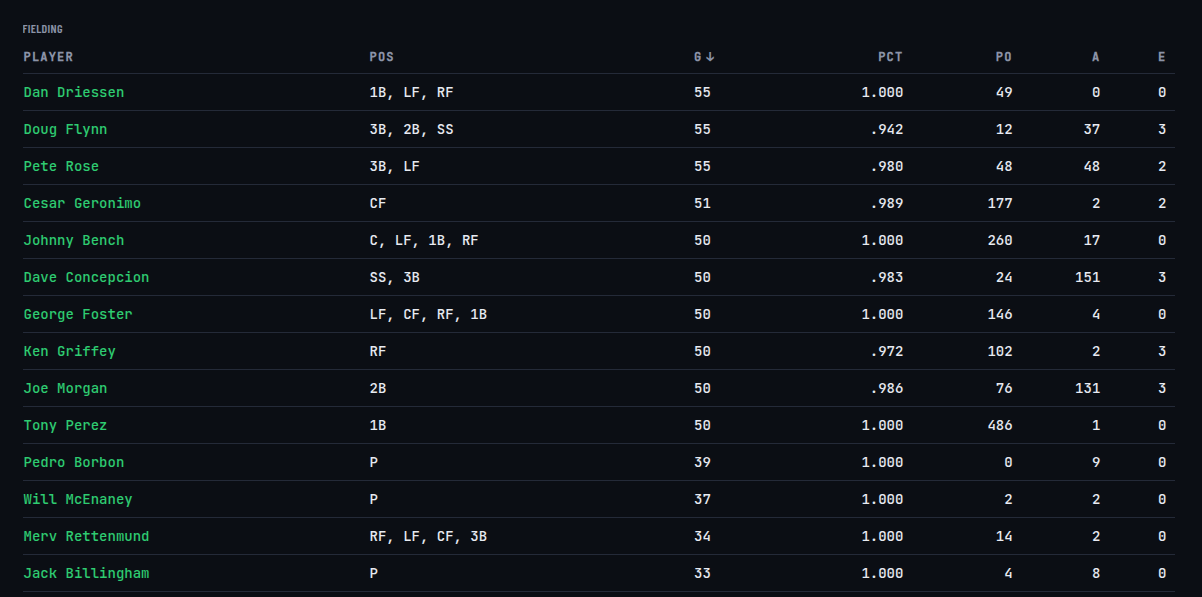
From the season dashboard, "League Leaders" ranks every player in the league across a full set of batting and pitching categories. Batting: AVG, HR, RBI, 2B, 3B, BB, SO, and SB. Pitching: ERA, SO, W, SV, BS, CG, SHO, BB (allowed), HR (allowed), and G. Fielding: FPCT. Switch categories using the tabs across the top, or jump straight to one from the dashboard's own leader snippets. Rankings are computed fresh from that season's completed games, with your own team's players highlighted. Blown saves and pitching walks/home runs allowed rank highest first: the pitcher at the top of the BS tab is the one who blew the most saves. ERA ranks lowest first. AVG, ERA, and fielding percentage only include players who've cleared a minimum-playing-time threshold, scaled to how many games their own team has played so far. Early in a season, before anyone qualifies, those categories show "No qualifiers yet".
The FPCT tab shows a separate top-15 list for each defensive position — catcher, first base, second base, third base, shortstop, left field, center field, and right field — instead of mixing every position into one ranking. A player only shows up in a position's list once they've cleared that position's own minimum-playing-time threshold.
A Stats toggle above the table switches every ranking between these simulated numbers (the default) and each player's real-world historical line for that year instead — the qualifying threshold still scales to this simulated season's own games played either way, only the ranked stat line's source changes.
-
Awards Watch
MVP and Cy Young Watch #
From the season dashboard, "Awards Watch" tracks who's leading the race for MVP and the Cy Young Award as the season plays out. Switch between the two races with the tabs across the top. Each table shows AVG/HR/RBI/OPS (MVP) or W-L/SV/SO/ERA (Cy Young) for context, but the ranking itself runs on a real sabermetric formula rather than any single one of those columns: MVP by Bill James' Runs Created, and Cy Young by the Cy Young Predictor (Bill James and Rob Neyer's formula, also used by ESPN's own tracker), which weighs wins, saves, and strikeouts alongside ERA so a reliever's one scoreless inning can't outrank a real workhorse season. Like the batting/ERA titles on the League Leaders screen, only players who've cleared a minimum-playing-time threshold show up.
In a full league replay, each award is ranked separately for the American and National Leagues, matching how the real MVP and Cy Young are awarded -- one winner and set of runner-ups per league, not a single league-wide ranking. A custom season's hand-picked pool of teams doesn't have a real AL/NL split to run those races within, so it gets one combined award instead.
Once the regular season ends, this screen locks in the winner along with the 2nd and 3rd runner-ups for each award (and league, where applicable).
-
Team Statistics
Browse Team Statistics #
From the season dashboard, "Team Statistics" breaks every team's season down into five tabs: Scoring (runs scored/allowed, run differential), Pitching (team ERA and full pitching line), Batting/Fielding, Bullpen (performance from relievers only, excluding rotation starts), and Situational (home/away, one-run game, and extra-inning records). Every table lists the whole league at once, with your own team's row highlighted, and reflects every game completed so far this season.
On the Scoring, Pitching, and Batting/Fielding tabs, a Stats toggle switches between these simulated numbers (the default) and each team's real-world historical line for that year instead. Bullpen and Situational have no real-world equivalent to switch to — Lahman doesn't track either at the team-season level — so those two tabs always show simulated data and leave the toggle off.
-
League Highlights
Follow the Season Log #
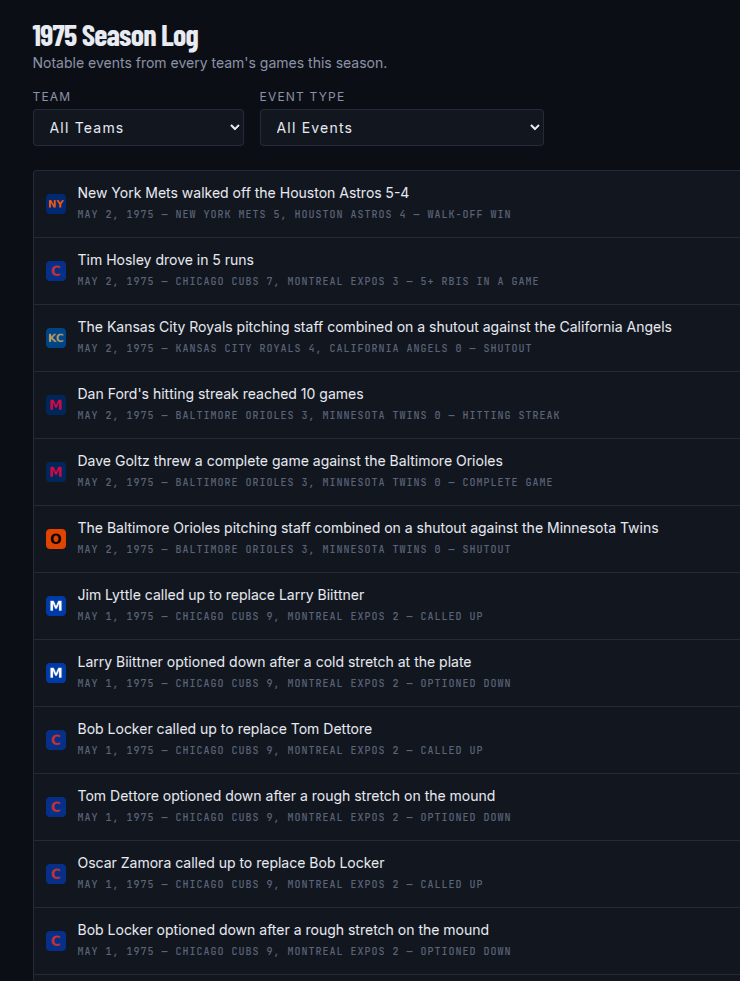
The dashboard's "Season Log" widget surfaces notable events from the team you're viewing — Cycles, 3+ home run games, 5+ RBI games, inside-the-park home runs, grand slams, no-hitters and perfect games, walk-off wins, a pitcher giving up three straight home runs, hitting and home run streaks, blowouts, 1-0 pitchers' duels, marathon extra-inning games, players sent down and called up, and (when the season's Injuries option is on) injuries and activations off the injured list all show up here as soon as they happen, newest first. Each entry links straight to that game's box score — including a season postseason World Series game or the in-season All-Star Game, not just regular-season games.
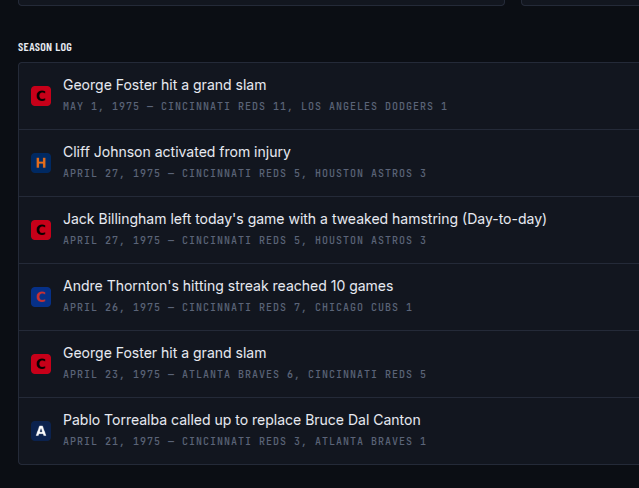
Click "Full Log" from the widget (or its own button in the dashboard's league-wide row) for the complete season log covering every team, filterable by team or by event type.
-
Players
Browse Roster Statistics #
From the season dashboard, "Players" shows a team's full roster as three tables -- batting, pitching, and fielding -- current through the latest completed game, with each player's position(s) alongside their line. Pick a team to browse its roster, or search by name across the whole league; a name search shows which team each match belongs to. Click any player to open their individual season stat page. To keep each table focused, a pitcher who hasn't recorded an at-bat doesn't clutter the batting table, and a position player with no pitching appearances doesn't clutter the pitching table — either still shows up the moment they actually bat or pitch, even just once.
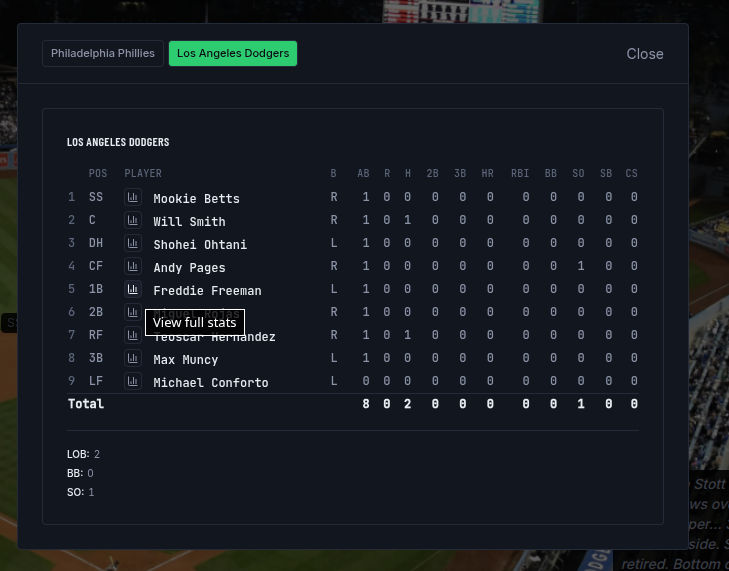
The batting table includes an HBP column (times hit by a pitch), next to BB, on the roster table, the individual player page, and the historical career page. Every column header on the roster tables sorts, so you can rank a roster by it.
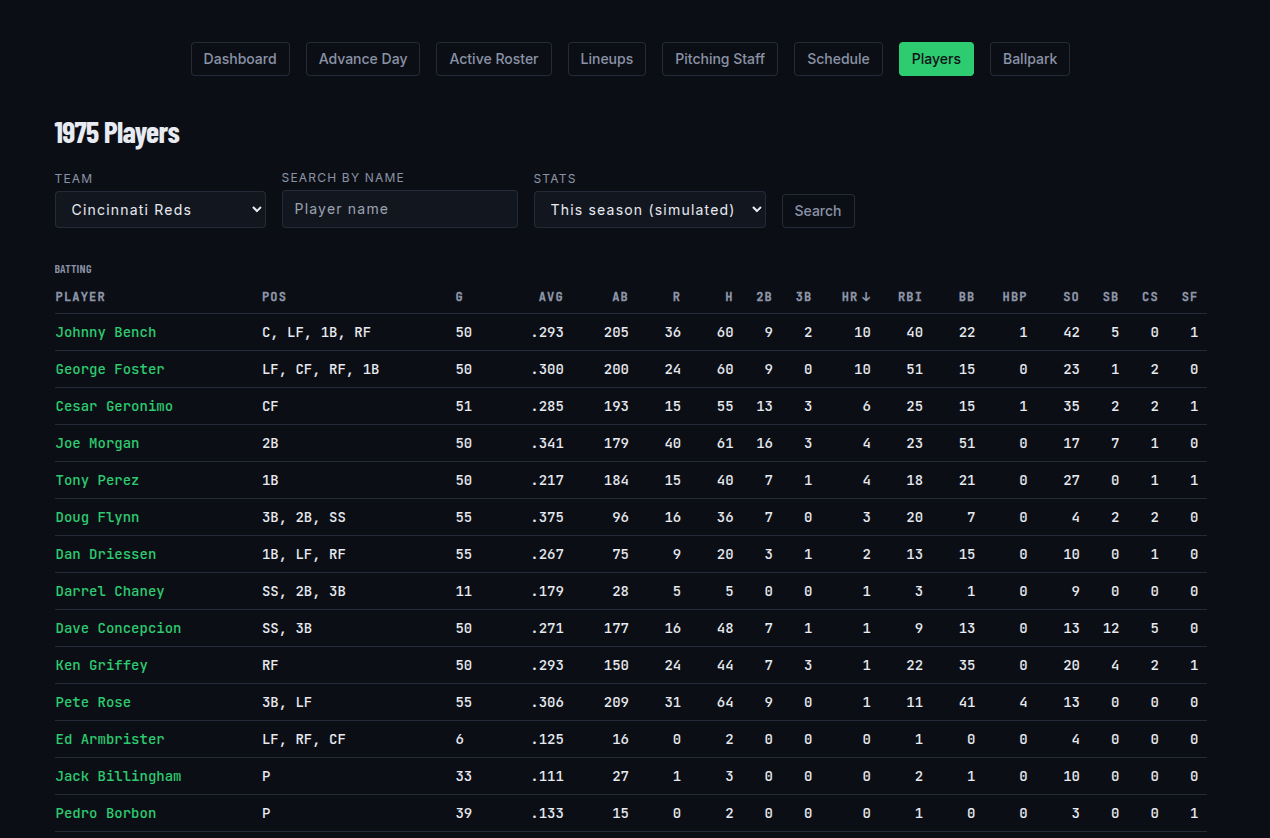
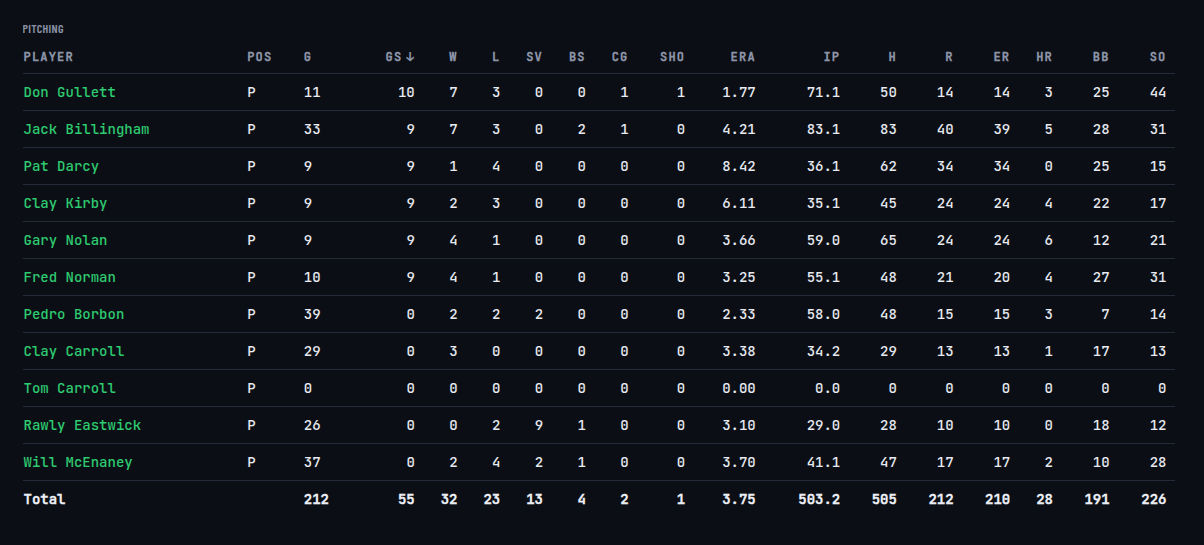
A Stats toggle switches all three tables between these simulated numbers (the default) and each player's real-world historical line for that year instead — the same roster (and the same batting/pitching table exclusions above) either way, only the stat line each row reports switches.
From an individual player's stat page, a View Historical Career Stats link opens their full real-world career line — every year of that player's actual MLB career, not just this simulated season — with pitching shown first for a player who was primarily a pitcher.
-
Ballpark
See Where Your Team Plays #
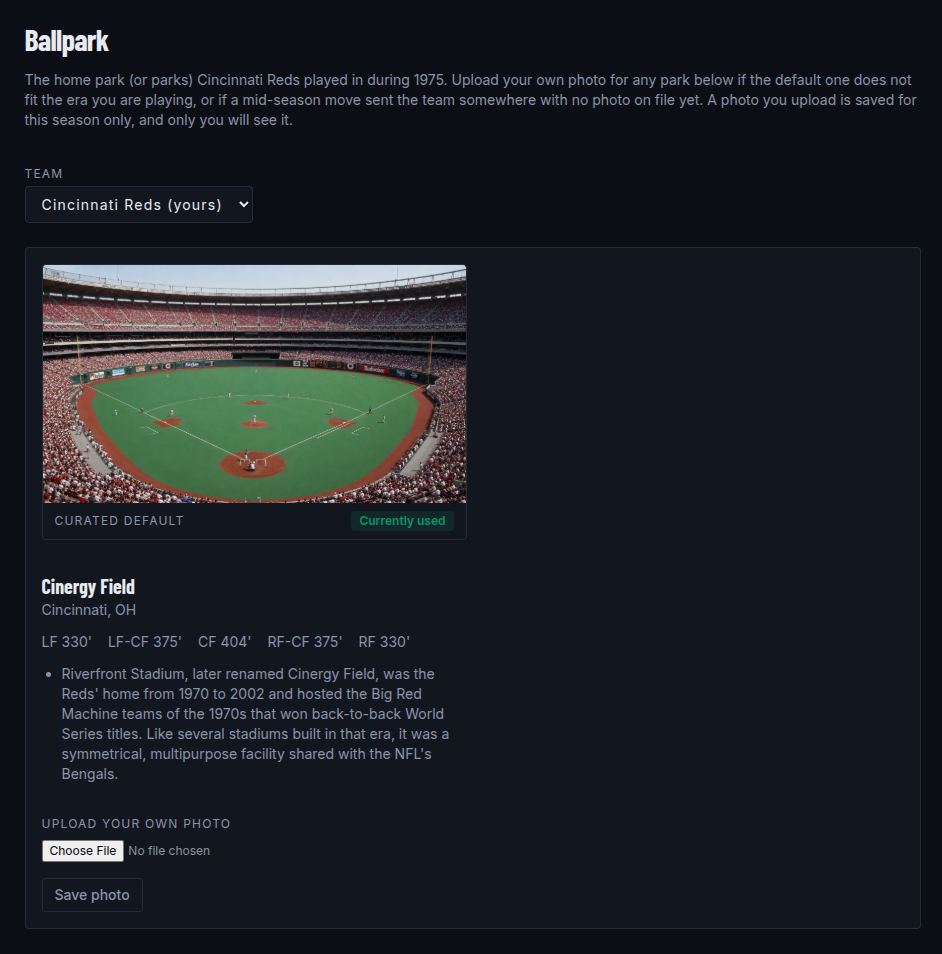
"Ballpark" shows the home park your team played in that season, with its location and a photo where one is on file. If a team changed home parks partway through the season, every park it called home that year is listed, not just the one that hosted the most games.
You can upload your own photo for any park on this screen. This is useful for an older season whose default photo does not match the era you are playing, such as a ballpark from before a renovation. A photo you upload only shows on this season. Every other season, including ones you play at the same park, keeps its own photo or the default.
The default photo stays on the screen even after you upload your own, so you can compare the two. Whichever one is actually used for this season's games is marked "Currently used." If you want to go back to the default, use "Remove photo" to delete your upload.
-
Active Roster
Manage Your Active Roster #
From the season dashboard, "Active Roster" shows your team's current roster against the active-roster size for where the season currently stands: 30 players through August, expanding to 40 — effectively your whole team-year — for September call-ups, then back down to 30 for the postseason. Players are grouped by position — pitchers first, then each fielding position, then a Utility group for anyone with no tracked experience at a position or DH.
The initial 30-man roster is up to 2 players at each fielding position, ranked by games played there, plus one more spot for the everyday designated hitter (a 3rd catcher instead, in a year or league with no DH), and up to 13 pitchers by innings pitched that season, with any thin spots filled out by games played. A two-way player who doesn't make the pitching staff can still take a position-player spot. A required-position warning shows up if a position ends up with nobody who's ever played it. Once the roster expands in September, new additions aren't held to that position breakdown; if the roster is still over 30 when the postseason begins, you'll need to trim it back down yourself before it's playable again.
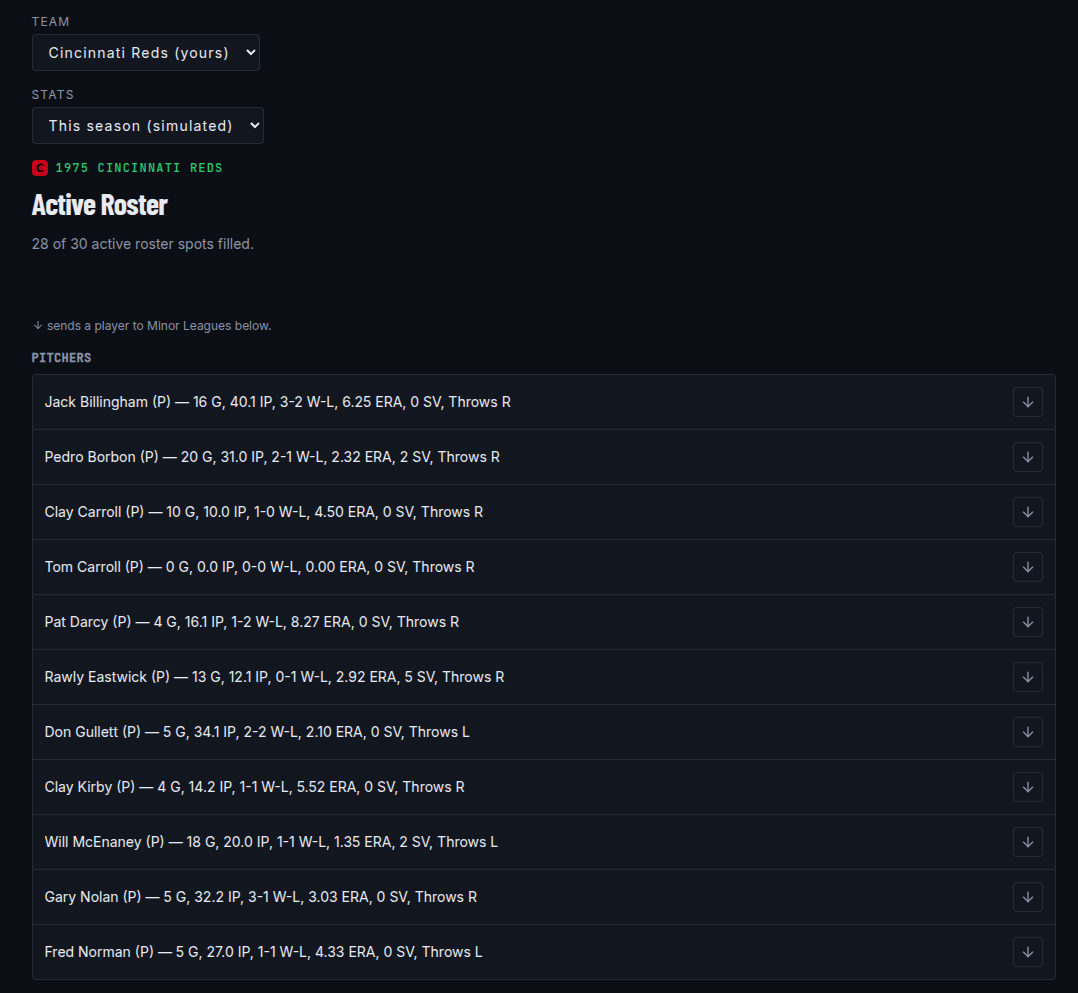
Below the active roster, "Minor Leagues" lists everyone else in that team-year's history who isn't currently rostered, grouped by position the same way. Click the ↑ button next to a minor-league player to call him up, or the ↓ button next to an active-roster player to send him down — either one saves immediately and every section on the page (position groups, Minor Leagues, the roster-size count) updates together, no separate submit. The roster can't exceed its current size limit.
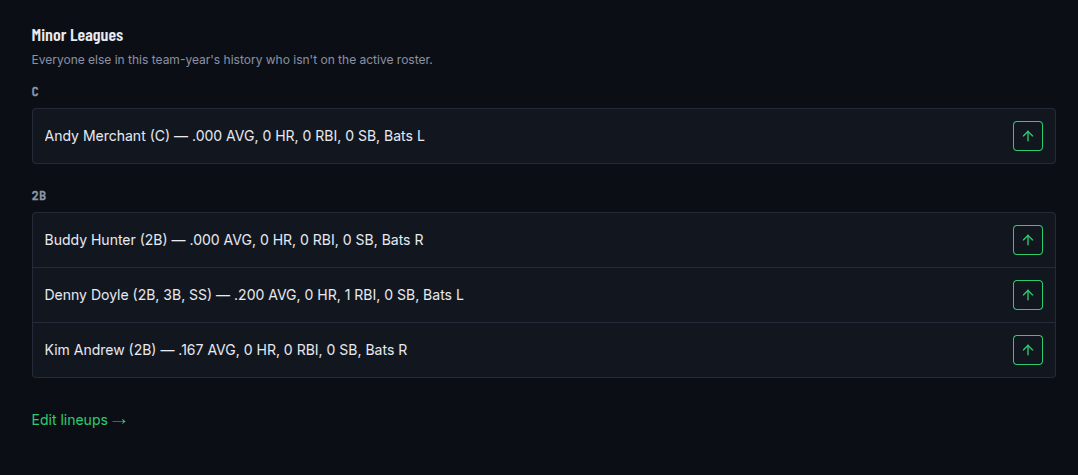
Players also move on and off the active roster on their own during the season. When a team's bullpen runs short of available arms, a reliever who has been worked hard is sent down and a fresh pitcher takes his place; the same happens on the bench when a reserve position player has been playing every day for a stretch, with a fresh bat from the team-year's history called up in his place. This happens for every team, yours included, and always swaps one player for one at the same role.
A player who changed teams mid-season in real life belongs to exactly one club here: the team he played the most games for that year. He won't appear in the other team's Minor Leagues list, and that team can't call him up.
A team picker at the top isn't limited to your own team — switch it to any team in the league to manage that team's active roster instead, including one ManagerAI is otherwise running for you.
Whoever's on the active roster is the full pool a season game can draw from — a player left off can't be selected for that day's starting lineup or brought in as a pinch hitter, pinch runner, defensive replacement, or reliever, even if he has a full stat line for the team-year. Call him up first if you want him available; he's playable again the moment he's back on the active roster.
When the season's Injuries option is on, an injured player shows a red status badge next to his name — his severity, what's hurt, and (unless it's season-ending) when he's expected back. He keeps his roster spot the whole time, but a short-term or season-ending injury doesn't count against the roster's size limit, so you may see the roster list a player over the usual 30 while he's out. This frees up a real spot for a call-up. A day-to-day injury still counts against the limit; he can still be started, just at reduced effectiveness.
A Stats toggle above the roster switches every player's line — on both the active-roster and Minor-Leagues rows — between what this season's own simulated games have produced so far (the default) and that team-year's real-world historical stats.
Pinch hitter, pinch runner, and defensive replacement preferences, and the vs.-RHP/vs.-LHP lineups themselves, aren't set here anymore — see Lineups below.
-
Lineups
Set Your Vs.-RHP and Vs.-LHP Lineups #
From the season dashboard, "Lineups" lets you set a batting order, fielding positions, and starting pitcher for your team — separately for facing a right-handed starter and a left-handed one. Only players on your active roster are eligible; the DH slot appears when the season's DH rule is in effect, and the fielding positions cover the pitcher's spot when it's not. Whoever's on the active roster and isn't in that lineup's starting nine shows up as the bench — it's not set directly, so adding or dropping a player from the active roster updates the bench automatically. Once saved, that lineup becomes the default whenever you play a game against a starter of that hand — you can still adjust it on a given day's pregame screen without changing what's saved here.
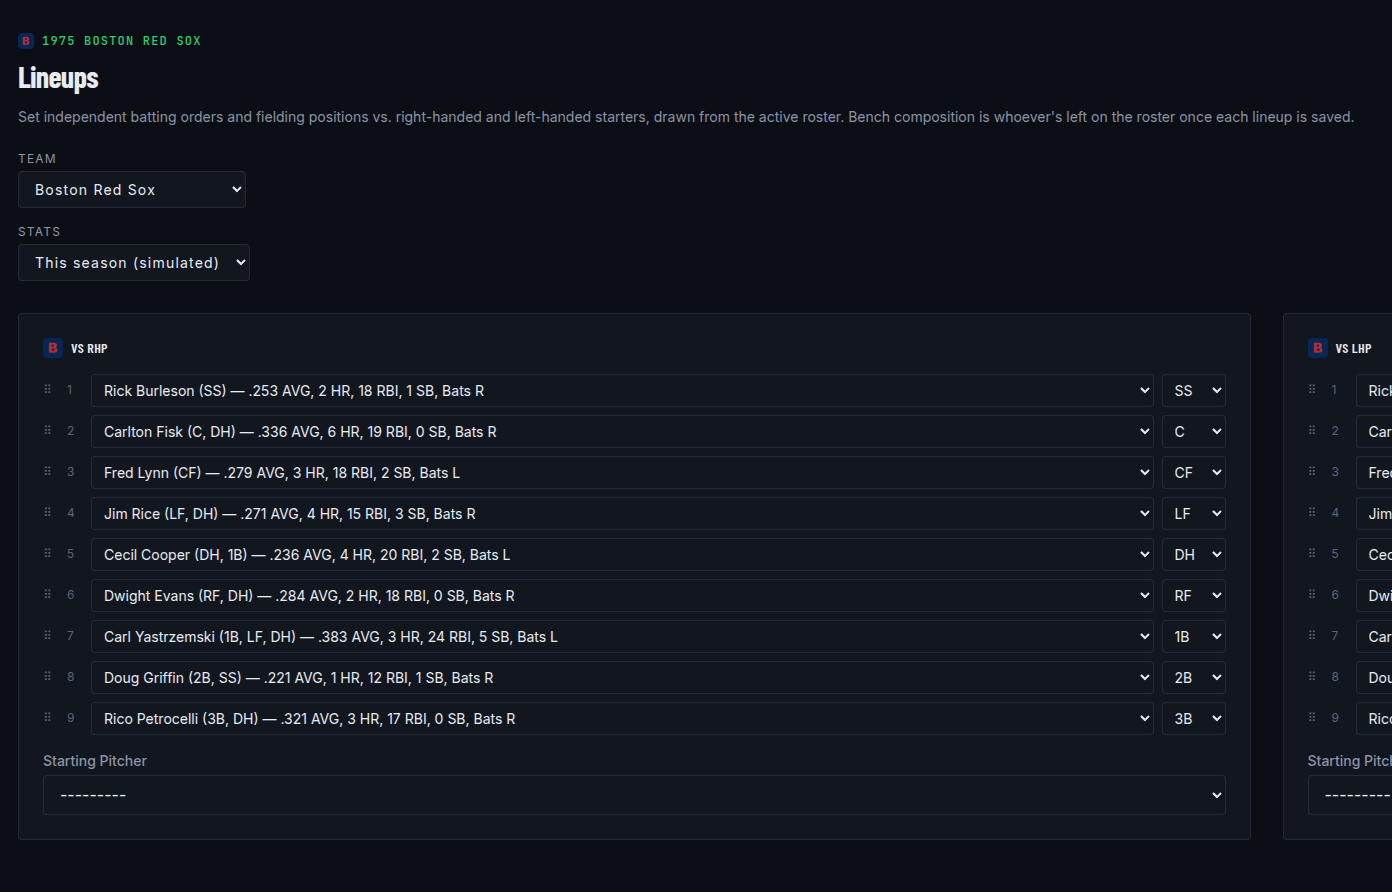
Each vs.-hand lineup saves itself the moment you change a player, position, or the Starting Pitcher — there's no separate save button to click. A "Saved." note appears under the lineup once a change goes through; if a change would leave the lineup invalid (like the same player in two slots), the card shows what's wrong instead and doesn't save until it's fixed.
Each batting slot's player dropdown lists players with active-roster experience at that slot's defensive position first, and shows every position a player is eligible for next to their name. The Starting Pitcher dropdown only lists pitchers with a real starter's workload that season — relievers stay off this list even if they're on the active roster. When the season's DH rule is off, the pitcher's batting slot is locked and always mirrors the Starting Pitcher dropdown.
To reorder the batting order, grab the ⠿ handle on the left of any slot and drag it onto the slot you want to trade places with. Dropping swaps those two slots' players and their fielding positions with each other; nothing else in the lineup moves. On a No DH lineup, you can drag the locked pitcher slot too — wherever you drop it becomes the new locked slot, still tied to the Starting Pitcher dropdown, and the slot it came from opens back up.
A team picker at the top isn't limited to your own team — switch it to any team in the league to set that team's lineups instead, including one ManagerAI is otherwise running for you. For a CPU-controlled team, the batting order saved here is what ManagerAI uses; the starting pitcher, though, always follows that team's actual rotation turn once a game is set to be played, so it won't get stuck starting whoever was saved here if the rotation's moved past them.
The same Stats toggle the Active Roster screen uses is available here too, switching every batter and pitcher dropdown's stat line between this season's own simulated numbers so far (the default) and real-world historical stats.
Below your two lineups and Spot Lineups, this screen also holds every bench-role priority — pinch hitter, pinch runner, defensive replacement, emergency catcher — see Set Bench Role Priorities below.
-
Lineups
Spot Lineups #
Below your vs.-RHP and vs.-LHP lineups, "Spot Lineups" lets you set up one or more additional named lineups that stand in for the default on a schedule — "every N games" — instead of every single game. Every team starts a new season with one already created for you: Rest Lineup, set to run every 10 games, with bench players swapped in wherever one of them can cover a starter's position. You're free to rename it, change how often it runs, edit who's in it, or delete it outright — if you delete it, a fresh copy is generated again the next time you visit this page.
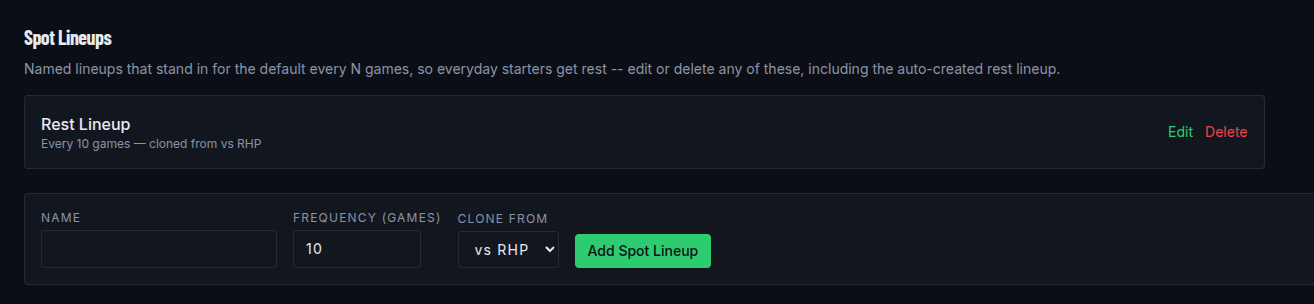
The Rest Lineup no longer benches the same players every time it runs. Each regular gets days off based on how many games they actually missed in real life, spread out across the season instead of piled onto the same handful of days. A player who's sitting out today also can't be called off the bench later in that same game. Everyone plays in the postseason no matter what.
Add a spot lineup of your own from the form at the bottom of the section: give it a name, how many games apart it should run, and which of your two default lineups (vs RHP or vs LHP) to start from — it's cloned from that lineup, then editable exactly like any other lineup on this page, drag-and-drop swapping included. Click a spot lineup's Edit link to change its batting order, fielding positions, name, or frequency together on one screen — that edit screen carries the same historical-vs-season Stats toggle the main lineups and Active Roster screens use.
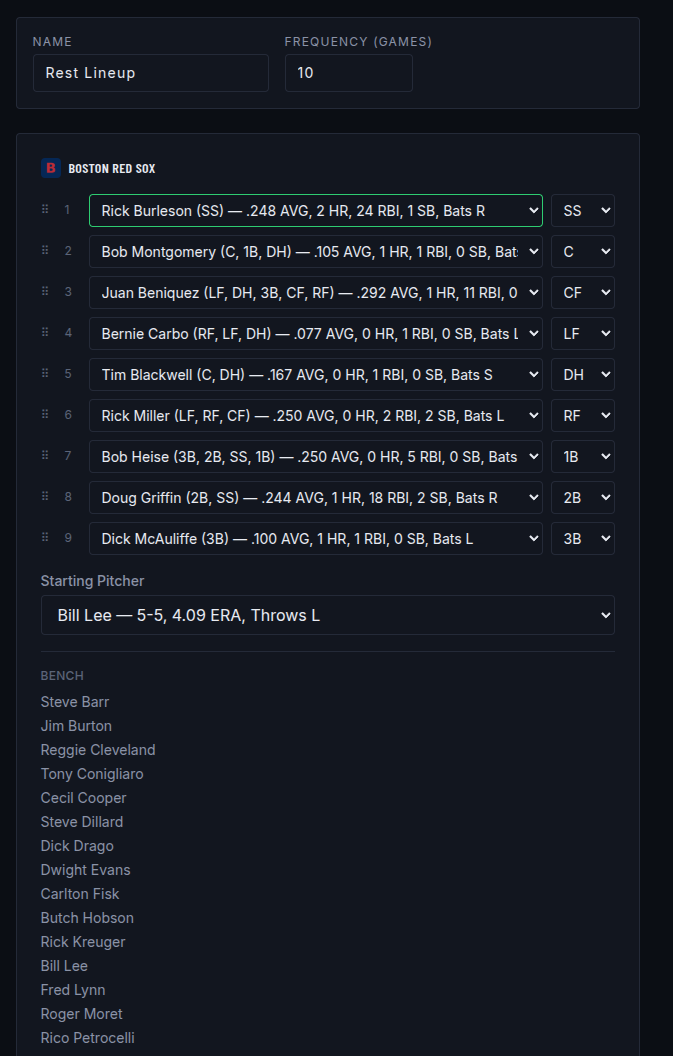
A spot lineup's cadence counts your team's completed games this season — game 10, 20, 30, and so on for a "every 10 games" lineup. When a game lands on that count, the spot lineup takes over automatically for that game instead of your usual default, for both AI-managed teams and your own — on your own team's pregame screen, a note tells you which spot lineup is in effect, and you can still adjust it there before you play, the same as any other pre-filled lineup. If more than one spot lineup would apply to the same game, the more frequent one wins.
-
Lineups
Set Bench Role Priorities #
Below your two lineups and Spot Lineups, the Lineups screen also holds every bench-role decision: who pinch hits first, who pinch runs first, who's the go-to defensive replacement at each position, and who's your emergency catcher. Pinch hitter and pinch runner are each a single ranked priority list of your whole bench — not a flag you check, an actual order — and defensive replacement is one ranked list per fielding position, since a versatile utility player can rank differently at short than at third.
Grab the ⠿ handle on the left of any player in a list and drag them onto another player to swap the two spots — the same drag-and-drop interaction the lineup batting order uses above. Each pinch-hitter/ pinch-runner row shows that player's AVG/HR/RBI/SB line and which side they bat from; each defensive-replacement row shows their PO/A/E and fielding percentage at that position. Every list saves the moment you drop a player — no separate submit.
Once saved, in-game decisions respect these rankings whenever practical: ManagerAI reaches for your top-ranked pinch hitter or pinch runner ahead of picking one off season stats, and for your top-ranked defensive replacement at the specific position that's weak ahead of picking whoever's first on the roster. Emergency Catcher is the one remaining checkbox-style preference — a single-slot "who backs up the last catcher-eligible player" pick rather than a ranked list — and the Active Roster screen flags a roster with only one catcher-eligible player and no emergency catcher set.
Pinch hitter, pinch runner, and defensive replacement priorities are pre-filled for you from your bench once you've set a lineup — best hitters ranked highest for pinch hitter, best base stealers for pinch runner, and the strongest glove at each position for defensive replacement. Any ranking you change and save is kept exactly as you set it going forward; if nobody on the bench is ranked for a given role — an incomplete or legacy roster that's never been through the pre-fill above — ManagerAI falls back to picking from season stats the same way it always has.
-
Pitching Staff
Set Your Rotation Order and Bullpen Roles #
From the season dashboard, "Pitching Staff" lets you set your starting rotation order and assign pitchers on your active roster to bullpen roles — closer, primary and middle setup (RHP/LHP), long relief (RHP/LHP), and mop-up duty. There's no separate emergency or spot starter slot — a pitcher you want held in reserve just occupies a rotation spot you don't expect to reach soon. In-game pitching decisions respect these assignments whenever practical, starting with holding your assigned closer for a true save situation instead of guessing from season stats.
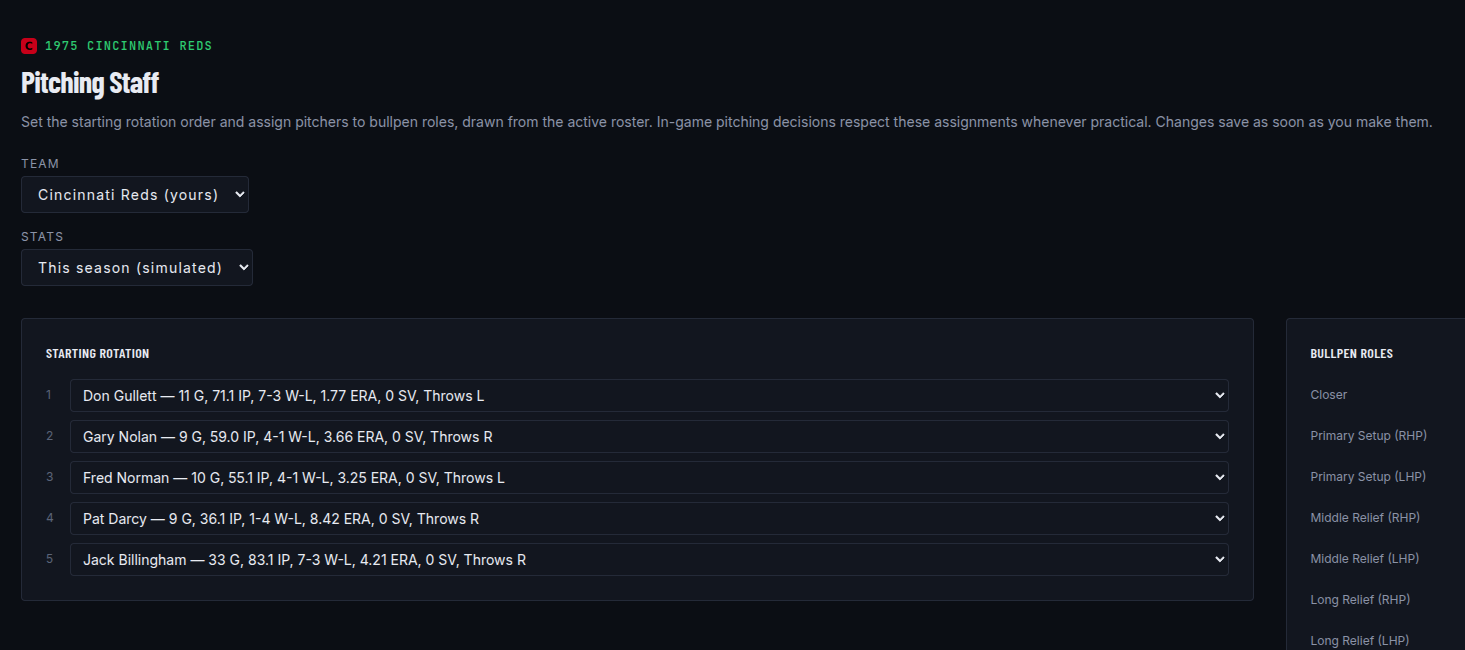
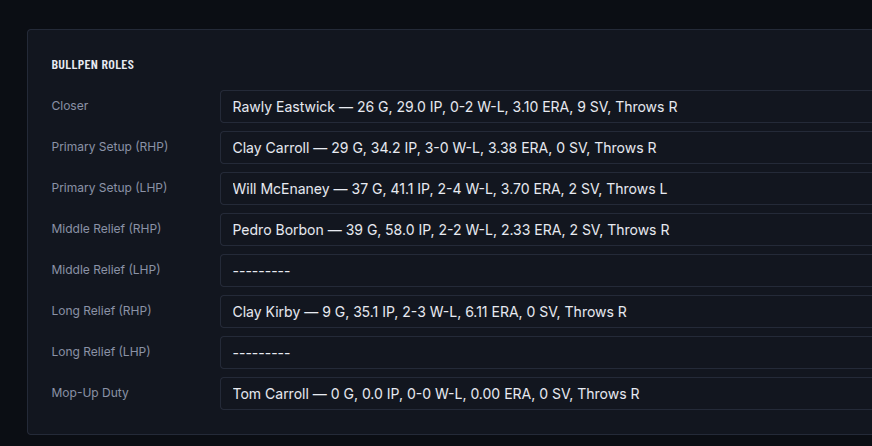
Both sections save on their own the moment you change a pick, the same way the Lineups screen works, with a short "Saved." note under the section you changed. If a change isn't allowed, such as putting the same pitcher in two rotation spots, the section tells you what's wrong instead of saving.
Every bullpen role you haven't set yet is pre-filled for you from your active roster's relief pitchers — best ERA arms into setup and middle relief, your saves leader as closer, and so on — so the screen starts out with every role filled unless your roster genuinely doesn't have enough arms. Any role you change is kept exactly as you set it going forward.
Picking the blank option at the top of a bullpen role's list leaves that role unassigned, and it stays that way instead of being filled back in for you. In-game pitching decisions then fall back to the stats-based pick for that role. Rotation slots work differently: all five have to be filled, since the rotation always has to have somebody to hand the ball to.
A single pitcher can hold more than one bullpen role at once.
A team picker at the top isn't limited to your own team — switch it to any team in the league to set that team's rotation order and bullpen roles instead, including one ManagerAI is otherwise running for you.
The same Stats toggle the Active Roster and Lineups screens use is available here too, switching each pitcher's G/IP/W-L/ERA/SV line between this season's own simulated numbers so far (the default) and real-world historical stats.
-
CPU Opponents
CPU Teams Follow a Real Rotation #
Each CPU-controlled team tracks its own starting rotation and every starter's rest across the season. On the pregame screen, a CPU opponent's starter is whoever's next in line and has had enough days off — not automatically their ace every game. Early in the season, or after an off day throws the order out of sync, a team may reach back to its best arm on short rest instead.
-
CPU Opponents
CPU Bullpen Rest Tracking #
A CPU-controlled bullpen also tracks each reliever's last appearance across games. When a pitching change comes up, ManagerAI still holds its closer for an actual save situation, but among the rest of the bullpen it favors arms that have had a couple of days off over whoever pitched yesterday.
A reliever who pitched on each of the last two days, or three times in the last week, is unavailable and won't be listed in the bullpen at all. This applies to your own team's pitching-change picker as well as ManagerAI's. If every reliever is unavailable, the full bullpen is listed again.
If nobody assigned to long relief or mop-up duty is left in the bullpen, ManagerAI reaches for the team's 5th rotation starter. This applies to your own team's pitching-change picker too, so you'll see that starter listed as an option in the same situation.
-
CPU Opponents
Lineups Adjust to the Opposing Starter #
A CPU team keeps a separate lineup for facing a right-handed starter versus a left-handed one. On the pregame screen, it fields whichever one matches today's probable opposing starter — including your own, if you haven't set a lineup yet — instead of running out the same batting order regardless of who's on the mound.
A spot lineup (see below) takes priority over this vs-RHP/vs-LHP pick whenever its "every N games" cadence lands on today's game — the opposing starter's hand only decides which lineup applies on days a spot lineup doesn't.
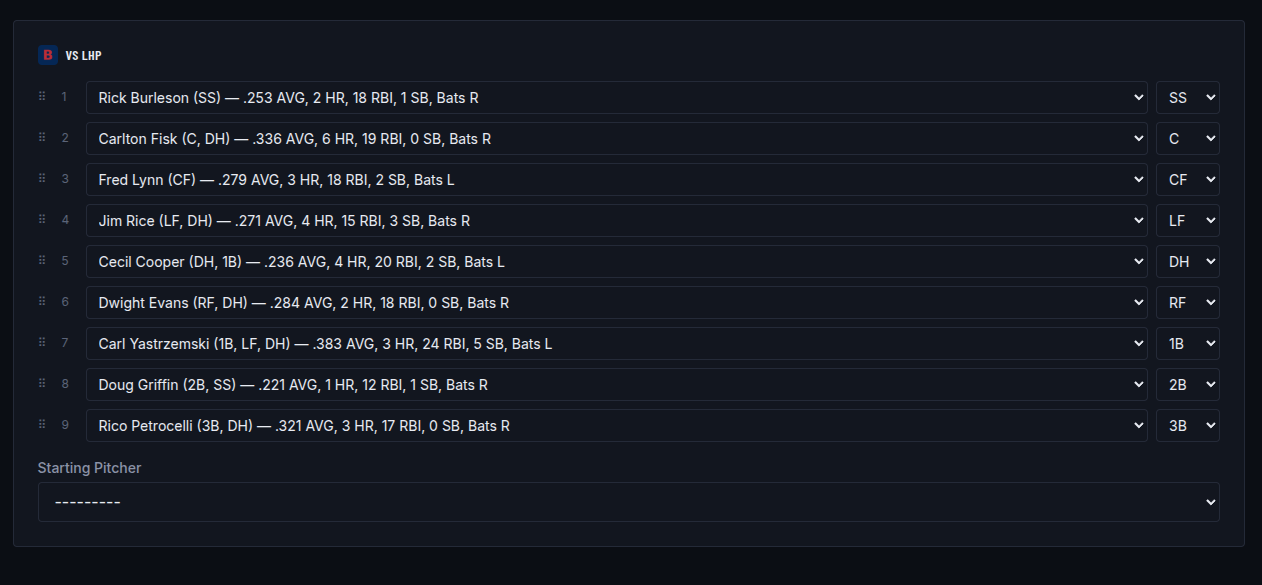
-
My Seasons
Delete a Season #
My Seasons on the Baseball page lists every season you've started, in progress and complete. Click the × in the corner of a season's card to delete it — you'll be asked to confirm first, since this permanently removes that season's full schedule, any postseason series it played, and every saved-game box score from games played during the season or its postseason. This can't be undone, so make sure it's really the season you want gone. A Delete All Seasons link at the bottom of the page does the same for every season on the list at once, in progress and complete alike.
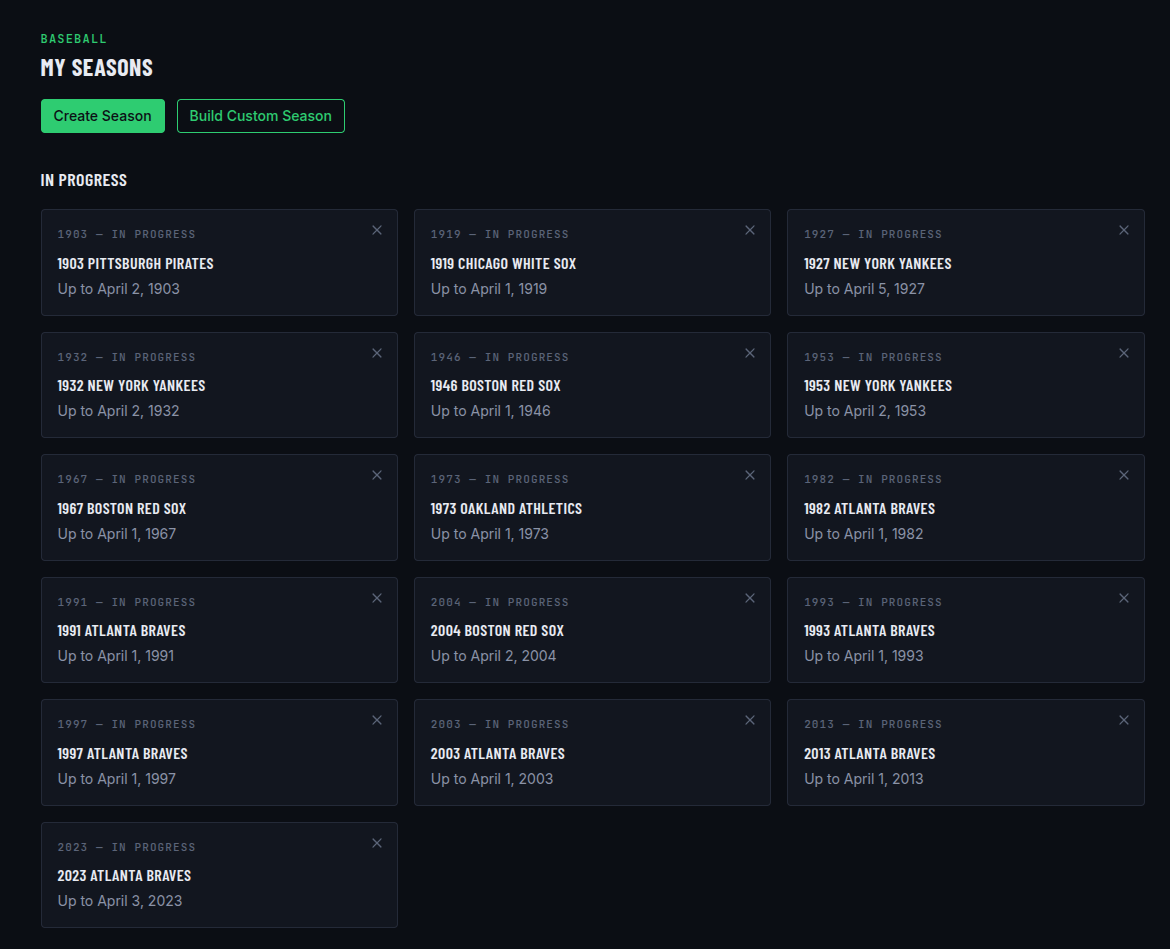
08. Playing an All-Star Game #
-
Step 1
Pick a Year #
From the Baseball home page, click the All-Star Game card, choose a year, and optionally check Computer-controlled under either league to have ManagerAI run that side's lineup and in-game decisions instead of you. Click Set All-Star Game to build the rosters and continue to the pregame screen.
Ballpark is set to that year's real All-Star Game host by default, so the field card shows the actual park name and dimensions. Pick a different park from the dropdown if you'd rather play somewhere else.
ManagerAI manages an All-Star Game differently from a regular one: it changes pitchers every inning or so instead of riding a starter, and starts working the bench in partway through rather than waiting for the late innings, so more of the roster gets into the game.
-
The Rosters
Roster Selection #
American League and National League rosters are the actual players selected as All-Stars that year — not a computed "best players" ranking. There's nothing to pick or adjust: the two squads are set as soon as you choose a year. A real All-Star roster commonly runs 30+ players deep, wider than a regular season roster.
Because a league's squad is drawn from as many as 15 different real clubs, there's no single "team" behind the scenes the way a Single Game or World Series matchup has one. Each player's stats, defensive eligibility, and tendencies still come from his own real season — only park factor is different: with no real home ballpark for an All-Star Game, every plate appearance plays out under neutral (league- average) conditions.
-
Step 2
Pregame #
Both lineups are pre-filled from each squad's best available players at every position, with the strongest arm on the roster set as the starting pitcher — there's no rotation to work through the way World Series does, since it's a single game. Adjust either lineup, defensive positions, or either starting pitcher as you like, then click Play Ball. It plays exactly like a Single Game.
Same lineup-builder as everywhere else: each batting slot's dropdown surfaces players with experience at that slot's position first and labels every player with their eligible positions. Drag a slot's ⠿ handle onto another to swap those two batters and their fielding positions with each other.
If you checked Computer-controlled for a side back on the setup screen, its lineup here is still editable — pre-filled with ManagerAI's own pick — but that side stays computer-managed once the game starts unless you click Manage Both Teams next to Play Ball to take it over for this game. If both leagues ended up Computer-controlled, that button reads Watch Game instead, and plays the game out one at-bat at a time with ManagerAI managing both dugouts.
If the host park doesn't have a photo you like, click Upload your own ballpark photo above the lineups. Your photo is remembered for that park in every single game or All-Star game you play there afterward — only you see it.
-
Final Screen
Exhibition Only #
When the game ends, its final screen shows a Continue → button in place of the usual Save Game button. Clicking it records the final score and takes you to a result screen with the winner, score, and pitching decisions.
An All-Star Game is exhibition only — it never affects any Full Season's stats, roster, or rotation, and it isn't tracked as an "All-Star appearance" anywhere else in the app.
-
My All-Star Games
Finding and Deleting a Game #
My All-Star Games on the Baseball page lists every All-Star Game you've started, in progress and complete. Click the × in the corner of a game's card to delete it — you'll be asked to confirm first, since this permanently removes that game and its box score. This can't be undone. A Delete All All-Star Games link at the bottom of the page does the same for every standalone game at once; a season's own in-season All-Star Game isn't affected — delete that season instead.
An in-progress game's progress is checkpointed automatically as you play — there's no separate Save button to remember. If you leave before it finishes, clicking that game's card here picks it back up exactly where you left off, inning and all, instead of starting lineup selection over. Once a game finishes, its result is permanent and always reachable from this list.
A season's own All-Star Game (see In-Season All-Star Game above) shows up here too, mixed in with any standalone ones you've played — this list isn't only for the Baseball page's standalone mode. That season's own Advance Day and Schedule pages also link straight to it.